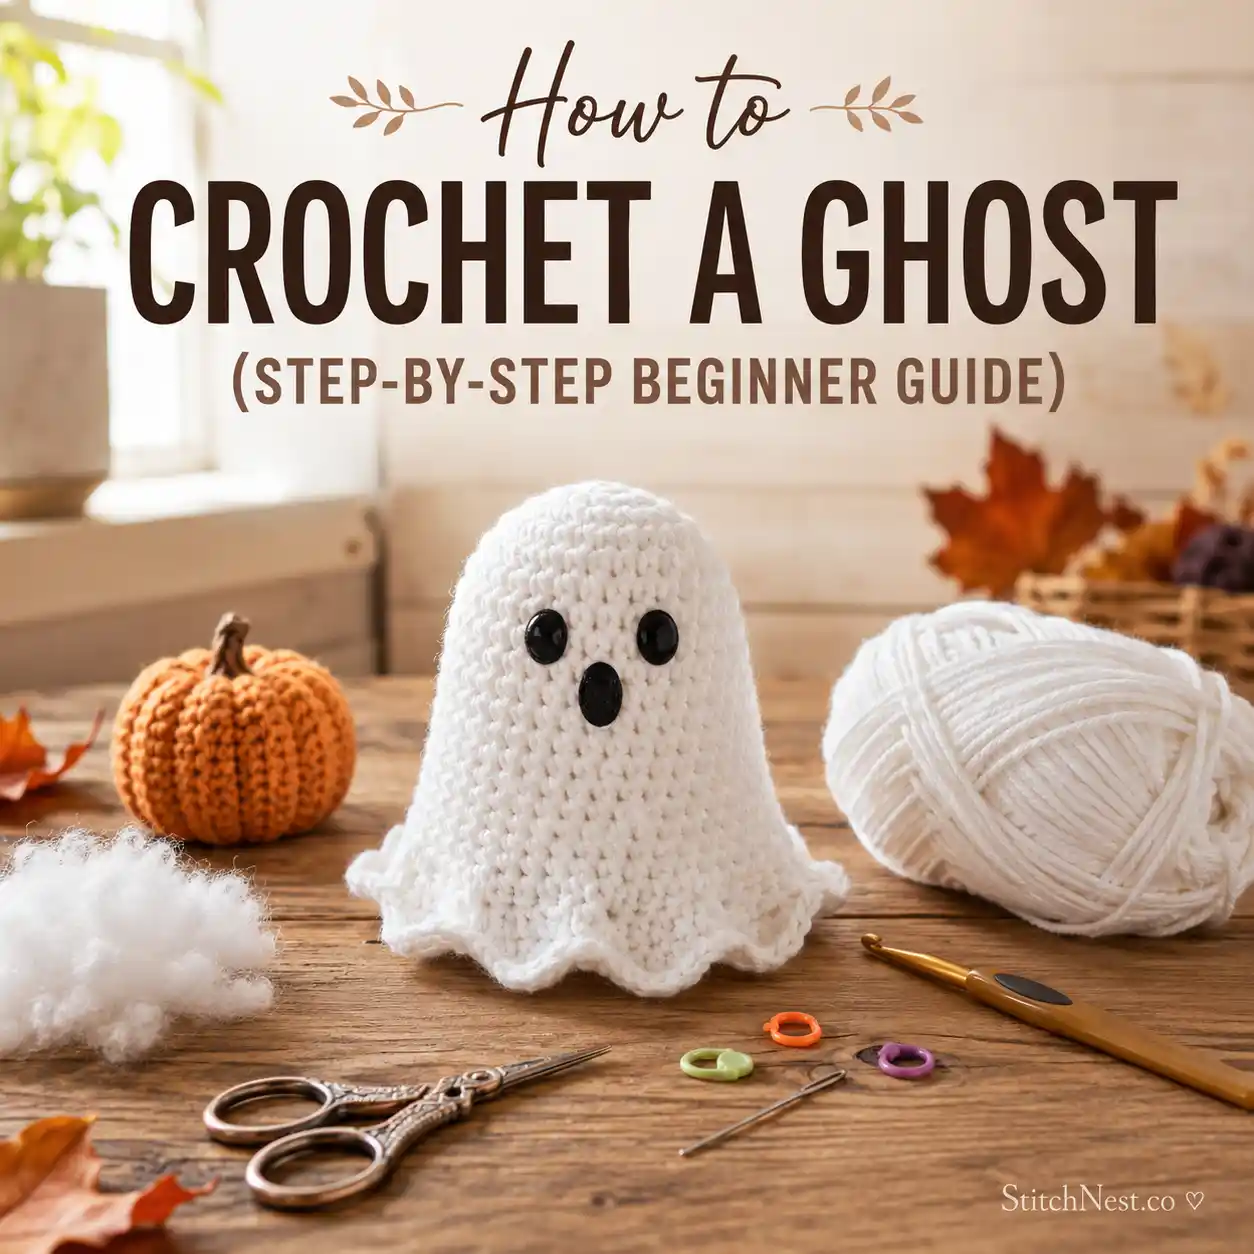
If you’re looking for something quick, beginner-friendly, and irresistibly cute for Halloween, a crochet ghost is a perfect place to start. You don’t need years of crochet experience to make one. In fact, if you already know a few basic stitches, you can create your very first ghost in an afternoon. Even if you’re brand new to crochet, we’ll walk through every step together so you always know what comes next. Here’s how to crochet a ghost in 8 easy steps!
Why You’ll Love Making Crochet Ghosts
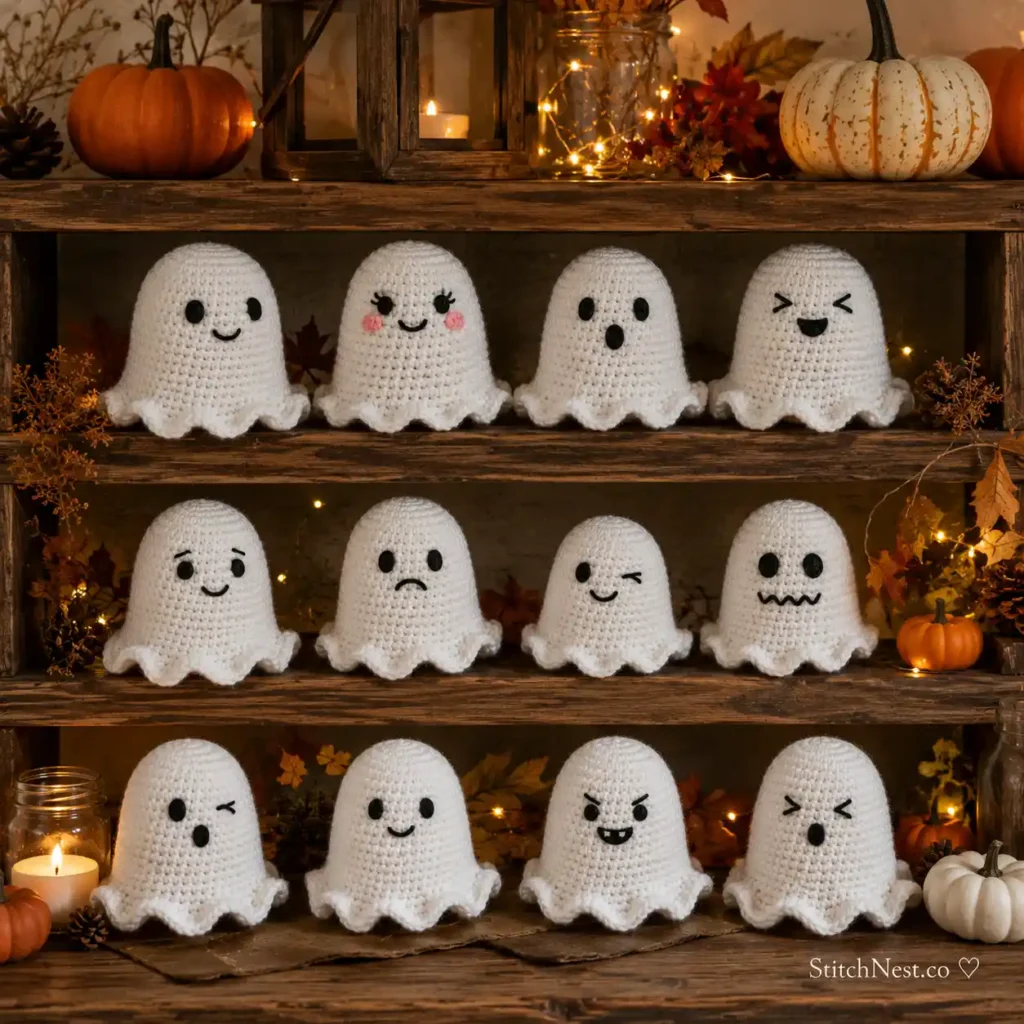
There are plenty of beginner crochet projects out there, but ghosts have a few advantages that make them especially rewarding for new crocheters.
First, they’re small enough that you can finish one without feeling overwhelmed. Many beginners lose motivation halfway through larger projects like blankets or sweaters. A crochet ghost comes together much faster, giving you the satisfaction of finishing something in just a few hours.
Second, you’ll practice nearly every basic amigurumi skill in one simple project. By the time you’re finished, you’ll have learned how to work in continuous rounds, increase stitches, crochet evenly, stuff your project, and embroider a simple face.
You’ll also gain confidence reading crochet instructions because each round builds naturally on the last. Instead of memorizing complicated stitch combinations, you’ll repeat simple techniques until they become second nature.
Another reason beginners love this project is that small imperfections are easy to hide. If one stitch isn’t perfectly even or your ghost has a little extra personality, nobody will notice. Handmade decorations always have a bit of character, and that’s part of what makes them special.
Before we gather our supplies, here’s a quick overview of the project. This gives you a better idea of what to expect before you begin and helps you decide if it’s the right crochet project for your skill level.
Skill Level: Beginner
Crochet Terms: US
Finished Size: Approximately 4–5 inches tall
Time Required: About 2–4 hours
Construction: Worked in continuous rounds from the top down.
Choosing the Right Supplies
Using the right materials makes learning much easier. You don’t need expensive tools, but choosing beginner-friendly supplies will help you create cleaner stitches and a more polished finished ghost.
Yarn
For your first ghost, choose a smooth worsted weight (#4) yarn in white.
This yarn is thick enough that you’ll clearly see each stitch as you work, making it much easier to count rounds and identify mistakes before they become bigger problems.
Avoid fuzzy, fluffy, or textured yarn for your first attempt. Although those yarns look adorable, they hide your stitches, making it much harder to see where your hook should go next.
Cotton yarn creates crisp stitches and helps your ghost hold its shape beautifully. Acrylic yarn is another excellent choice because it’s affordable, widely available, and comes in countless shades of white and cream.
If you’re shopping for supplies, a quality worsted weight cotton yarn or worsted weight acrylic yarn works beautifully for beginner amigurumi projects.
Using worsted weight (#4) yarn with a 4 mm or 4.5 mm crochet hook, your finished ghost will usually measure around 4 to 5 inches tall. Your exact size may vary slightly depending on your yarn choice and personal crochet tension.
Crochet Hook
Always check your yarn label for the recommended hook size.
Most worsted weight yarns suggest a 5 mm (H-8) hook for general crochet. For amigurumi, however, you’ll usually want to size down slightly.
A 4 mm or 4.5 mm hook creates tighter stitches that keep the stuffing from showing through. Don’t worry if your stitches feel a little tight at first. That’s completely normal when making stuffed crochet toys.
A comfortable ergonomic crochet hook can reduce hand fatigue, especially if you’re still practicing your tension. And if you need more help, check out our beginner’s guide to crochet hooks!
You don’t need to worry about matching an exact gauge for this project. Just aim for tight, even stitches that keep the stuffing from showing through. If you notice gaps between stitches, switching to a slightly smaller hook can make a big difference.
Stuffing
Polyester fiberfill is the most popular stuffing for amigurumi because it’s lightweight, washable, and keeps projects soft without losing their shape.
Add small amounts at a time instead of trying to stuff the entire ghost at once. This creates a smoother finish without lumps.
A bag of premium polyester fiberfill will last through dozens of small crochet projects.
Stitch Markers
Unlike flat crochet pieces, amigurumi is usually worked in continuous rounds. That means you won’t join each round with a slip stitch before starting the next one.
Without a stitch marker, it’s surprisingly easy to lose track of where each round begins. Simply place your marker in the first stitch of every new round and move it up as you continue.
A simple pack of locking stitch markers is one of the most useful tools you can add to your crochet kit.
Yarn Needle
After finishing your ghost, you’ll use a yarn needle to weave in loose ends and embroider the eyes and mouth.
Plastic and metal yarn needles both work well. Choose one with a large eye so thicker yarn passes through easily.
A basic yarn needle set is inexpensive and useful for nearly every crochet project you’ll ever make.
If you’d rather not embroider the face, you can also use 6–8 mm safety eyes for a polished finish. Just remember to attach them before you completely close and stuff your ghost, since the backing pieces need to be secured from the inside.
Love crocheting flowers? Our DIY crochet hibiscus flower tutorial walks you through every step and shows you how to create a realistic bloom you can add to bags, hats, hair clips, and more.
Crochet Abbreviations We’ll Use
Don’t let crochet abbreviations intimidate you. They simply shorten common stitch names so patterns are easier to read.
We’ll use standard US crochet terminology throughout this guide.
- MR = Magic Ring
- ch = Chain
- sc = Single Crochet
- inc = Increase (two single crochet stitches worked into the same stitch)
- dec = Invisible Decrease
- sl st = Slip Stitch
- st = Stitch
- sts = Stitches
If you’ve never used an invisible decrease before, don’t worry. We’ll explain exactly how it works later in the tutorial. If you need a quick lesson, check out our crochet abbreviaions cheat sheet here!
If you’re new to reading crochet patterns, don’t let the abbreviations intimidate you. When you see “2 sc in next stitch,” it simply means you’ll work two single crochet stitches into the same stitch before moving to the next one. If a sequence is followed by a repeat count, like “(sc, inc) ×6,” you’ll repeat that entire sequence six times to complete the round.
Before You Begin
Before making your first stitch, it’s helpful to understand how amigurumi differs from regular crochet.
Most blankets, scarves, and dishcloths are worked in rows. You reach the end of each row, turn your work around, and crochet back across.
Amigurumi works differently.
Instead of turning your project, you’ll crochet in a spiral, creating one continuous round after another. This produces a smooth, seamless shape that’s perfect for stuffed toys.
The beginning of each round slowly moves around the project, which is why a stitch marker is so important.
You’ll also notice that amigurumi uses tighter stitches than most crochet projects. Tight stitches keep the stuffing securely inside and help your ghost stand upright once it’s finished.
Don’t worry if your first few rounds feel awkward. Every crocheter spends a little time getting comfortable with crocheting in the round, and it quickly becomes second nature.
Sometimes all it takes is a few appliqué pieces to turn a simple quilt into something truly memorable. If you’re looking for fresh inspiration, don’t miss these appliqué quilt patterns full of color and creativity.
In the next step, we’ll create the magic ring, which forms the very top of your ghost’s head. Once you’ve mastered this simple technique, you’ll use it for countless future amigurumi projects, from pumpkins and snowmen to teddy bears and tiny animals.
How to Crochet a Ghost
Quick Pattern Summary
Before we walk through each step in detail, here’s a simplified version of the pattern for easy reference. If you’re already comfortable with basic amigurumi, you can use this as a quick guide and refer back to the detailed instructions whenever needed.
- Round 1: 6 sc in Magic Ring (6)
- Round 2: Increase around (12)
- Round 3: (Sc, Inc) ×6 (18)
- Round 4: (2 Sc, Inc) ×6 (24)
- Rounds 5–10: Sc around (24)
- Stuff firmly.
- Finish with the wavy edge, fasten off, and embroider the face.
Step 1: Make the Magic Ring
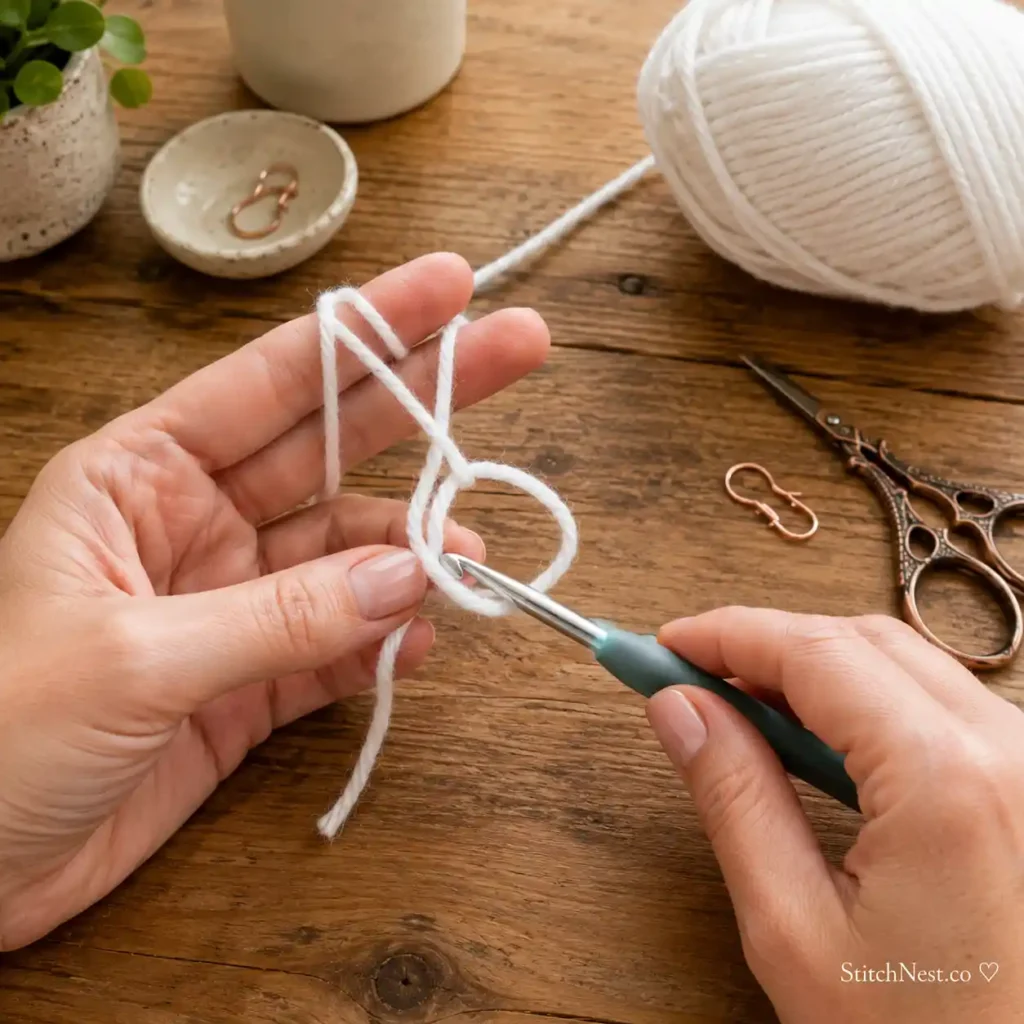
Every amigurumi project starts with a small circle, and the magic ring is the best way to create it. Unlike chaining a few stitches and joining them into a loop, a magic ring pulls completely closed, leaving no hole at the top of your ghost’s head.
Don’t worry if it feels tricky at first. Nearly every crocheter needs a few attempts before it clicks. Once you learn it, you’ll use it again and again for plushies, ornaments, pumpkins, flowers, and many other crochet projects.
Start by leaving a yarn tail about 6 to 8 inches long. Wrap the yarn around two fingers to create a loop, making sure the working yarn (the strand attached to your yarn ball) sits behind the tail.
Slide your crochet hook under the first strand and grab the second strand with your hook. Pull it through the loop, then chain one to secure the ring. This chain simply holds everything in place. It doesn’t count as your first stitch.
Now work six single crochet stitches directly into the center of the ring. Instead of crocheting around the yarn itself, you’ll insert your hook into the open circle each time.
If Halloween quilting is on your project list, be sure to check out our DIY Quilted Halloween Table Runner guide. It includes step-by-step instructions, beginner tips, and plenty of practical quilting advice.
When you’ve completed all six stitches, gently pull the yarn tail. The opening in the middle will begin to shrink until it closes completely. Pull firmly enough to remove the hole, but don’t tug so hard that the yarn becomes difficult to tighten smoothly.
Place a locking stitch marker into the first single crochet stitch you made. This marks the beginning of your first round and makes counting much easier.
Beginner Tip: If your magic ring keeps coming undone, check that you crocheted over both strands of the ring instead of only one. A securely worked magic ring should stay closed once you’ve woven in the yarn tail at the end.
And if you still find the magic ring frustrating, don’t get discouraged. Many experienced crocheters struggled with it in the beginning. Practice it a few times using scrap yarn before moving on, and you’ll likely find it much easier.
Step 2: Increase to Shape the Head
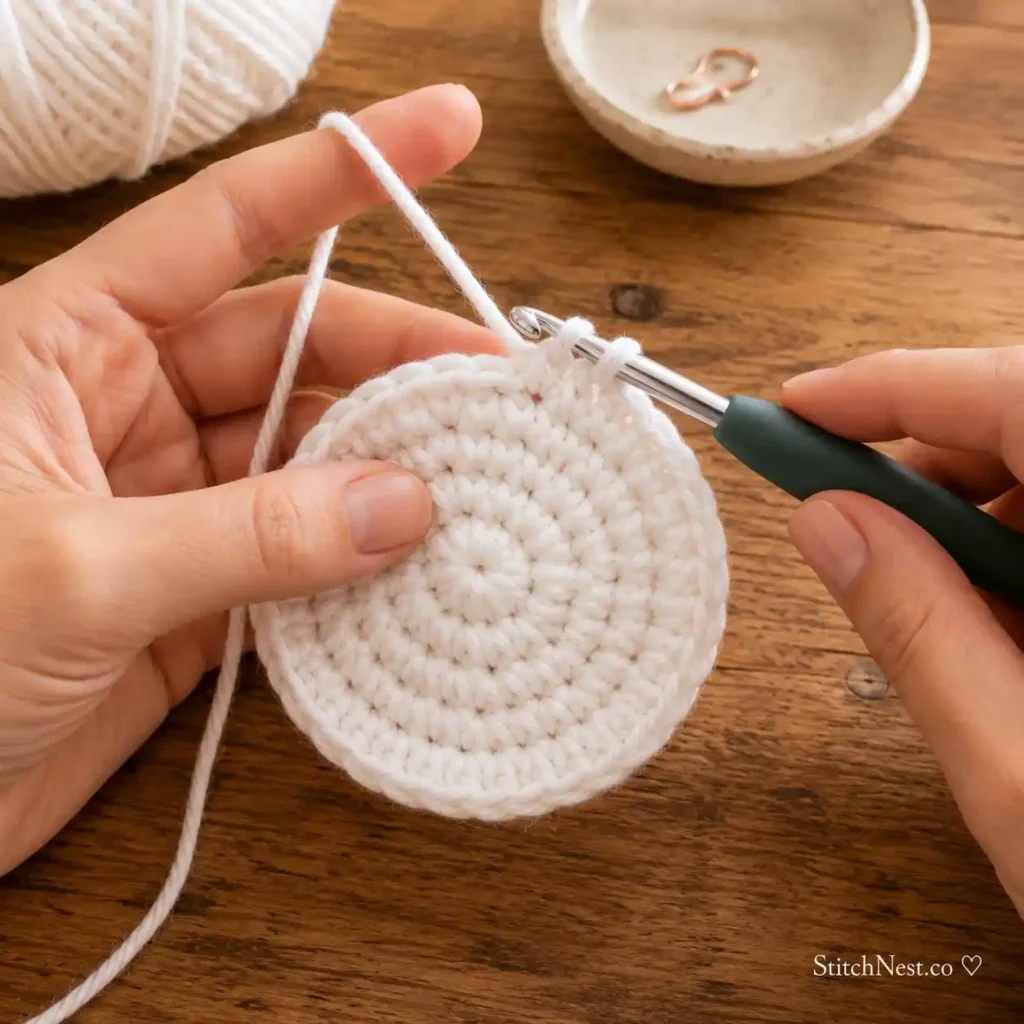
Now that you’ve created the top of your ghost, it’s time to make it wider. This is where increases come in.
An increase simply means placing two single crochet stitches into the same stitch instead of one.
Think of it like adding extra room. Every increase makes the circle a little larger, allowing it to grow into a smooth, rounded shape instead of curling into a tube.
Round 2
Work two single crochet stitches into each of the six stitches from the previous round.
You’ll begin with 6 stitches and finish with 12.
Take your time counting carefully. Beginners often miss one stitch or accidentally add an extra increase, which can throw off every round that follows.
Once you’ve completed the round, move your stitch marker into the first stitch of the new round.
Check Your Work
Your crochet piece should still lie flat. If it begins curling upward already, your stitches may be tighter than necessary. That’s perfectly normal for beginners, but try relaxing your grip just a little on the next round.
And if the circle looks wavy or ruffled, you may have accidentally added extra increases. Plus, don’t hesitate to count every stitch. Even experienced crocheters count frequently.
If you’re liking this one, then you’ll have loads more fun trying this DIY crochet dragonfly tutorial! Don’t miss out!
Step 3: Continue Growing the Circle
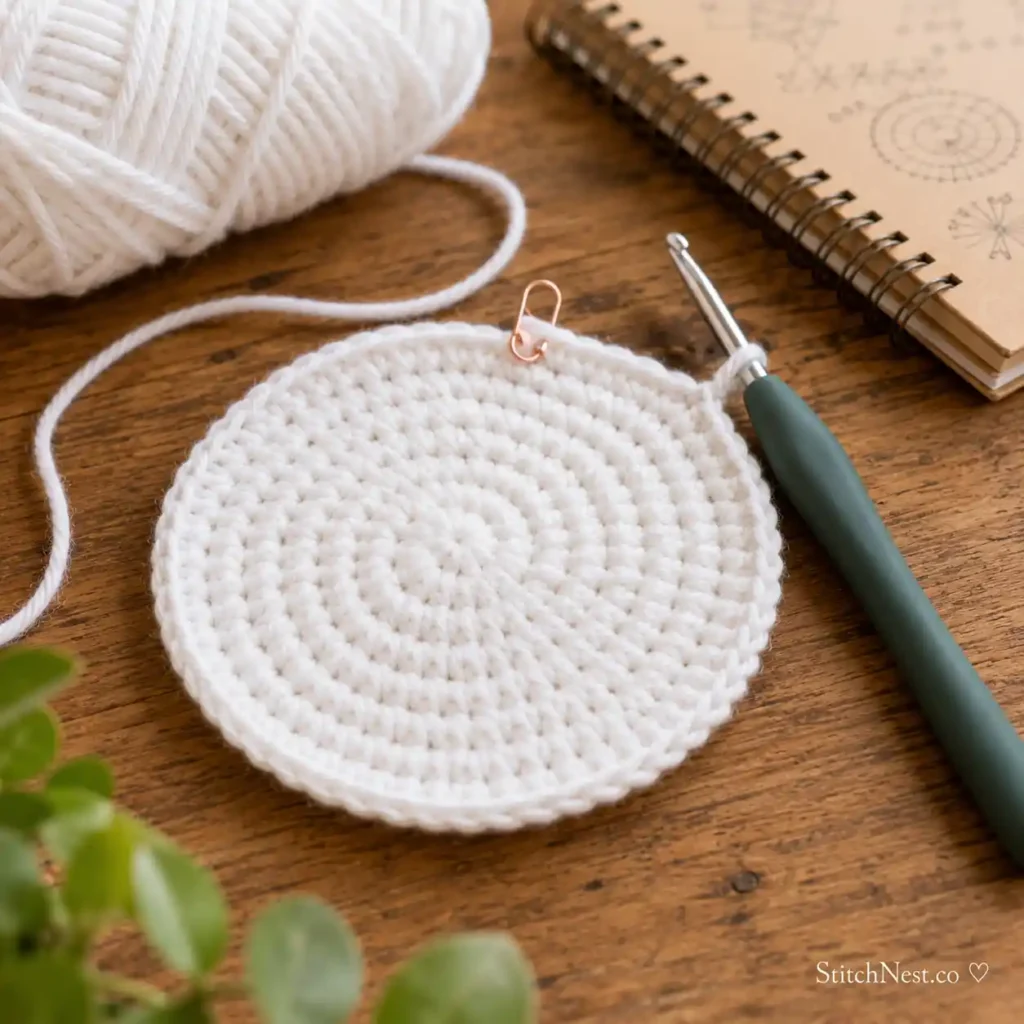
We’ll continue increasing gradually to create a nice round head.
Instead of increasing every stitch again, we’ll spread the increases farther apart.
This creates a smooth curve instead of sharp corners.
Round 3
Work:
- 1 single crochet in the first stitch.
- 2 single crochet in the next stitch.
Repeat this pattern all the way around.
By the end of the round, you’ll have 18 stitches.
Notice how the increases are becoming less frequent.
This gradual spacing creates a perfectly rounded shape that’s ideal for amigurumi.
Round 4
Now work:
- 1 single crochet in each of the next 2 stitches.
- Increase in the following stitch.
Repeat this sequence around the circle.
You’ll finish with 24 stitches.
Take a moment to lay your work flat on the table.
The circle should look smooth and even without curling, folding, or developing ripples around the edge.
If something doesn’t look right, now is the easiest time to fix it.
Pulling back one round takes only a minute and usually saves much more time than trying to correct mistakes later.
Understanding Why Increases Matter
Many beginner patterns simply list stitch counts without explaining what’s happening. Understanding the reason behind each round makes crochet much less confusing.
Imagine cutting a paper circle. If you want to make that circle larger, you need more paper around the edges. Crochet works exactly the same way.
Each increase adds another stitch around the outside of the circle. Adding too many increases causes the circle to ripple because there’s more yarn than the shape needs.
Too few increases cause the edges to pull upward into a bowl because the stitches become crowded. Once you understand this balance, you’ll find it much easier to troubleshoot almost any beginner amigurumi project.
If you’re looking for a beginner-friendly amigurumi project, our DIY Crochet Ladybug Tutorial teaches you how to crochet an adorable 3D ladybug with step-by-step instructions, helpful tips, and plenty of finishing advice.
Step 4: Crochet the Sides of the Ghost
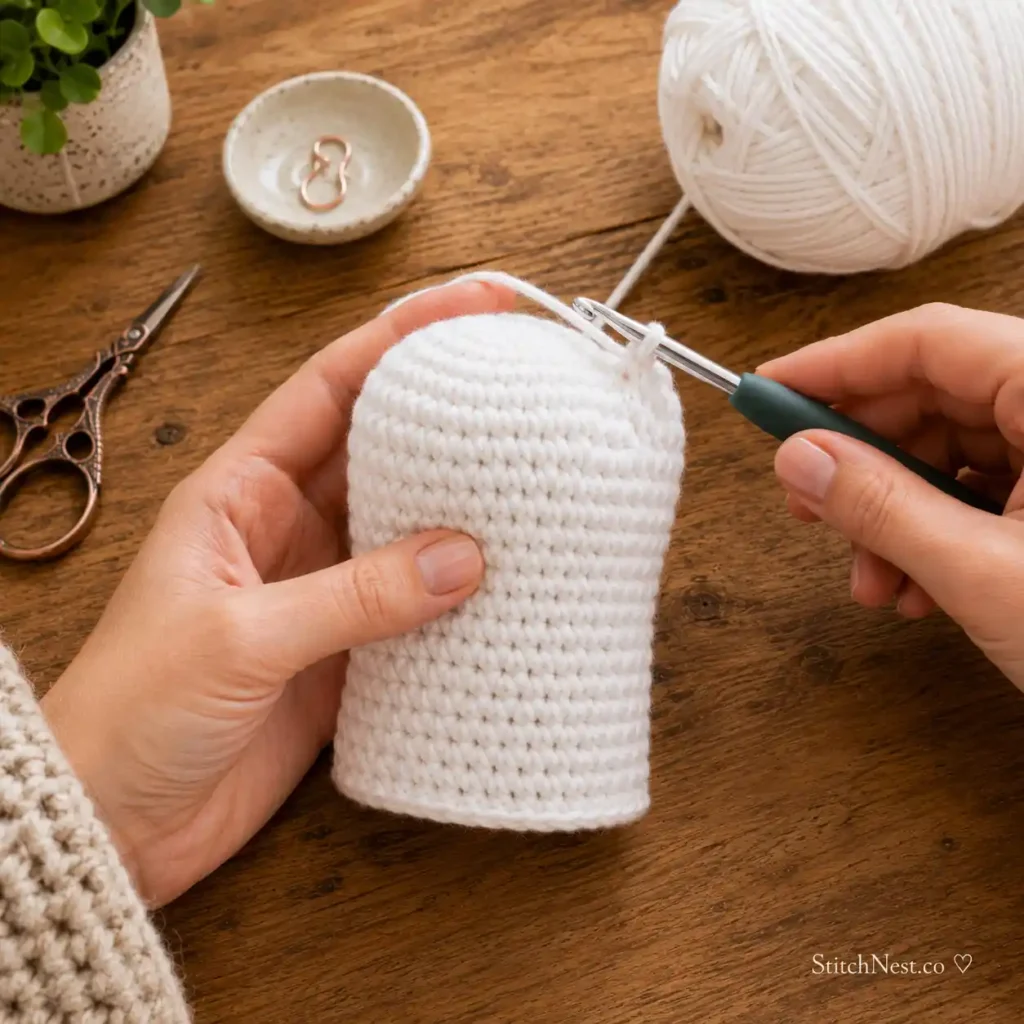
Once the head reaches its full width, we’ll stop increasing. From this point forward, you’ll work one single crochet into every stitch around.
This allows the sides of the ghost to grow downward instead of outward. For the next several rounds, simply crochet one single crochet in every stitch.
Each completed round should still contain 24 stitches.
Because we’re no longer increasing, you’ll notice the edges naturally begin curving downward. That’s exactly what we want.
The rounded top slowly transforms into the ghost’s body without requiring any complicated shaping.
Keep checking your stitch count every few rounds. It’s surprisingly easy to skip a stitch without noticing. If your stitch count changes, the ghost may begin leaning or developing an uneven shape.
Using a row counter alongside your stitch markers can make this much easier, especially if you’re interrupted during your project.
Keeping Your Tension Even
One of the biggest challenges for beginners isn’t learning new stitches. It’s keeping those stitches consistent.
Some stitches naturally end up tighter than others, especially when you’re concentrating. Don’t worry if your first ghost isn’t perfectly smooth.
Instead, focus on keeping your yarn flowing comfortably through your fingers. Avoid pulling each stitch as tightly as possible.
Instead, allow your hook to glide naturally through the loops.
A relaxed rhythm almost always creates cleaner-looking stitches than forcing every loop into place.
As you crochet, occasionally rotate your ghost in your hands. Looking at it from different angles makes uneven areas much easier to notice before they become permanent.
Remember, handmade projects aren’t supposed to look machine-made.
Small differences give your ghost personality, and each one you make will become more even as your confidence grows. If you’re still having trouble, here’s how to hold crochet yarn and maintain even tension!
Step 5: Start Adding Stuffing
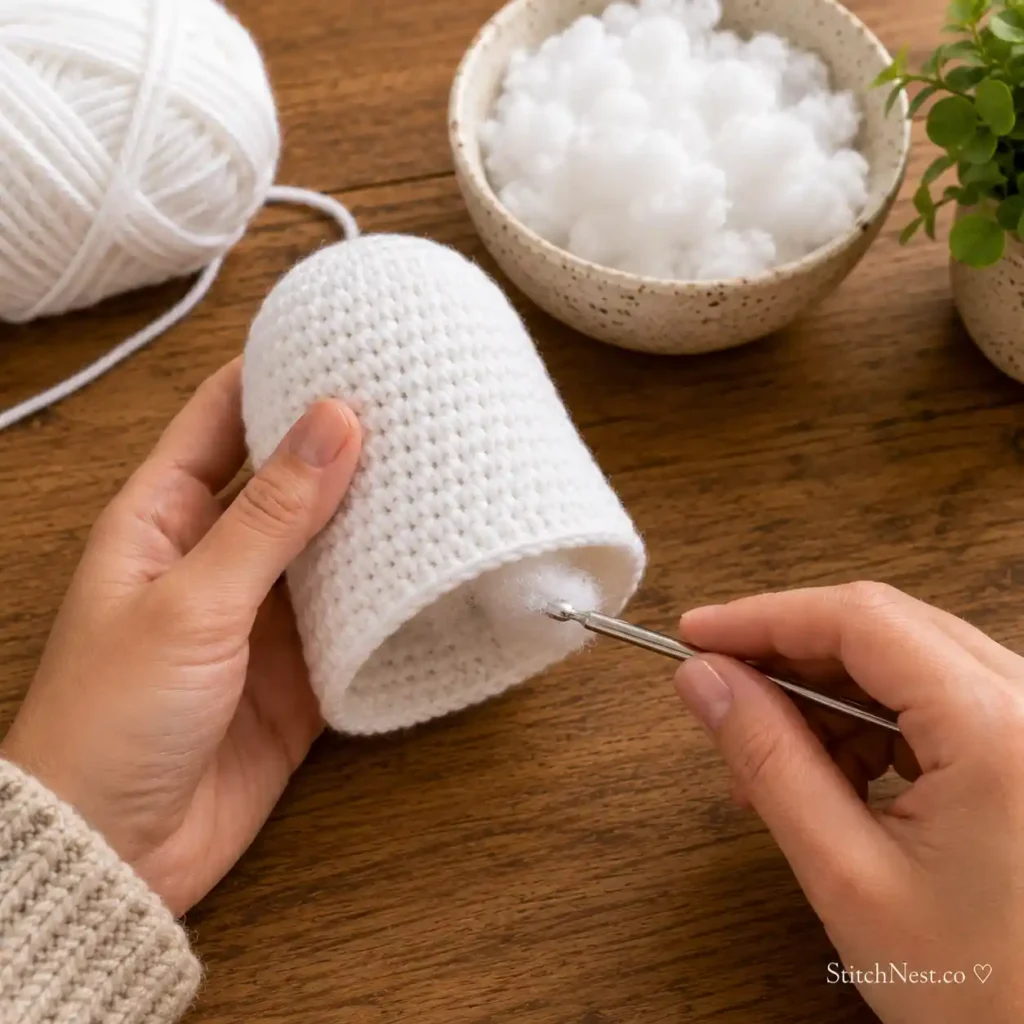
Before the opening becomes too small, it’s time to add stuffing.
Use small pieces of premium polyester fiberfill instead of one large handful. Tiny pieces spread more evenly and create a smoother finish.
Begin by filling the rounded head first. Use the back end of your crochet hook or a blunt pencil to gently push stuffing into the corners. Avoid packing the stuffing too tightly.
Overstuffing stretches the stitches, making small gaps appear between them.
On the other hand, using too little stuffing can leave the ghost looking floppy instead of softly rounded.
Aim for a firm but squeezable shape. If you gently press the ghost with your fingers, it should spring back into shape without feeling hard.
We’ll continue adding a little more stuffing as we finish the body in the next section so your ghost keeps its adorable rounded appearance without becoming lumpy.
Pro Tip: Less is more when it comes to stuffing. Add small pieces a little at a time instead of one large handful. This helps prevent lumps, gives your ghost a smoother shape, and makes it much easier to adjust the firmness as you crochet toward the bottom.
You should definitely give a shot to making this lovely DIY Halloween pumpkin applique as well! It’s a lot easier than it looks!
Step 6: Crochet the Classic Wavy Ghost Bottom
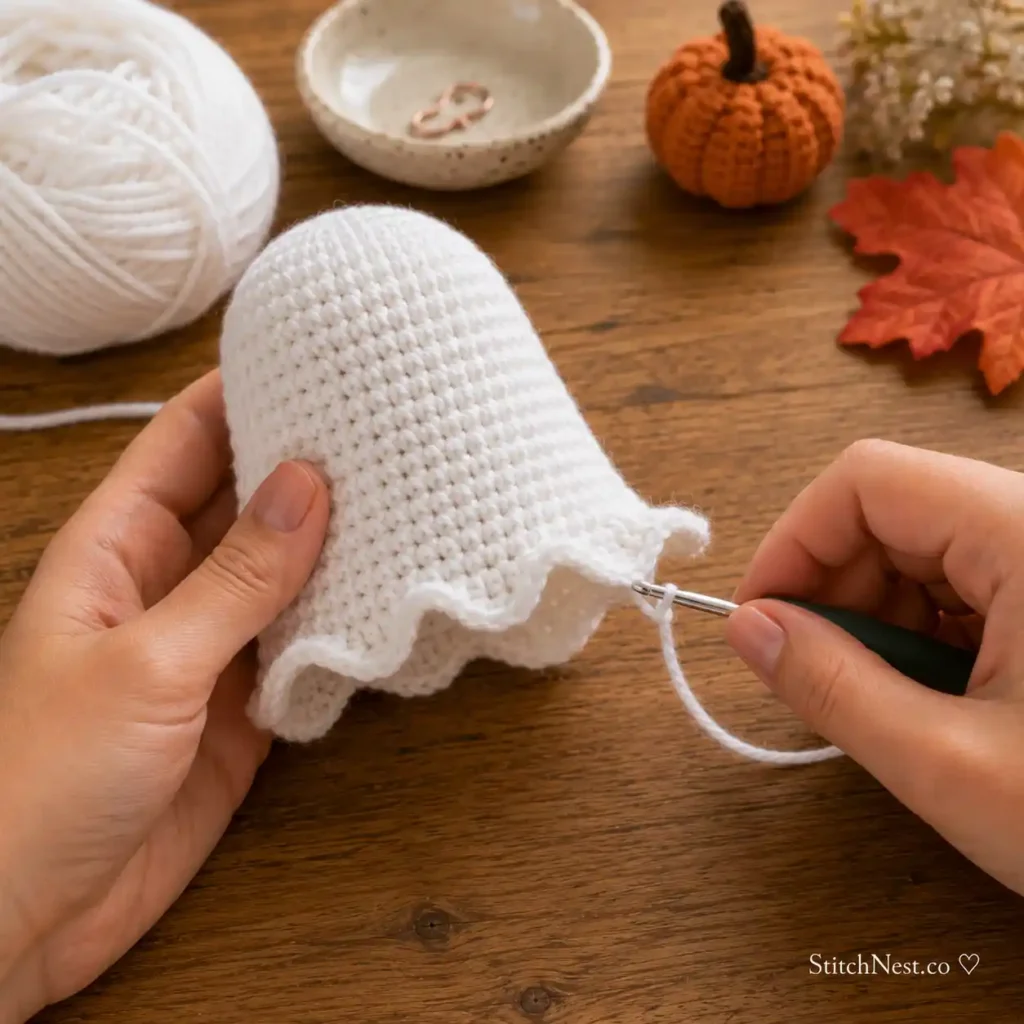
The little ruffles at the bottom are what give your ghost its signature floating look. This is also one of the most enjoyable parts of the project because you’ll see your simple crochet tube transform into an adorable ghost.
Before you begin this round, check that your ghost is stuffed to your liking. Add a little more premium polyester fiberfill if the body feels too soft, but avoid overfilling it. You want the ghost to keep its rounded shape without stretching the stitches.
There are several ways to create a wavy edge, but this beginner-friendly version is simple to remember and creates soft, even curves.
Work the following pattern around the entire round:
- Slip stitch into the first stitch.
- Single crochet into the next stitch.
- Half double crochet into the following stitch.
- Two double crochet stitches into the next stitch.
- Half double crochet into the next stitch.
- Single crochet into the following stitch.
Repeat this sequence until you reach your stitch marker.
As you crochet, you’ll notice gentle curves beginning to form. These rounded waves give your ghost the appearance of floating through the air.
Don’t worry if every wave isn’t identical. Handmade decorations naturally have a little variation, and those small differences add personality to your finished project.
Maybe try this lovely DIY daisy flower tutorial as well. It’s great for beginners!
If you prefer a more dramatic ruffle, you can add one extra double crochet into the center stitch of each wave. If you’d rather have a flatter bottom, simply replace the double crochet stitches with half double crochet stitches.
Before cutting your yarn, take a quick look over your project. Make sure your stuffing feels evenly distributed, your stitch count hasn’t changed, and the bottom edge sits evenly all the way around. Spending a minute checking these details now can save you from having to undo your finishing work later.
Step 7: Fasten Off and Close Your Work
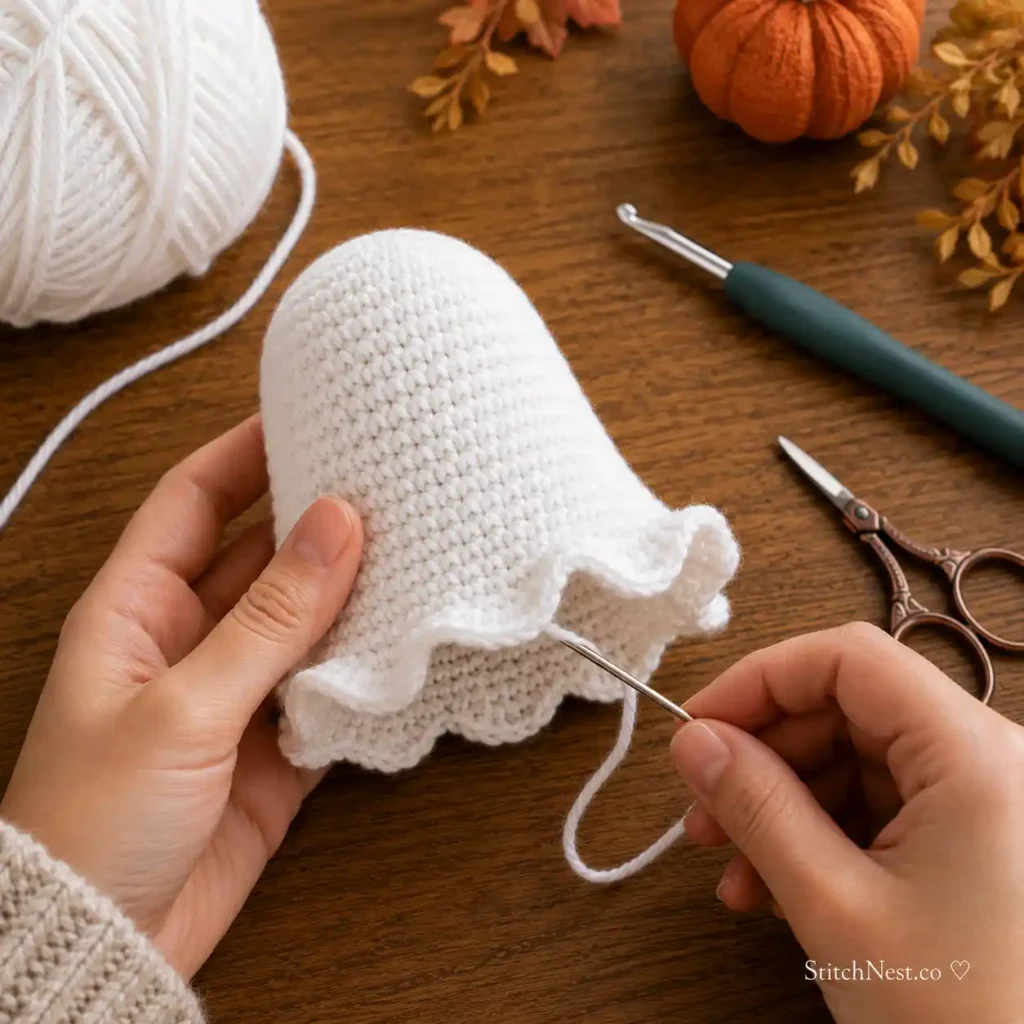
Once you’ve finished the final wave, cut your yarn, leaving a tail about 8 inches long.
Pull the yarn completely through the last loop and gently tighten it to secure your work.
Thread the yarn tail onto a large-eye yarn needle.
Instead of tying bulky knots, weave the yarn tail through several stitches inside the ghost. Change direction once or twice before trimming the excess yarn. This helps lock the yarn in place and creates a much cleaner finish.
If your ghost has shifted slightly during stuffing, gently shape it with your hands. Roll it lightly between your palms to smooth out any uneven areas.
Take a moment to look over your project before adding the face. Check for loose stitches, visible stuffing, or yarn tails that still need to be woven in.
These small finishing details make a big difference in the final result.
Most amigurumi projects don’t require blocking, but gently shaping your finished ghost with your hands can help smooth uneven stuffing and give it a cleaner, more rounded appearance before you add the face.
Once you’ve finished this project, try making a few crochet hearts. They’re beginner-friendly, easy to customize, and useful in all kinds of handmade gifts.
Step 8: Add a Cute Ghost Face
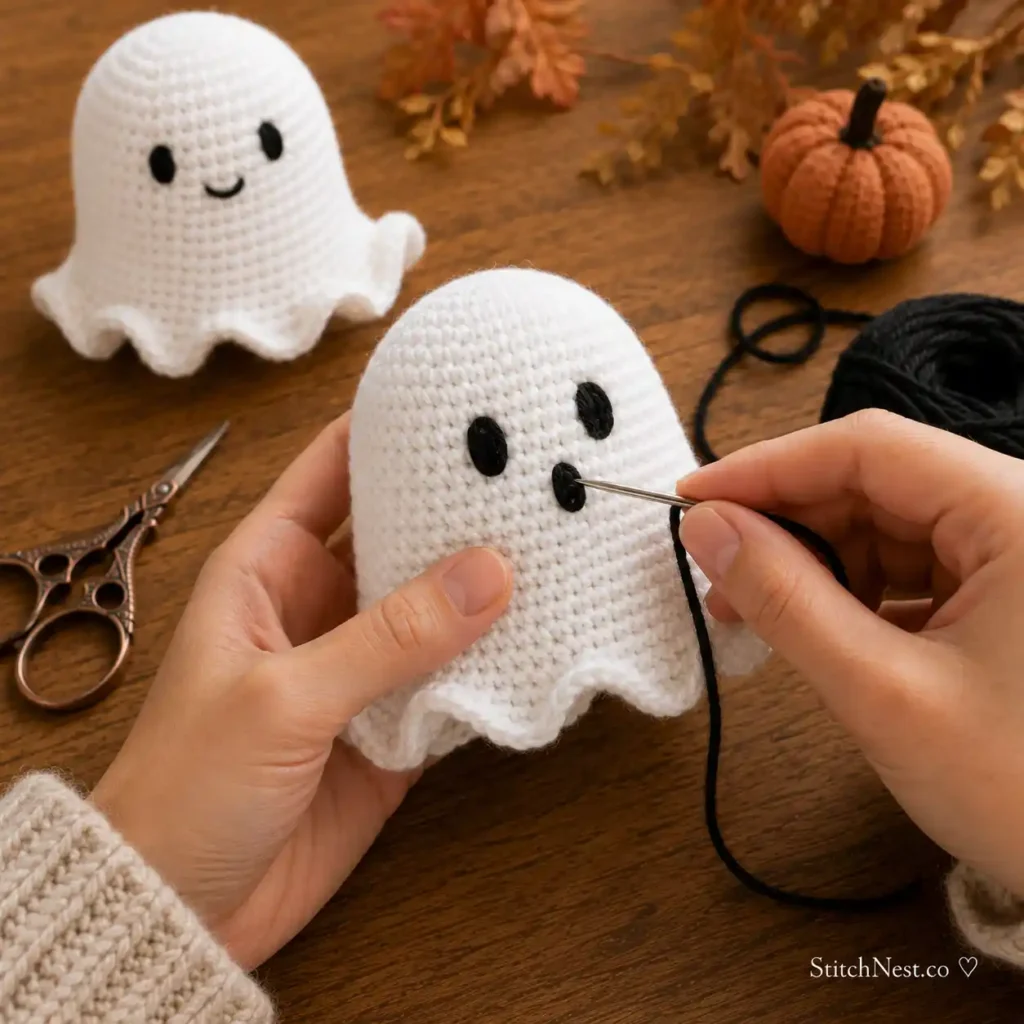
This is the part where your ghost truly comes to life.
Even the simplest facial expression can completely change its personality.
For a classic ghost, embroider two small oval eyes using black yarn. Position them evenly on the front of the head, leaving a few stitches between them.
Below the eyes, stitch a tiny oval or slightly open “O” shape for the mouth.
If embroidery feels difficult, small safety eyes are another beginner-friendly option. They create a polished finish and are available in several sizes.
Keep in mind that safety eyes should only be used on decorations meant for older children and adults. If you’re making a toy for a young child, embroidered features are the safer choice.
Don’t be afraid to experiment with different expressions.
A tiny smile creates a friendly ghost.
A surprised “O” mouth gives it a playful Halloween look.
Curved sleepy eyes make it look peaceful.
Small changes like these allow you to create an entire collection of ghosts, each with its own personality.
Loved this one? Then you’ll have way more fun making this 7-step crochet butterfly! It’s just as simple!
Easy Ways to Customize Your Crochet Ghost
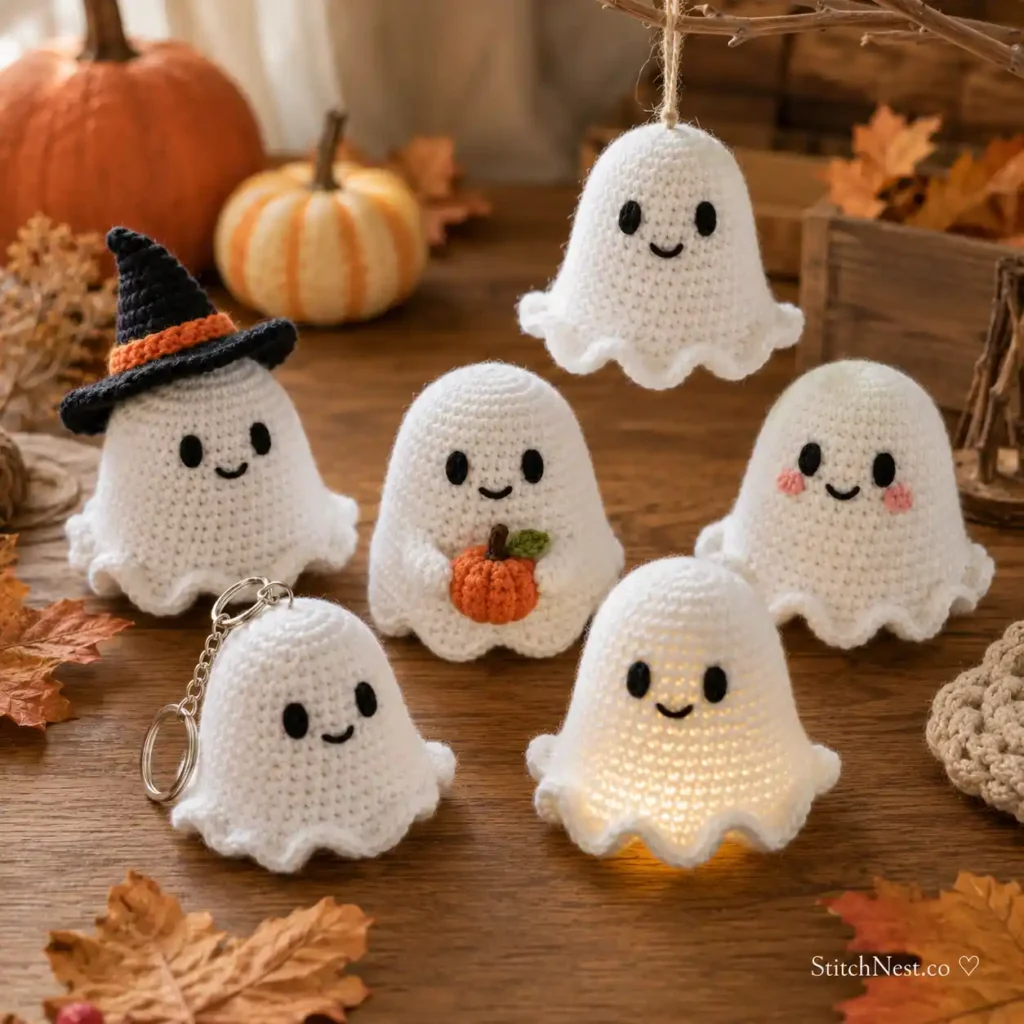
Once you’ve made your first ghost, you’ll probably want to make another. The good news is that small accessories can completely change the finished look without requiring a new pattern.
Here are a few fun ideas:
- Crochet a tiny black witch hat and stitch it onto the top.
- Add a miniature orange pumpkin beside the ghost.
- Tie a small plaid ribbon around the neck for a farmhouse-inspired decoration.
- Stitch tiny pink cheeks beneath the eyes using embroidery floss.
- Make several ghosts in different sizes for a Halloween garland.
- Attach a key ring to create a Halloween keychain.
- Add a hanging loop so your ghost can become a tree ornament or party decoration.
- Place a battery-operated mini LED tea light underneath a hollow version to create a glowing Halloween centerpiece.
These simple additions make wonderful handmade gifts and seasonal decorations without requiring much extra time.
Common Beginner Mistakes (And How to Fix Them)
Every crocheter makes mistakes, especially when learning amigurumi. The good news is that most problems have simple solutions.
Your Ghost Looks Like a Bowl
This usually means there weren’t enough increases during the early rounds.
Count your stitches carefully and compare them with the pattern. If your stitch count is too low, unravel a few rounds and add the missing increases.
Your Ghost Looks Flat and Wavy
Too many increases create excess fabric.
Double-check your stitch count to make sure you didn’t accidentally crochet two stitches into the same stitch where the pattern only called for one.
Stuffing Is Showing Through
This usually happens when your stitches are too loose, or your hook is too large.
Try using a hook that’s half a size smaller next time. Tighter stitches create a smoother fabric that hides the stuffing much better.
Your Rounds Keep Shifting
Continuous rounds naturally form a slight spiral, so this is completely normal.
Using a locking stitch marker helps you keep track of each round, and your finished ghost will still look great.
Beginner Tips for Better Results
Your first ghost doesn’t need to be perfect. Each one teaches you something new, and you’ll quickly notice your stitches becoming more even with practice.
Work in a well-lit area so it’s easier to see each stitch. And take breaks if your hands become tired. Relaxed hands usually create smoother stitches than tense ones.
Count your stitches at the end of every round instead of waiting until something looks wrong. Also, keep your yarn under consistent tension rather than pulling every stitch as tightly as possible.
Finally, don’t rush the finishing steps. Weaving in yarn tails neatly and shaping your ghost carefully often makes a bigger difference than perfect crochet stitches.
Once you’ve finished your first ghost, don’t be surprised if you want to crochet a whole collection. They’re quick enough to make over a weekend and look adorable displayed on mantels, tiered trays, Halloween wreaths, bookshelves, or party tables. They also make thoughtful handmade gifts, keychains, and seasonal ornaments that friends and family will love.
Every ghost you finish helps build the same skills you’ll use for pumpkins, snowmen, teddy bears, and other amigurumi projects. So grab your favorite yarn, put on a cozy Halloween movie, and enjoy every stitch. Before long, you’ll have an adorable little ghost that’s ready to become part of your Halloween decorations, and you’ll already be planning your next one.