If there is one crochet project that never really goes out of style, it is the DIY crochet daisy tutorial. Daisies are simple, cheerful, and surprisingly versatile once you start making them. You can turn them into coasters, earrings, bookmarks, appliques, bag charms, hair clips, garlands, or even sew them onto cardigans and tote bags for extra texture. The best part is that they work up quickly, which makes them perfect for beginners who want something satisfying without spending days on one project.
Things You Will Need
- Fine cotton yarn or crochet thread
- 2.5 mm to 3.5 mm crochet hook
- Yarn needle
- Sharp embroidery scissors
- Stitch markers
- Blocking mat or towel
- Optional beads for decoration
Turn Your Crochet Daisy Into Something You’ll Actually Use
Crochet Daisy Earrings
Smaller daisies look beautiful as lightweight summer earrings, especially with pearl centers or pastel petals. Cotton thread usually works best here because the petals stay crisp and structured.
Crochet Daisy Bookmark
Attaching several daisies along a simple chain creates a soft floral bookmark that feels delicate without being difficult to make.
Crochet Daisy Bag Charm
You can attach your finished daisy onto bags, headphones, backpacks, or zipper pulls for a quick decorative accent that feels bright and playful.
Crochet Daisy Applique
Daisies work beautifully stitched onto denim jackets, cardigans, hats, tote bags, and even crochet blankets for extra texture and layering.
Crochet Daisy Garland
Once you make several flowers in different shades, joining them into a garland creates beautiful spring or cottagecore decor for shelves, walls, or windows.
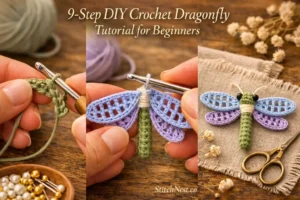
You should also check out this quick and easy DIY dragonfly tutorial; it’s a lovely piece for decor and applique.
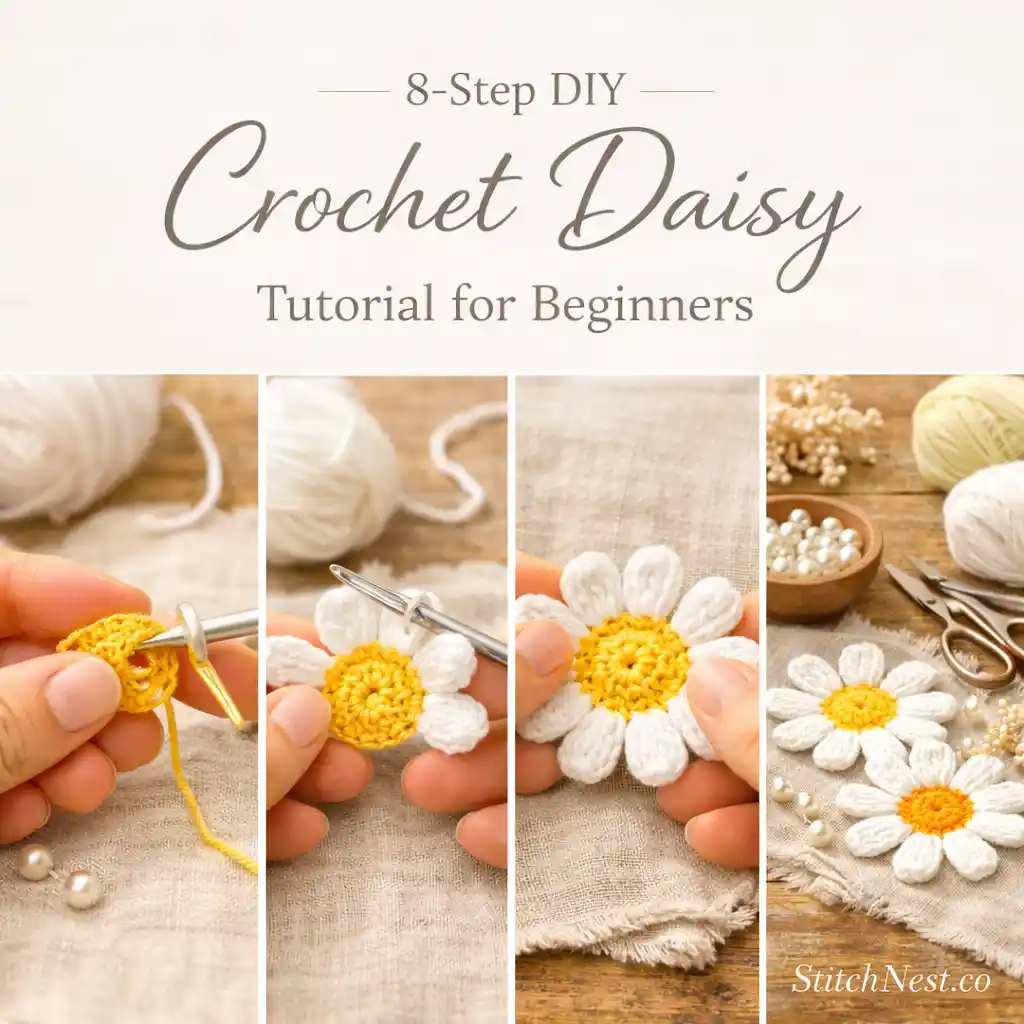
DIY Crochet Daisy Tutorial Easy
Step 1: Make a Magic Ring
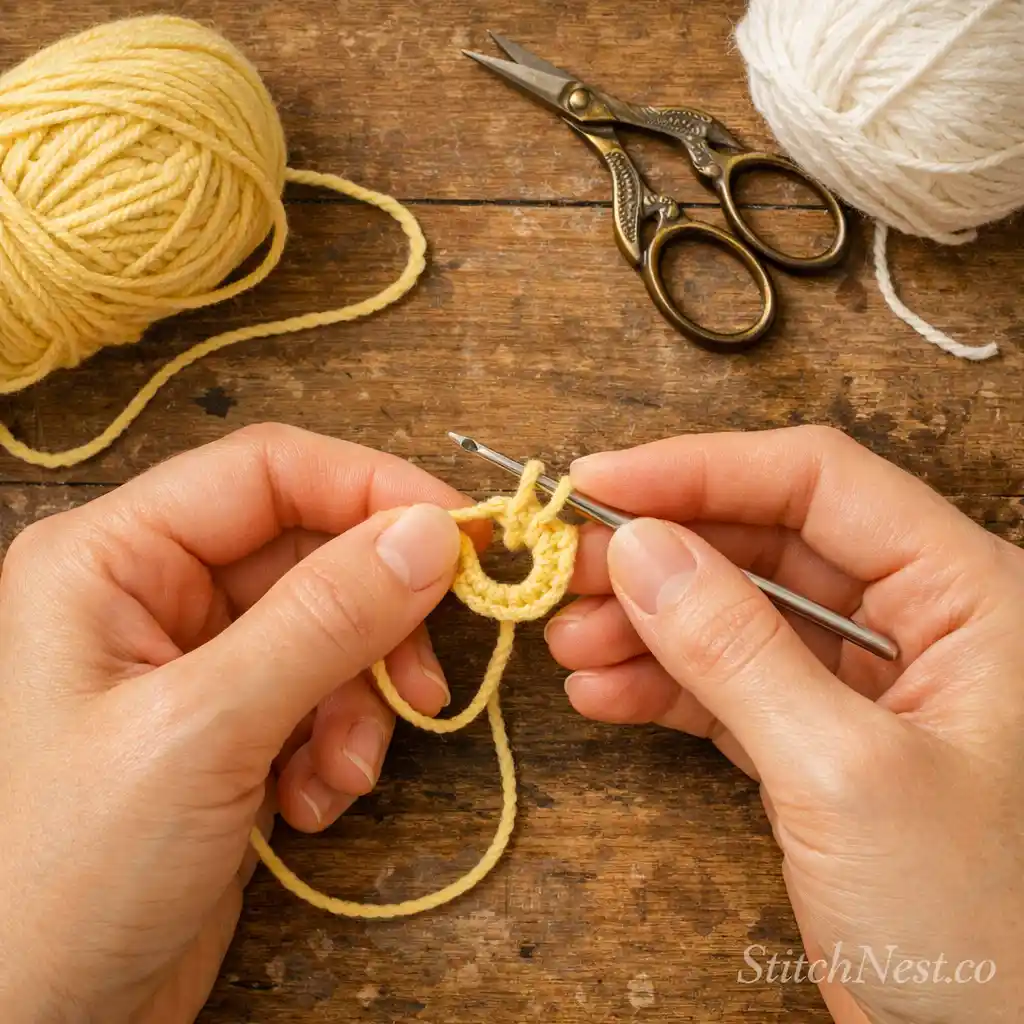
Start by creating a magic ring and chain 1 to secure it. Keep the loop slightly loose for now because you will need enough room to work the center stitches comfortably.
One thing many beginners struggle with is pulling the ring too tight too early. Leaving a little flexibility makes the first round much easier to crochet evenly.
Step 2: Crochet the Daisy Center
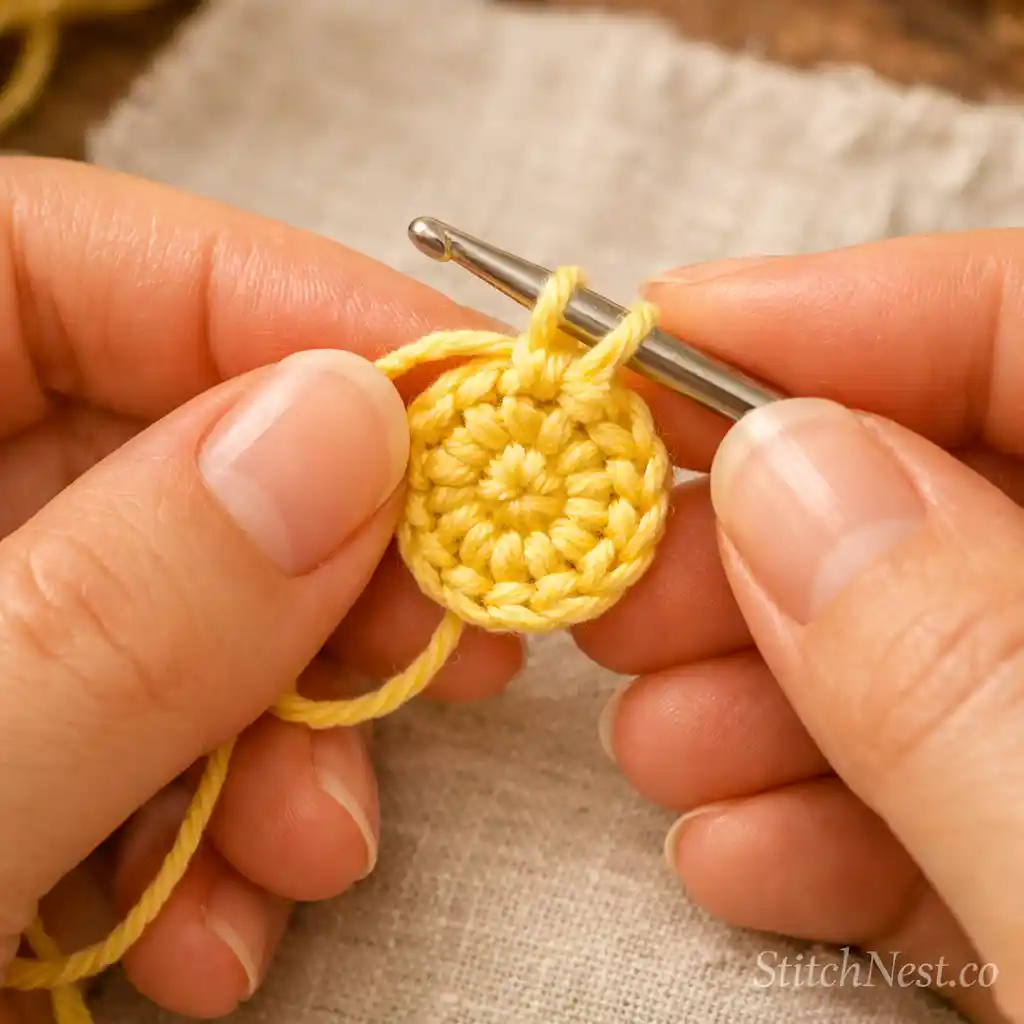
Work 10 to 12 single crochets directly into the magic ring to form the flower center. Once the stitches are complete, pull the yarn tail gently to close the ring tightly.
The center should sit flat without puckering. If the stitches begin crowding too tightly, spreading them slightly with your fingertips before closing the ring usually helps create a cleaner circle.
Step 3: Join the Round and Change Yarn Color
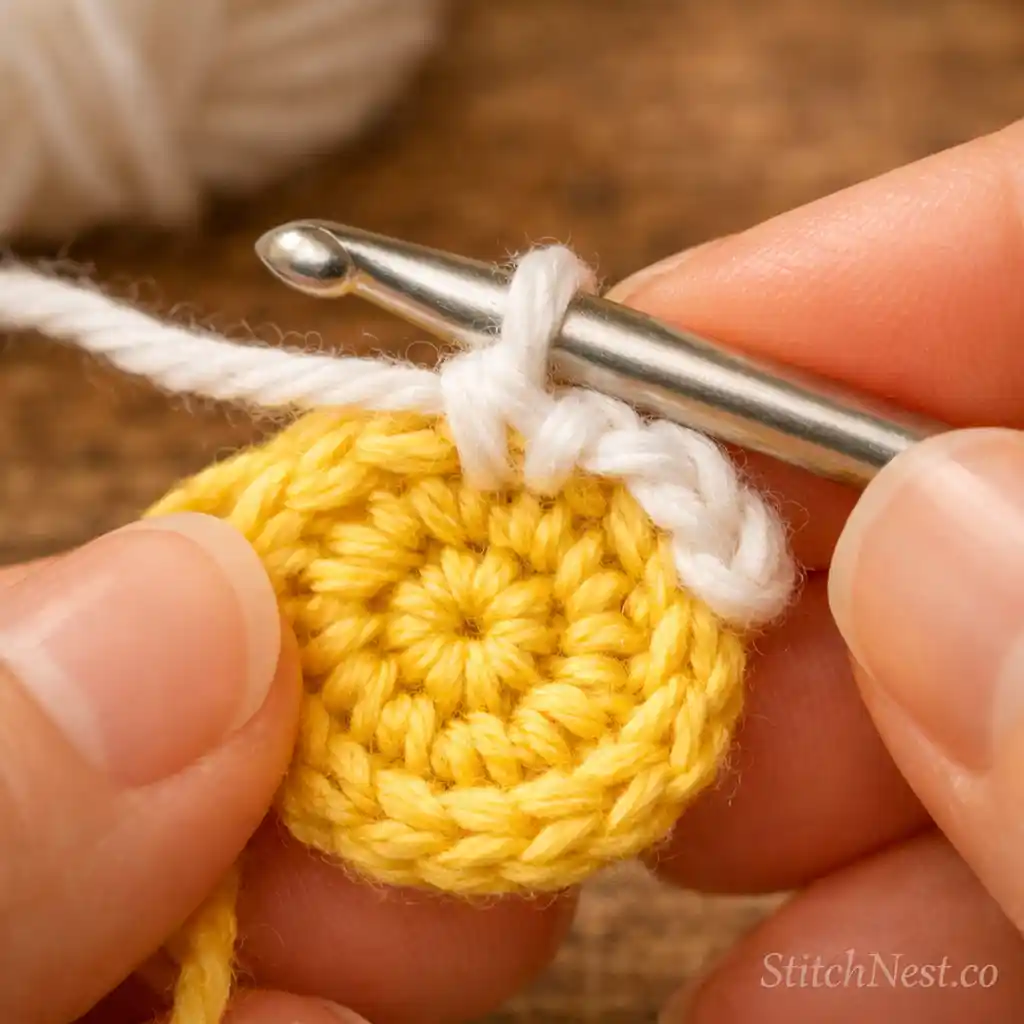
Slip stitch into the first stitch to close the round neatly. Cut the yellow yarn and attach your white yarn to any stitch around the center.
This transition stage makes a huge difference visually. We usually weave in the yellow yarn tail immediately here because it becomes harder to hide once the petals are added later.
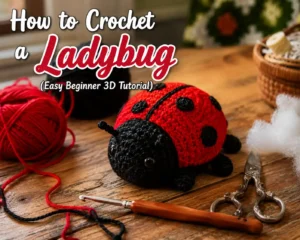
If you’re looking for a beginner-friendly amigurumi project, our DIY Crochet Ladybug Tutorial teaches you how to crochet an adorable 3D ladybug with step-by-step instructions, helpful tips, and plenty of finishing advice.
Step 4: Begin the Petals Around the Flower
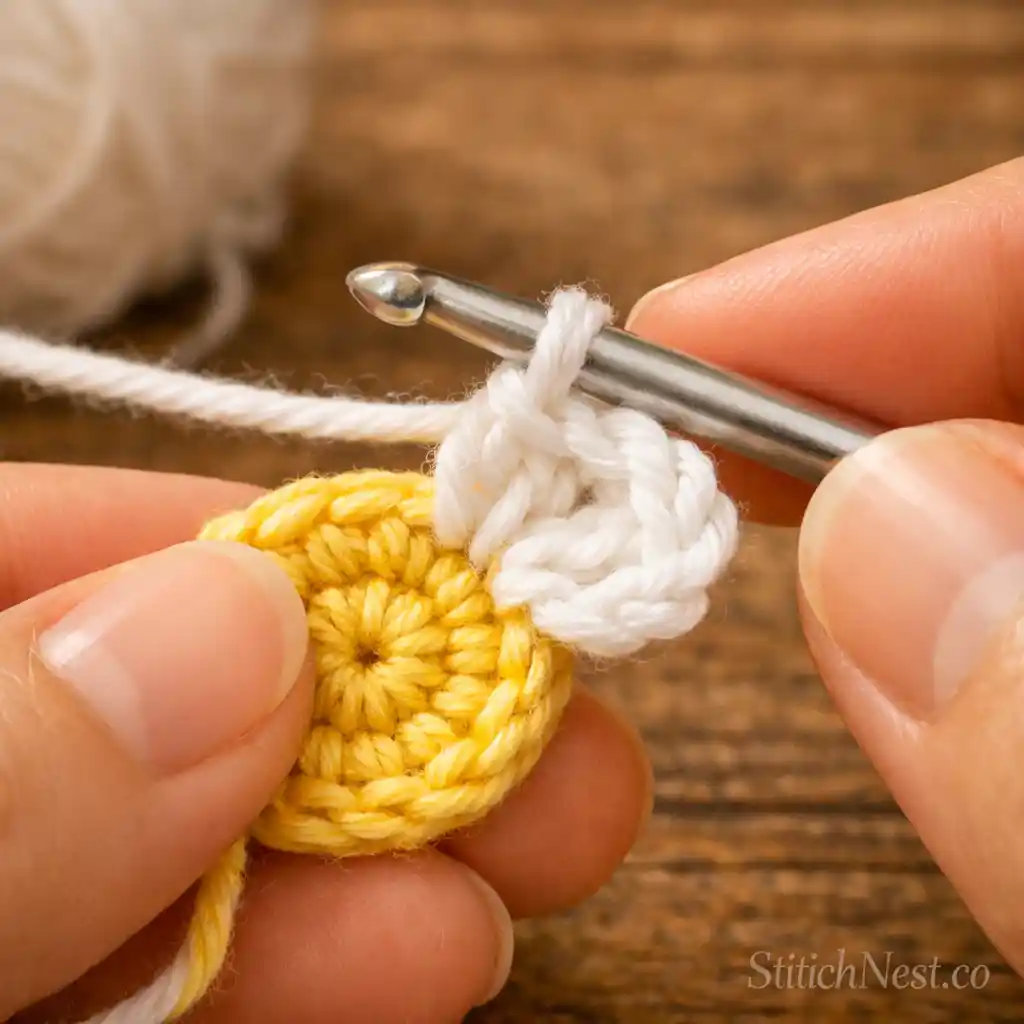
Continue repeating the same petal sequence into each stitch around the center until the flower is complete. Try to maintain similar tension so the petals stay evenly sized.
Did you know uneven tension usually becomes most noticeable in floral projects? Even one tighter petal can make the flower look slightly off balance, so slowing down during repetitive sections really helps.
Step 5: Repeat the Petals Around the Flower
Continue repeating the same petal sequence into each stitch around the center until the flower is complete. Try to maintain similar tension so the petals stay evenly sized.
Did you know uneven tension usually becomes most noticeable in floral projects? Even one tighter petal can make the flower look slightly off balance, so slowing down during repetitive sections really helps.
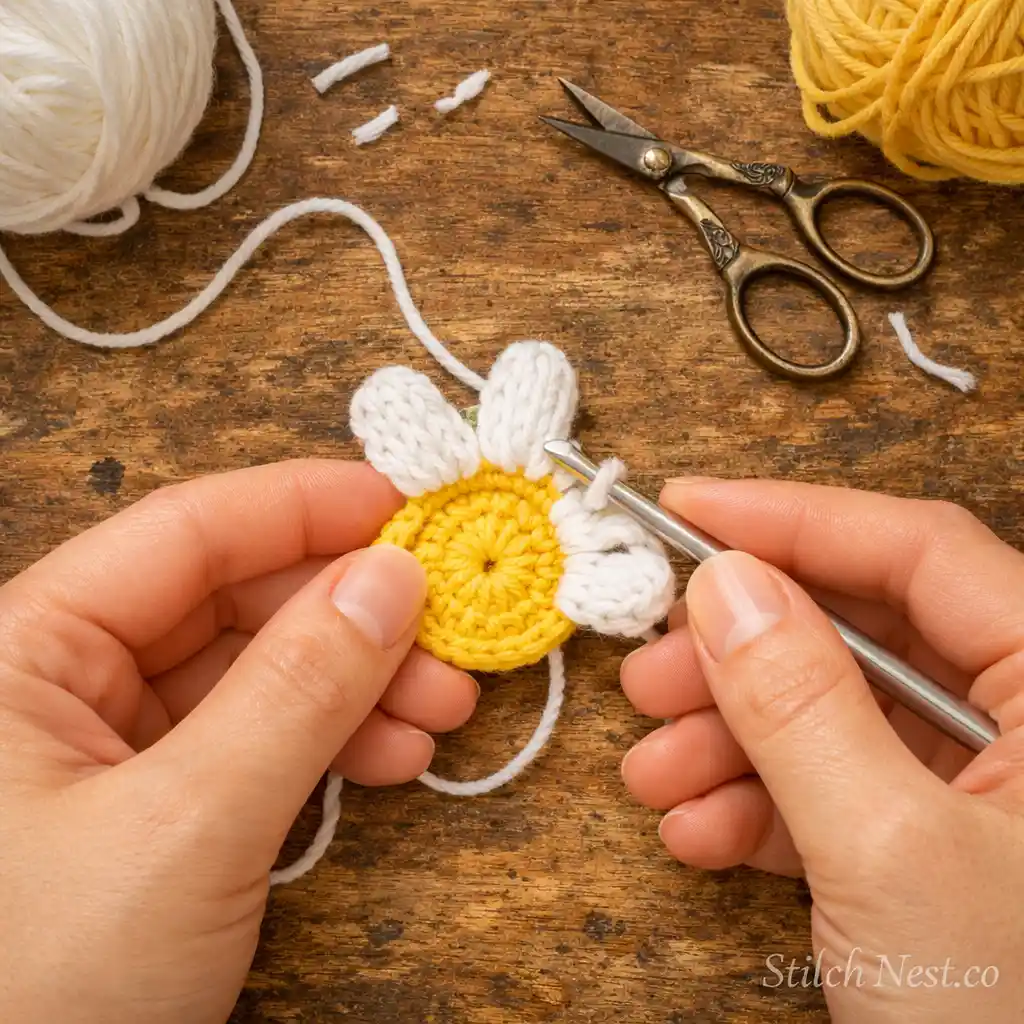
Step 6: Shape and Adjust the Petals
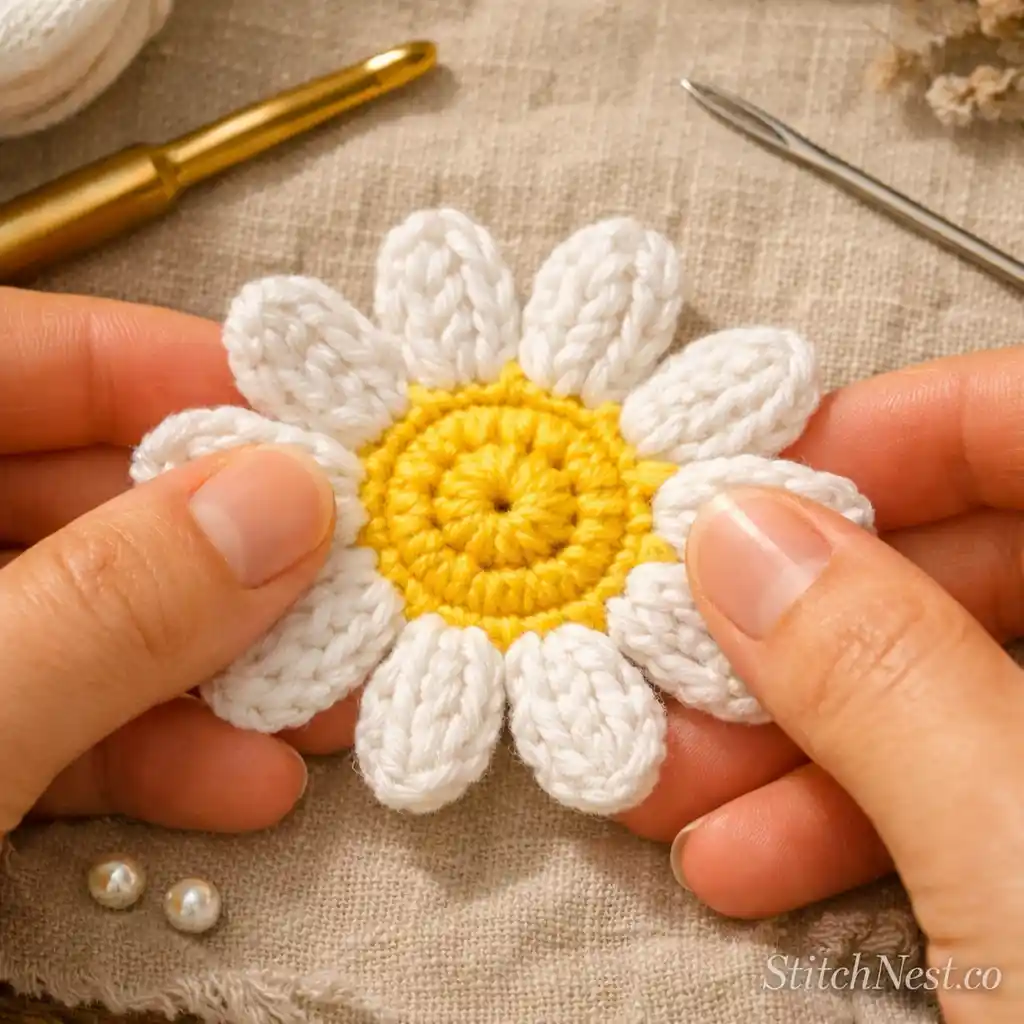
Once all petals are finished, gently spread them outward using your fingers. Adjust any curled edges and flatten the flower lightly against your work surface.
This step changes the entire look of the daisy. Small shaping adjustments immediately make the flower appear cleaner and more symmetrical.
Step 7: Block the Crochet Daisy
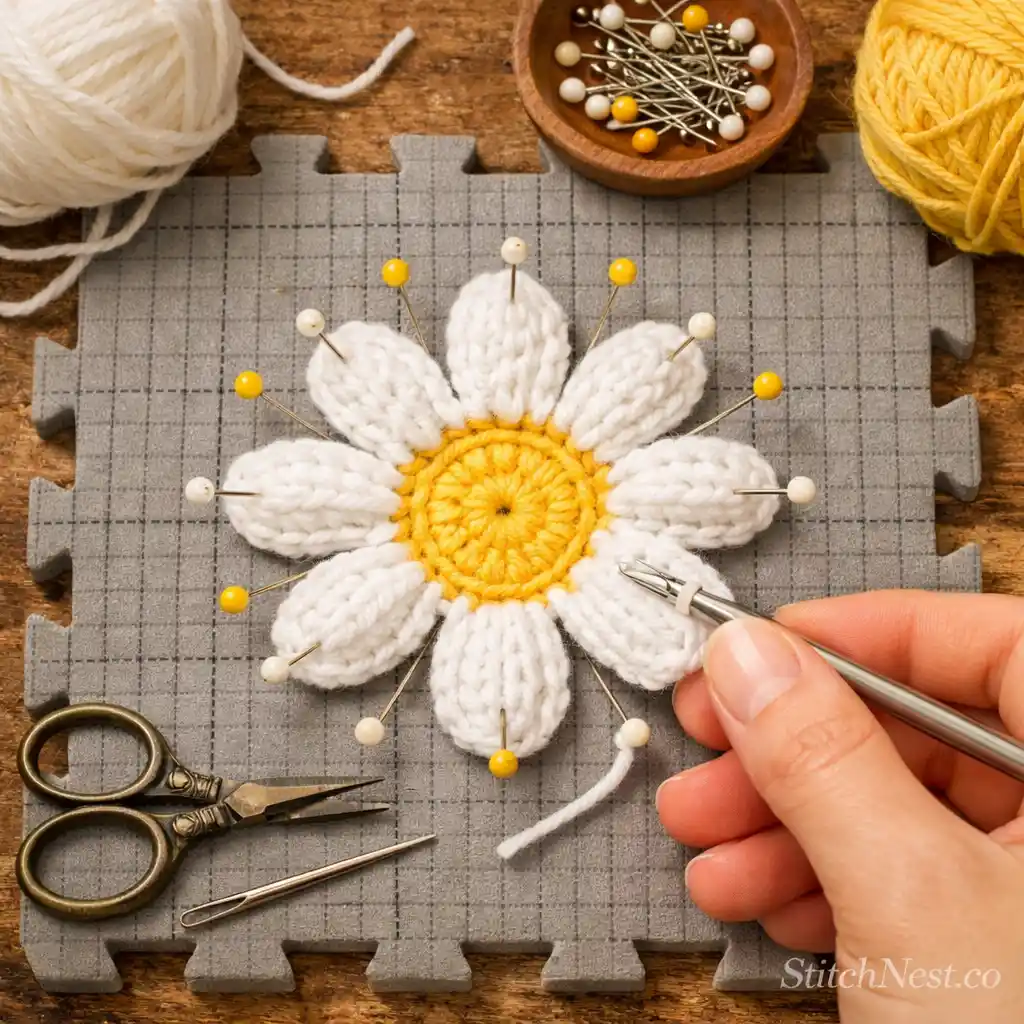
Lay the flower flat on a towel or blocking mat and lightly steam or pin the petals into shape. Cotton yarn responds beautifully to gentle blocking and helps the petals stay flatter afterward.
We usually avoid oversteaming smaller flowers because too much moisture can soften the petal edges more than intended.
Once you’ve finished this project, try making a few crochet hearts. They’re beginner-friendly, easy to customize, and useful in all kinds of handmade gifts.
Step 8: Finish and Style Your Crochet Daisy
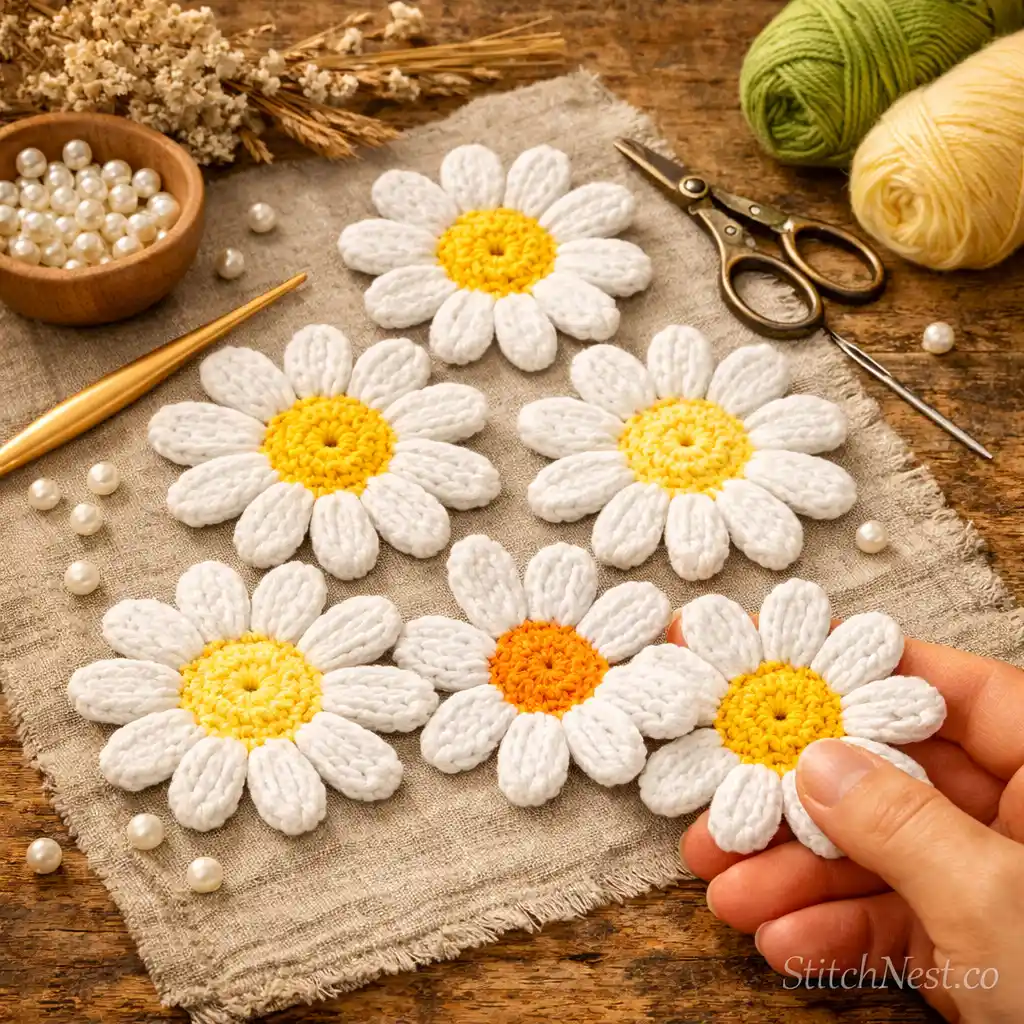
Once the flower is dry, weave in any loose tails using a yarn needle. Now your daisy is ready to become a bag charm, applique, bookmark, earring, coaster, or decorative accent.
One thing many crocheters notice after making daisies is how relaxing the petal rhythm becomes after the first flower. Before long, it turns into the kind of project you can comfortably repeat without constantly checking instructions.
Loved this one? Then you’ll have way more fun making this 7-step crochet butterfly! It’s just as simple!
Practical Tips for Cleaner Crochet Daisies
- Cotton yarn usually creates the sharpest petal definition because the stitches stay structured and open more cleanly after blocking. Softer yarns can work beautifully too, but they often create petals that curl more easily over time.
- If the daisy center begins puckering upward, the stitches inside the magic ring are probably too tight. Relaxing the tension slightly during the first round helps the flower sit flatter once finished.
- Petal spacing matters more than many beginners expect. Counting stitches carefully before attaching each petal keeps the flower looking balanced instead of crowded on one side.
- Weaving in yarn tails during color changes instead of waiting until the end keeps the back of the flower much cleaner and easier to manage.
Common Mistakes to Avoid for DIY Crochet Daisy Tutorial
One of the most common mistakes with crochet daisies is pulling the petal chains too tightly. Tight chains make the petals curl inward and lose that soft, rounded flower shape that daisies are known for. Relaxed tension during the chain sections usually fixes this immediately.
Another issue happens when the petals are attached unevenly around the center. Even if the stitch work itself looks clean, inconsistent spacing can make the flower appear lopsided once flattened. Stitch markers help tremendously here, especially during the first few flowers.
Many beginners also skip blocking because the project feels small and quick. In reality, blocking is often what transforms a decent crochet flower into one that looks polished and symmetrical. Cotton yarn especially responds beautifully to shaping and light steam.
Yarn choice changes the final look more than people expect it to. Fuzzy yarn tends to hide petal definition and makes the flower lose some of its crisp structure visually. Smooth cotton yarn usually gives the cleanest floral shaping for daisies.
Once you finish your first daisy, experimenting with different yarn shades, layered petals, or decorative centers becomes incredibly fun. Take your time with the shaping, enjoy the rhythm of the petal repeats, and you will end up with a floral crochet piece that feels just as relaxing to make as it is pretty to display. You should try these crochet flowering vines next!