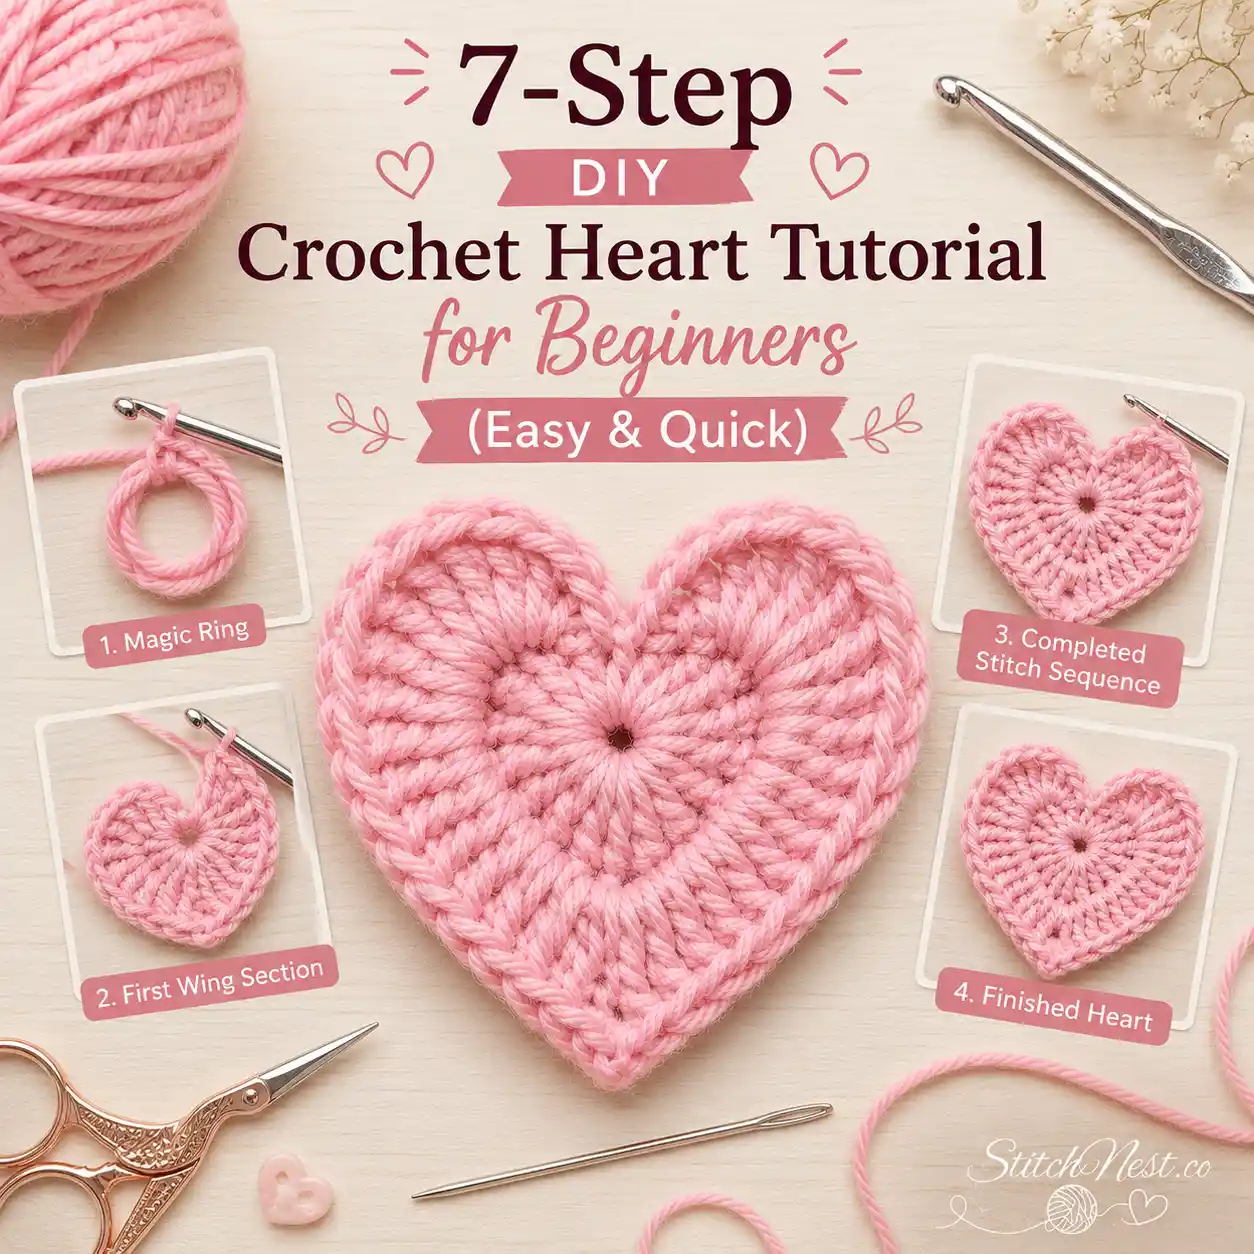
If you’ve been looking for a crochet project that’s quick, useful, and easy to remember, a crochet heart is hard to beat. It takes very little yarn, works up in just a few minutes, and opens the door to dozens of other projects once you’re finished. That’s one reason crocheters keep coming back to this little pattern year after year. The best part is that you only need a handful of basic stitches. Follow along step by step in this DIY crochet heart tutorial for beginners, and by the end, you’ll have a finished crochet heart ready to turn into gifts, decorations, accessories, and more.
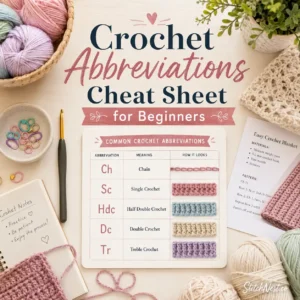
Common Crochet Heart Abbreviations
- Ch = Chain
- DC = Double Crochet
- TR = Treble Crochet
- Sl St = Slip Stitch
Things You’ll Need
Before we start stitching, gather a few basic supplies. Chances are you already have most of them in your crochet kit.
- Fine cotton yarn in multiple colors
- Steel crochet hooks in small sizes
- Yarn needle for weaving in ends
- Small embroidery scissors
Turn Your DIY Crochet Heart Into Something You’ll Actually Use
Once you’ve made your first crochet heart, you’ll quickly realize how many ways you can use it. A single heart can become part of dozens of different projects with very little extra work.
Crochet Heart Garland
String several hearts together, and you’ll have an easy decoration for bedrooms, nurseries, parties, Valentine’s Day displays, or seasonal décor. Mixing different shades often creates the most interesting result.
Crochet Heart Keychain
A small crochet heart makes a simple keychain project. Add a key ring, a little stuffing if you’d like extra dimension, and you’ve got something practical that uses very little yarn.
Crochet Heart Bookmark
Readers love handmade bookmarks because they’re useful without being bulky. A crochet heart attached to a chain or narrow strip creates a gift that’s quick to make and easy to personalize.
Crochet Heart Coaster
A larger version of the same heart shape can become a coaster for mugs, candles, or small decorative displays. Cotton yarn works especially well here because it holds its shape nicely.
Crochet Heart Appliqué
Heart appliqués are one of the easiest ways to customize existing projects. You can stitch them onto bags, blankets, sweaters, jackets, hats, or pillows for an instant decorative detail.
Crochet Heart Earrings
Lightweight cotton yarn and a small hook can create adorable crochet earrings. They’re quick to make and perfect for handmade gifts.
Maybe try our DIY Crochet Butterfly Tutorial next. It’s another beginner-friendly project that works up surprisingly fast.
DIY Crochet Heart Tutorial Easy
New to crochet patterns? Before you start, take a few minutes to learn the basics of reading crochet instructions, stitch abbreviations, and pattern terminology. Our guide, How to Read Crochet Patterns for Beginners, makes everything much easier to follow, especially if you’re still learning common crochet stitches and abbreviations.
Step 1: Make a Magic Ring
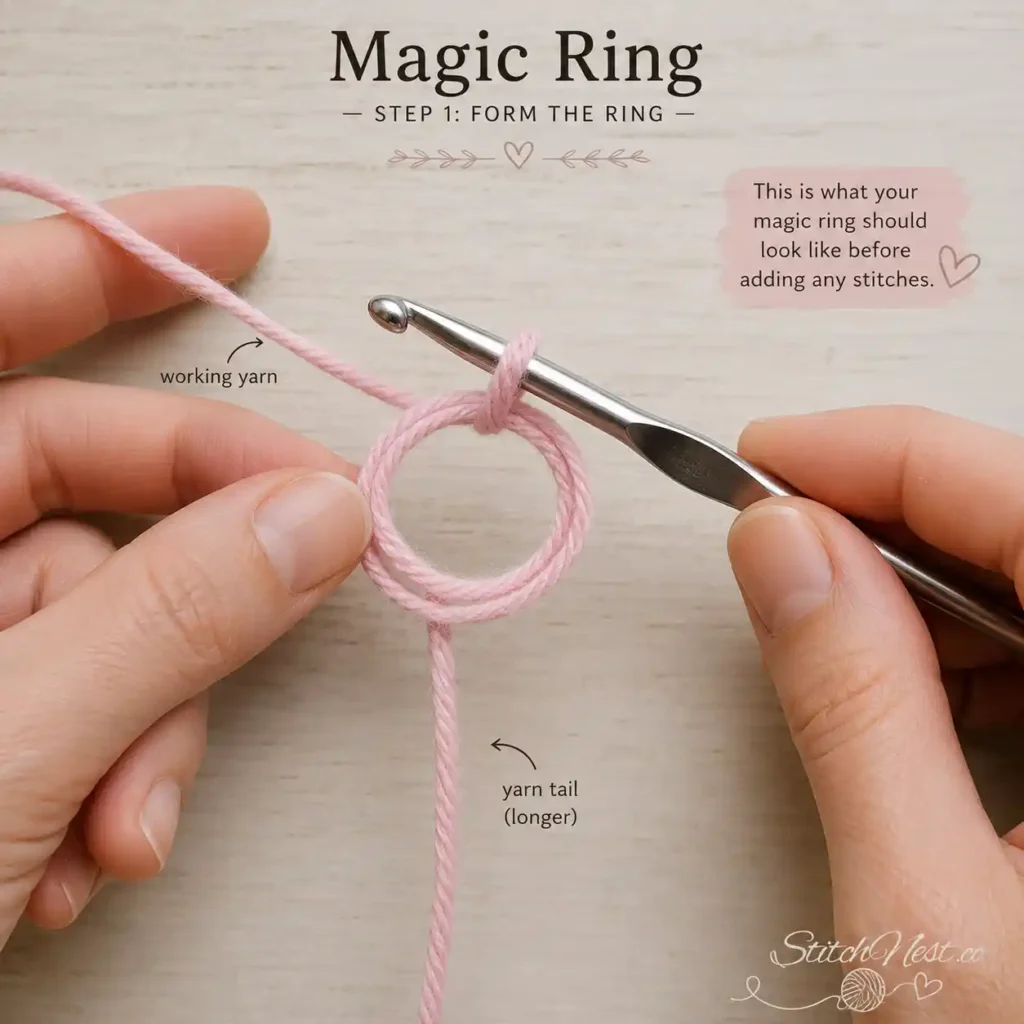
Begin by creating a magic ring.
Wrap the yarn around your fingers to form a loop, insert your hook into the center, yarn over, and pull up a loop. Chain 2 to secure the ring before working the stitches.
If magic rings still feel awkward, don’t worry. You can chain 4 and join with a slip stitch to form a small loop instead. The finished heart will still look great.
Try not to pull the ring too tight at this stage. You’ll need space to work several stitches into the center.
Step 2: Create the First Rounded Side
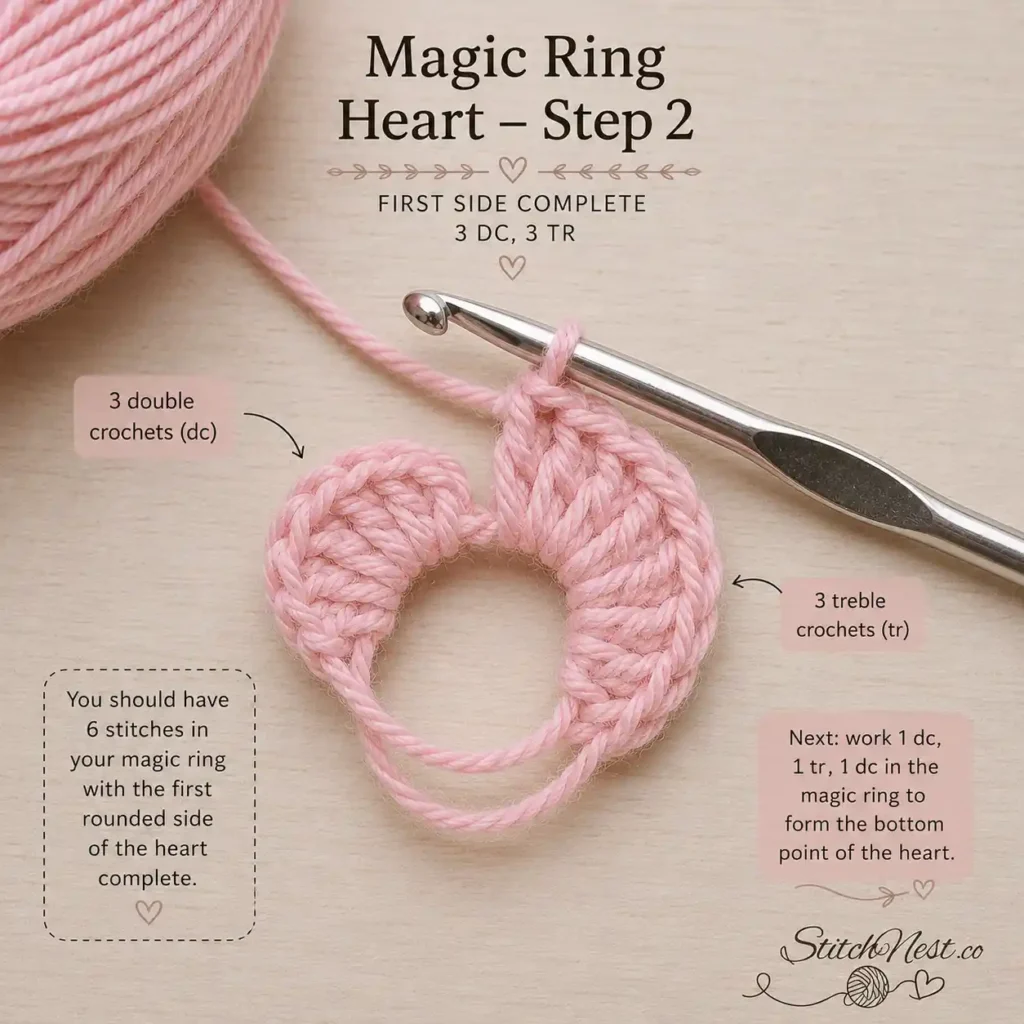
Now you’ll build the first top curve of the heart.
Work the following stitches directly into the magic ring:
- 3 Double Crochet (DC)
- 3 Treble Crochet (TR)
The double crochets begin forming the rounded shape, and the taller treble crochets create the upper curve that gives the heart its recognizable silhouette.
Keep the stitches relaxed and evenly spaced around the ring.
Step 3: Form the First Point
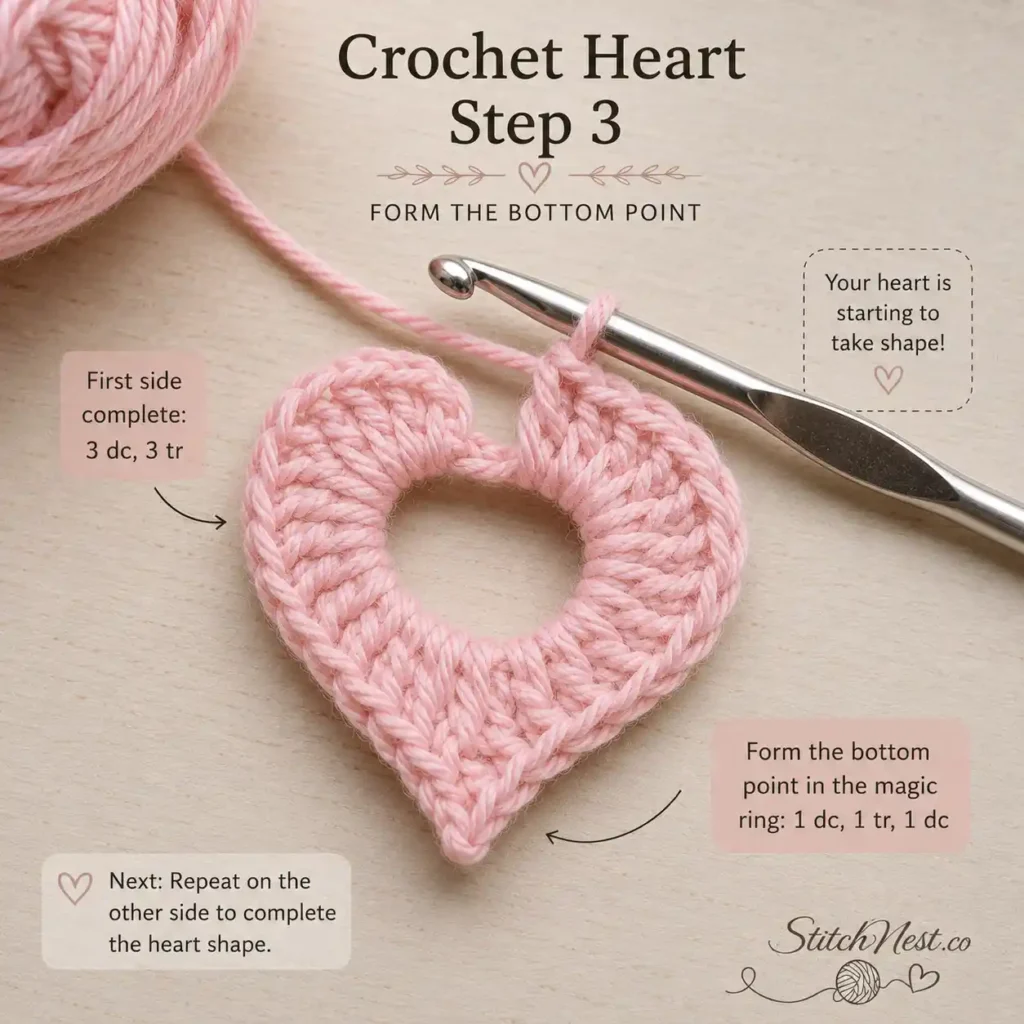
The bottom point of the heart comes next.
Into the same magic ring, work:
- 1 Double Crochet (DC)
- 1 Treble Crochet (TR)
- 1 Double Crochet (DC)
This small group creates the tapered point at the bottom of the heart.
Once these stitches are complete, you should already start seeing the shape emerge.
You’ll also want to make sure you’re using the right hook for your yarn. Our Beginner’s Guide to Crochet Hooks explains hook sizes, materials, and which hooks work best for different projects.
Step 4: Create the Second Rounded Side
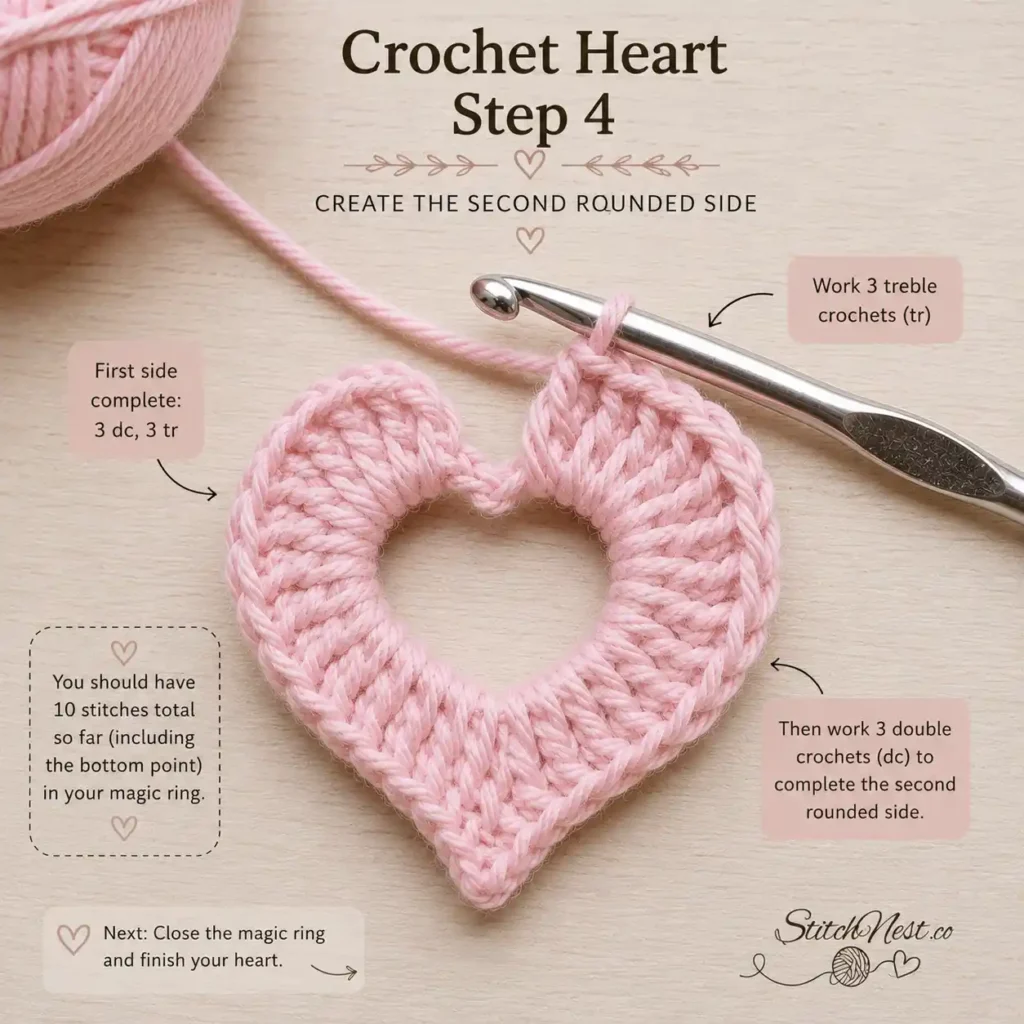
Now mirror the stitches from the first side.
Work into the magic ring:
- 3 Treble Crochet (TR)
- 3 Double Crochet (DC)
Once these stitches are in place, you’ll see the second half of the heart take shape.
Try to keep the stitch heights similar to the opposite side. Perfect symmetry isn’t necessary, but balanced curves always look nice.
Step 5: Close and Shape the Heart
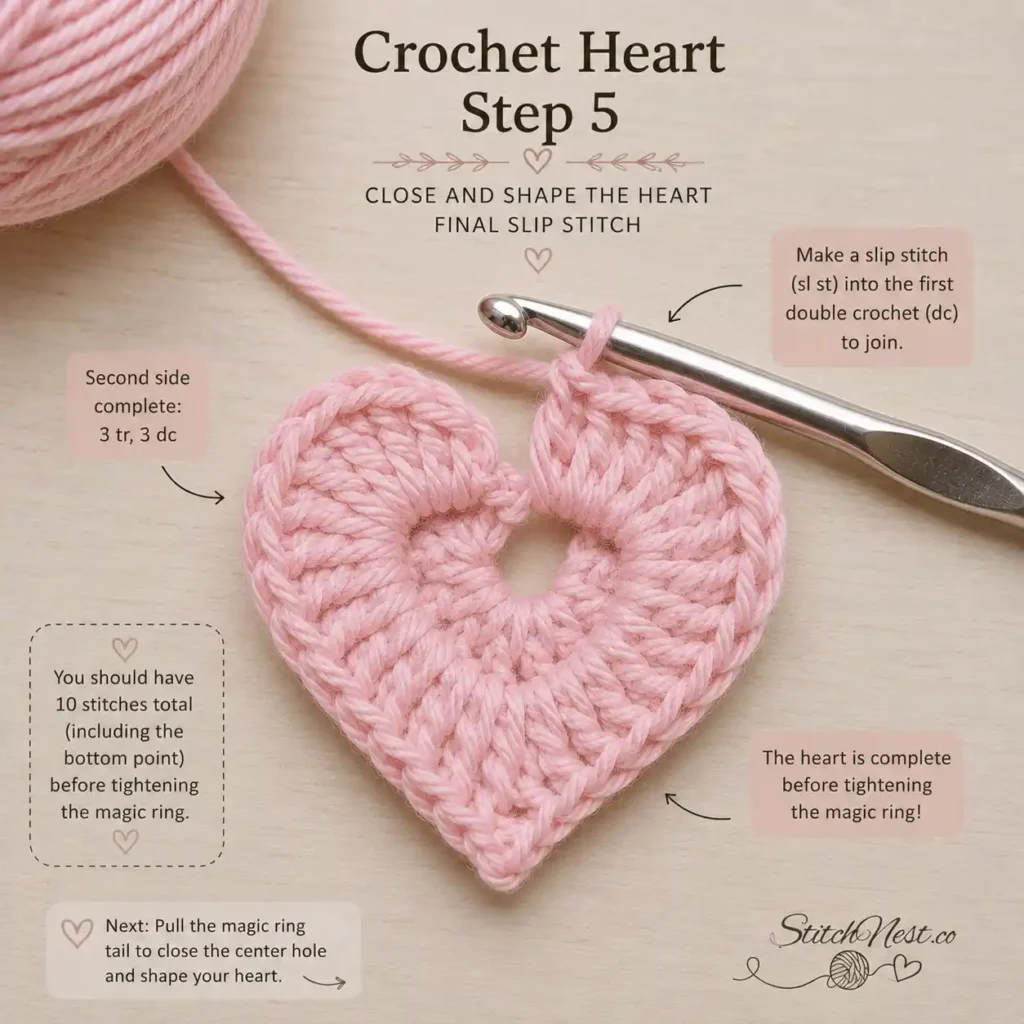
Finish the shape with:
- Chain 2
- Slip Stitch (SL ST) into the center of the magic ring
The chain creates a small indentation at the top center of the heart, helping separate the two rounded sections.
At this point, the heart should be fully formed but still slightly loose around the center.
Quick Stitch Sequence Reference
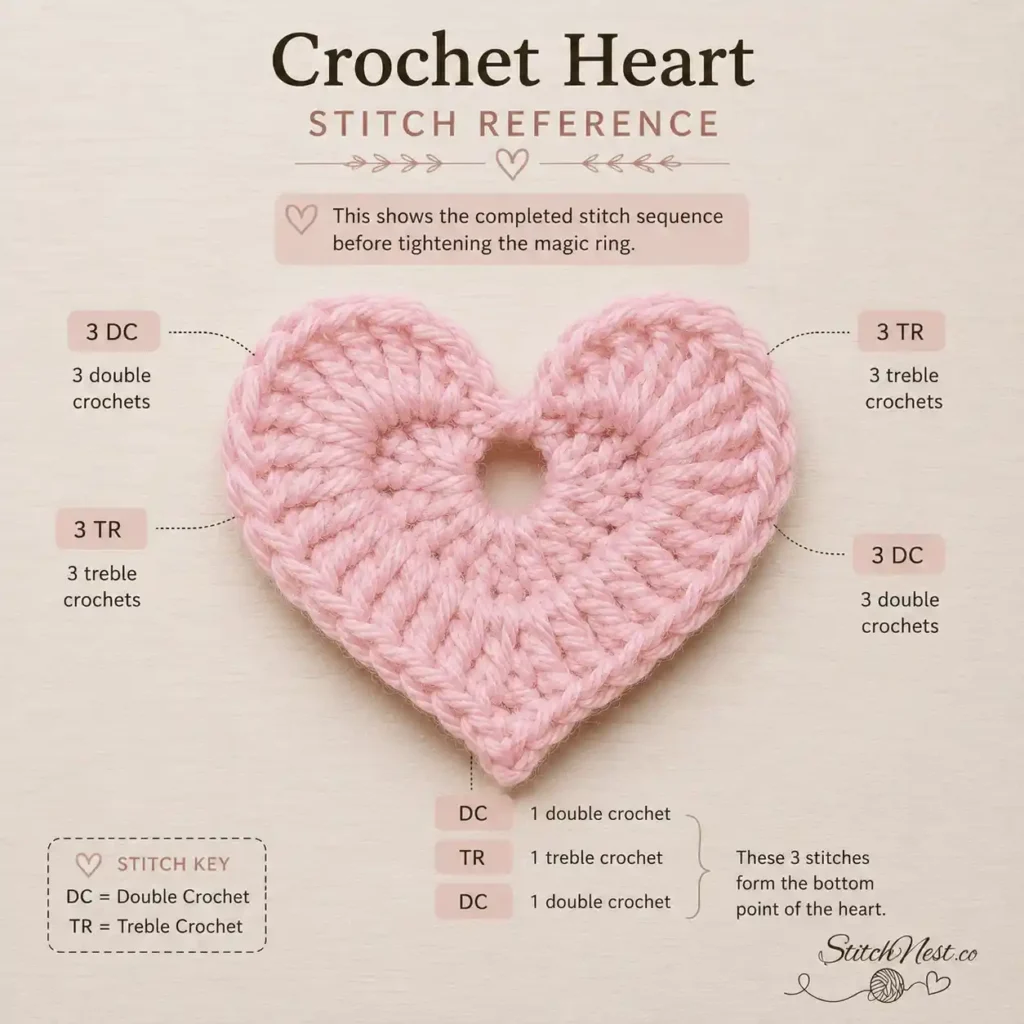
All stitches are worked directly into the magic ring.
Ch 2 → 3 DC → 3 TR → DC → TR → DC → 3 TR → 3 DC → Ch 2 → Sl St
You should have:
- Two rounded upper sections
- One pointed bottom section
- A center opening ready to tighten
Before moving on, take a quick look at the overall shape. The heart should already be recognizable even before tightening the ring.
Step 6: Tighten and Secure
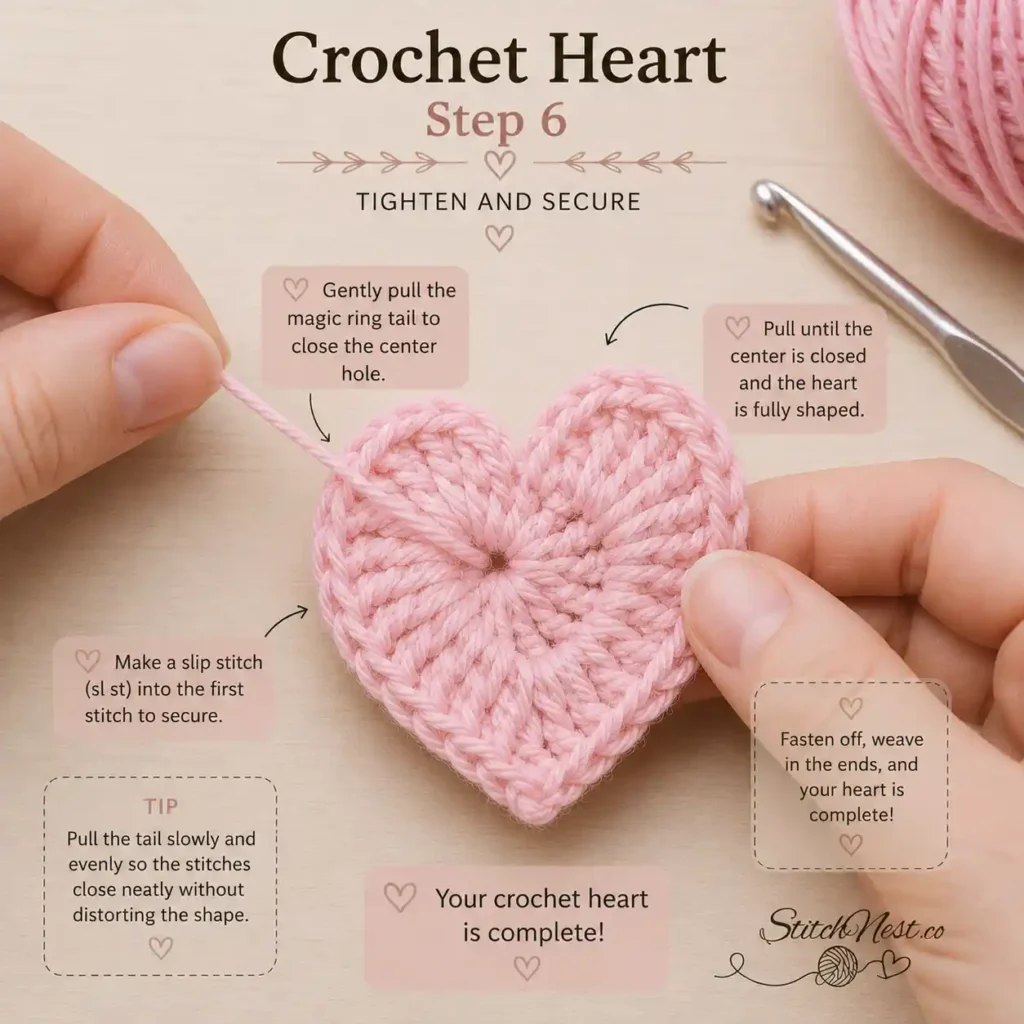
Gently pull the yarn tail to close the magic ring.
As the center closes, you’ll notice the heart becomes much more defined. Pull slowly and stop once the opening disappears.
Make a secure knot on the back if needed, then weave the tail through a few stitches to keep everything stable.
This step often makes the biggest visual difference, so don’t rush it.
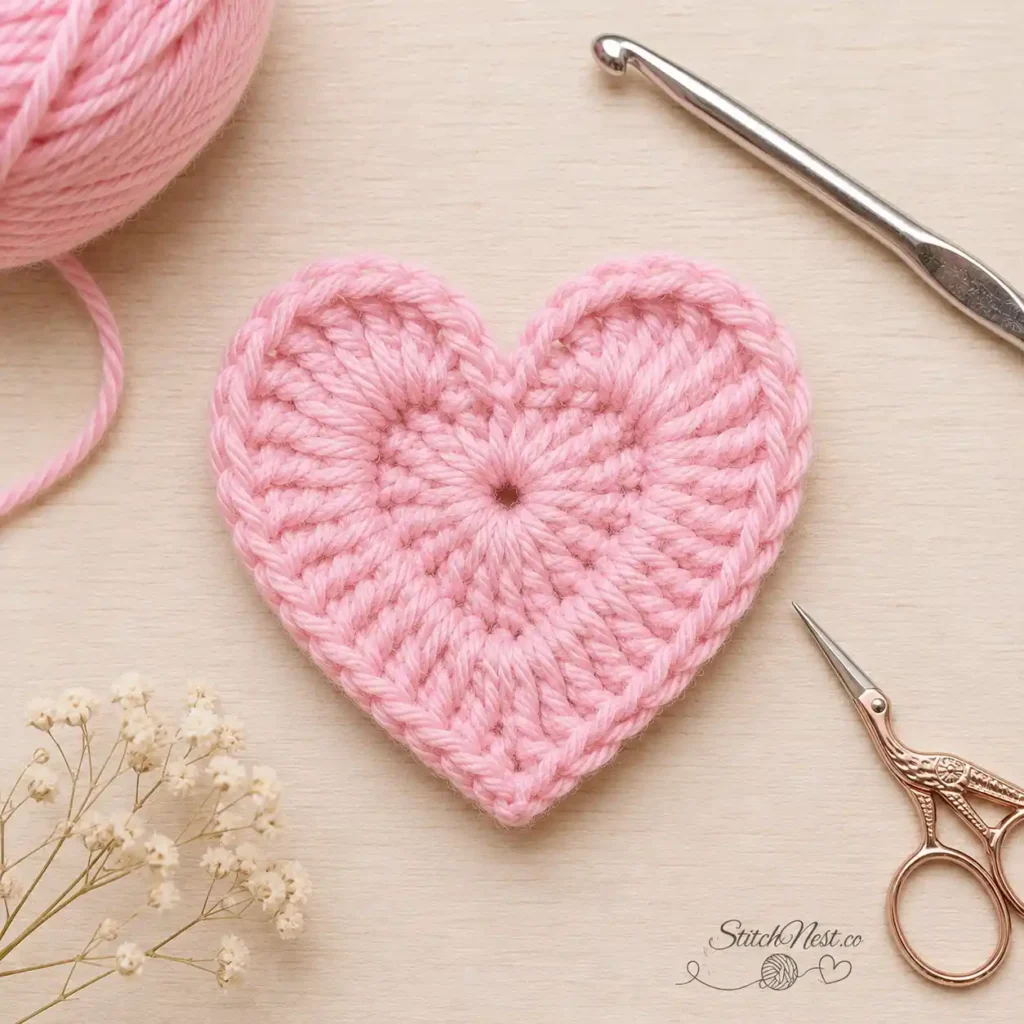
Step 7: Finish and Shape Your DIY Crochet Heart
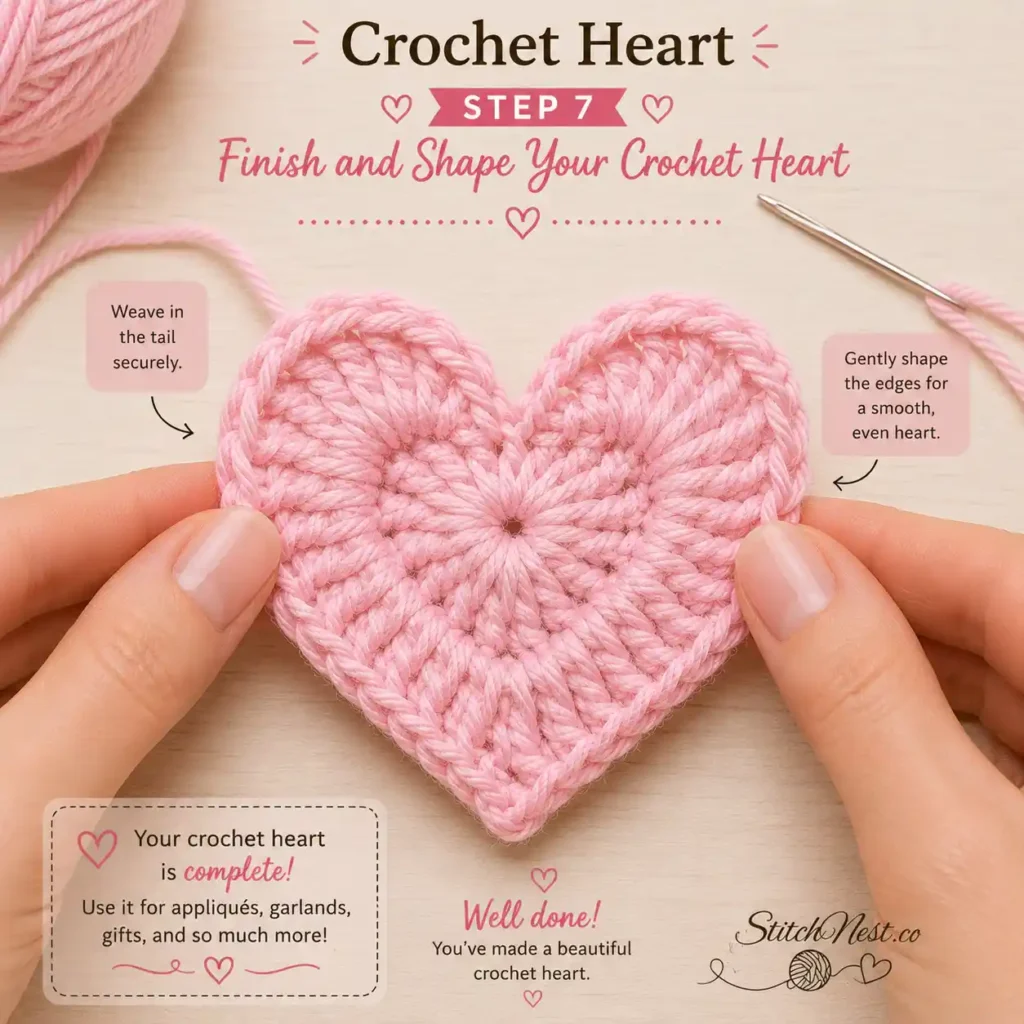
Use your fingers to gently shape both curves and adjust the bottom point.
If the edges curl slightly, a light steam blocking can help flatten everything. Cotton yarn responds particularly well to this step.
Weave in all remaining ends with a yarn needle and trim excess yarn carefully.
Your crochet heart is now finished.
One of the reasons crochet hearts stay so popular is that they’re useful long after you’ve finished making them. You can turn them into gifts, decorations, accessories, or simply keep a few in your yarn basket for future projects. After a couple of hearts, the stitch sequence starts to feel surprisingly natural, and that’s usually when the fun really begins.
If you enjoyed this project, our DIY Crochet Daisy Flower Tutorial is another fun way to practice basic stitches and create something beautiful in just a few minutes.