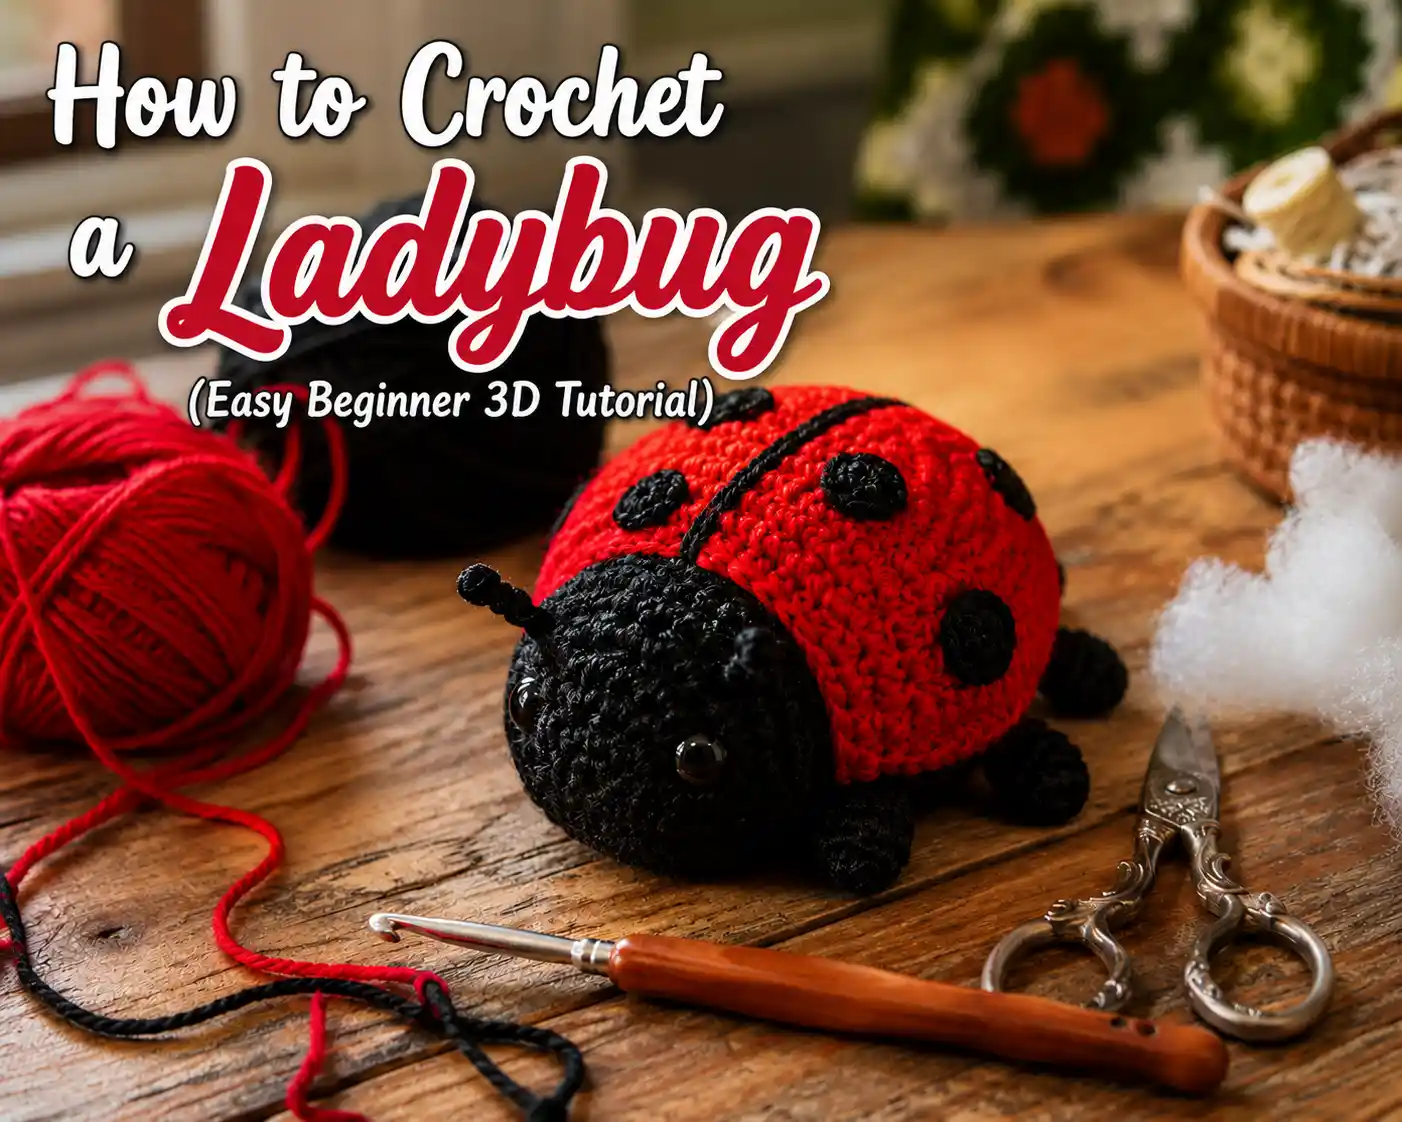
There’s something special about finishing a tiny crochet project in a single afternoon. This little ladybug is one of those projects that’s quick enough to fit into a busy day, but detailed enough to teach several useful amigurumi techniques you’ll use again and again. By the time you’re finished, you’ll have a cheerful little ladybug with a rounded shell, a separate head for neat shaping, and plenty of ideas for personalizing it with your favorite colors and finishing touches. Let’s see how to crochet a ladybug!
Skill Level
Beginner
If you already know how to make a magic ring and work single crochet, you’re ready for this project. Even if this is your very first amigurumi, don’t worry. Every important technique is explained before you need it, and you’ll find helpful checkpoints throughout the tutorial so you know your project is on the right track.
Finished Size
Using worsted weight yarn and a 3.5 mm crochet hook, the finished ladybug measures approximately 3 inches long and 2½ inches wide.
Your finished size may vary slightly depending on your yarn choice and crochet tension. That’s completely normal. A slightly larger or smaller ladybug will still look adorable and won’t affect the construction.
Before You Begin
If you’ve mostly crocheted blankets, scarves, or dishcloths before, you’ll notice that amigurumi feels a little different.
Instead of creating a soft, flexible fabric, the goal is to make a dense crochet fabric that holds its shape once stuffed. That’s why you’ll often use a crochet hook that’s slightly smaller than the yarn label recommends.
Wondering how much yarn you’ll need? Try our Free Crochet Yarn Calculator to estimate the amount of yarn required based on your project size, yarn weight, and hook size before you begin.
Don’t worry if the first few rounds seem tiny. Most beginners expect the ladybug to resemble its final shape immediately, but the rounded body develops gradually over several rounds. Trust the pattern, keep your stitch count accurate, and you’ll see the shell come together naturally.
One habit that makes every crochet project easier is reading through the pattern once before picking up your hook. Knowing where you’ll change colors, begin stuffing, and start decreasing helps everything flow much more smoothly.
If you’re still learning how written crochet instructions work, our How to Read Crochet Patterns for Beginners guide explains everything from stitch abbreviations to reading rounds with confidence.
Materials You’ll Need
- Black worsted-weight cotton or acrylic yarn
- Medium weight yarn in light colors (red and white) for better stitch visibility
- A comfortable crochet hook that feels easy to hold
- Stitch markers to keep track of your progress
- Yarn needle for finishing clean edges
- Small scissors for quick trims
If you’re just getting started with amigurumi, a complete crochet hook set with ergonomic handles is a worthwhile investment because you’ll use different hook sizes for future projects. A pair of locking stitch markers would also be good. They make it much easier to keep track of continuous rounds and help prevent frustrating stitch-count mistakes.
Not sure which hook size works best? Take a look at our Beginner’s Guide to Crochet Hooks before getting started. And if you already have leftover yarn from previous crochet projects, this is a wonderful opportunity to use it. Since the ladybug only requires small amounts of each color, you won’t need full skeins to complete the project.
Crochet Abbreviations (US Terms)
- ch – chain
- mr – magic ring
- sc – single crochet
- inc – increase (2 single crochet stitches worked into the same stitch)
- dec – invisible decrease
- sl st – slip stitch
- st – stitch
- rnd – round
- FO – fasten off
Understanding the Main Stitches
Magic Ring (MR)
The magic ring creates an adjustable center that closes completely once you pull the yarn tail. This gives amigurumi a much cleaner finish than starting with a chain loop because there won’t be a visible hole in the middle of your work.
If the center doesn’t close completely the first time, gently pull the yarn tail again before weaving it inside the finished project.
Single Crochet (SC)
Single crochet forms the foundation of nearly every amigurumi pattern. It creates a tight, sturdy fabric that’s excellent for holding stuffing without leaving noticeable gaps.
Try to keep your stitches consistent rather than overly tight. A steady rhythm creates a much smoother body than forcing every stitch.
Increase (INC)
An increase simply means working two single crochet stitches into one stitch.
Every increase adds one stitch to the round, allowing the body to grow evenly. Spacing those increases carefully is what creates a smooth, rounded shape instead of noticeable corners.
Invisible Decrease (DEC)
Invisible decreases reduce the stitch count without creating bulky seams.
Instead of pulling through both loops of each stitch, you’ll work through the front loops first, creating a much smoother finish that’s especially useful when closing the body.
Pattern Notes
This pattern is worked in continuous rounds unless otherwise noted. Place a stitch marker in the first stitch of every round and move it upward as you crochet. This tiny habit makes it much easier to keep track of your progress.
Take a few seconds to count your stitches after each round. It’s much easier to fix one missing stitch immediately than to unravel several completed rounds later. Don’t be discouraged if your ladybug doesn’t resemble a ladybug during the first few rounds. Right now you’re simply building the structure. The personality comes later.
Crochet the Ladybug Shell
The shell is worked first because it forms the largest part of the finished project. You’ll begin with a flat circle before gradually building the sides upward to create the rounded shape.
Round 1 – Create the Center
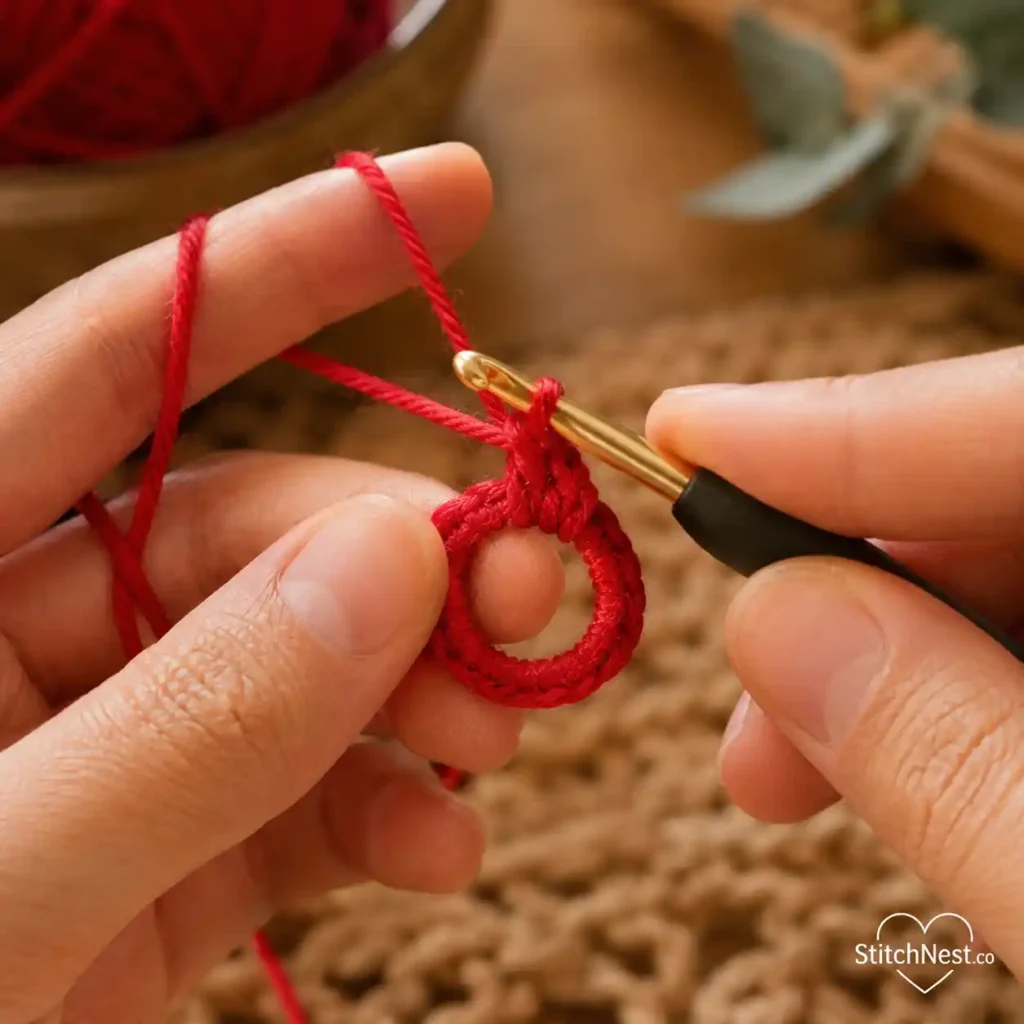
Using red yarn, make a magic ring.
Work 6 single crochet into the ring.
Pull the center closed.
Stitch Count: 6
Your work should resemble a tiny circle about the size of a dime. Don’t worry if it curls slightly before the ring is tightened.
If magic rings still feel a little awkward, don’t worry. They become much easier with practice, and you’ll use this same technique in our DIY Crochet Butterfly Tutorial and many other beginner-friendly projects.
Round 2 – Expand the Base
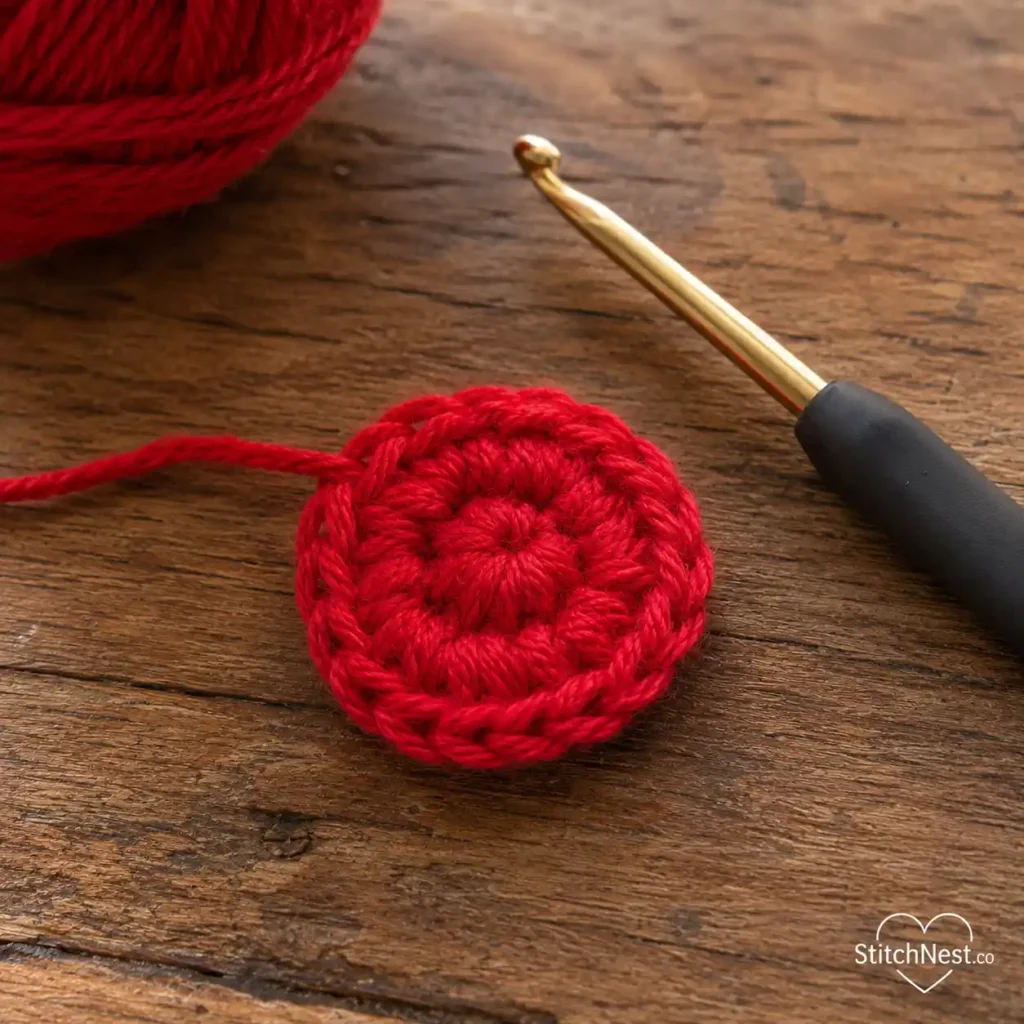
Work 2 single crochet into every stitch around.
Stitch Count: 12
This doubles your stitch count and creates a balanced circle that’s ready to expand further. Once you’ve finished the round, gently flatten the work between your fingers. It should lie almost completely flat. Here’s how it would look.
Round 3 – Continue Building the Circle
Work:
1 sc, inc
Repeat around.
Stitch Count: 18
Notice how the increases are now spaced apart instead of worked into every stitch. This keeps the circle growing evenly without creating ruffles around the edge.
If your work begins looking wavy, check that you haven’t added an accidental increase.
Round 4 – Grow the Shell
Work:
2 sc, inc
Repeat around.
Stitch Count: 24
By now your shell should resemble a smooth circle with rounded edges. Take a moment to compare it from different angles. If one side looks noticeably flatter than the other, double-check your stitch count before moving on.
Round 5 – Finish the Base
Work:
3 sc, inc
Repeat around.
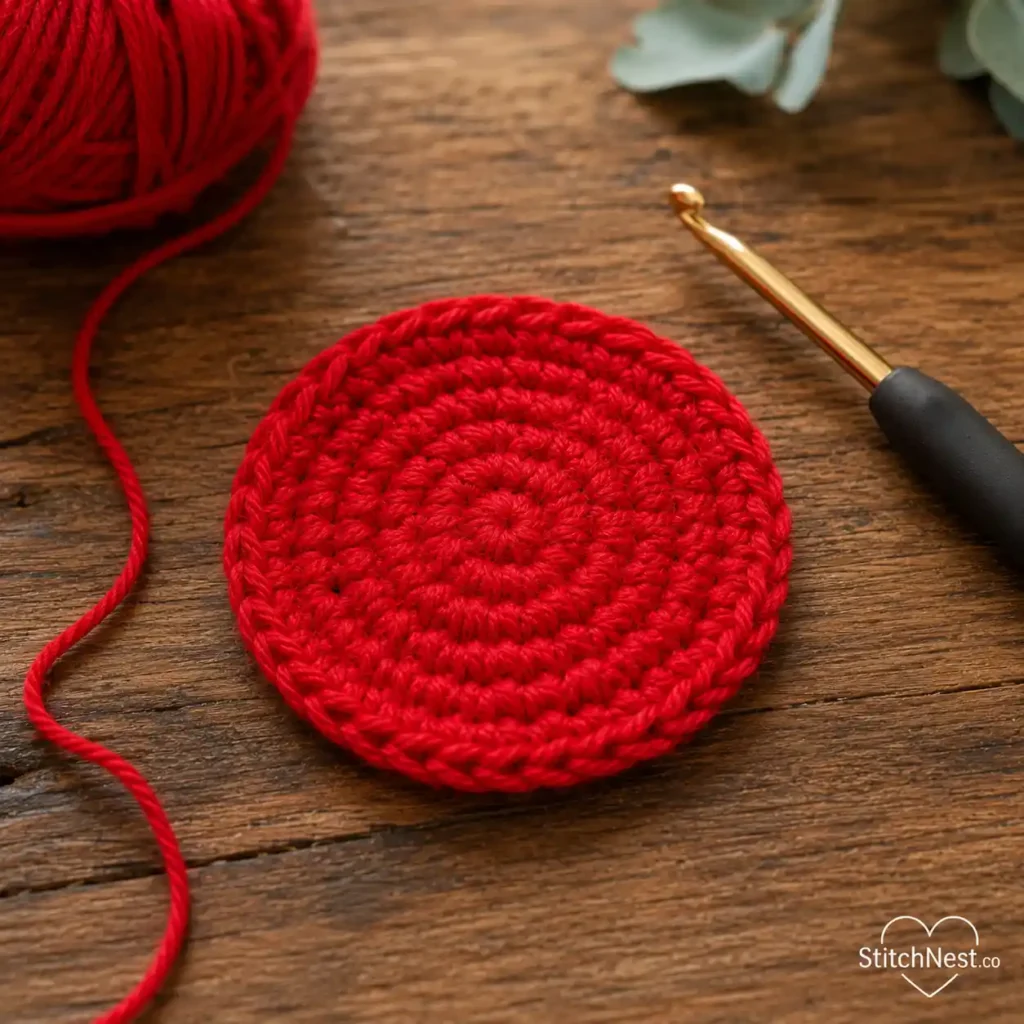
Stitch Count: 30
This completes the widest part of your ladybug. Instead of continuing to grow wider after this round, the next few rounds will begin building height. That gentle transition is what creates the familiar domed shell. You should have a piece like this.
Before You Continue
At this stage, many beginners think they’ve done something wrong because the project still looks like a flat circle. That’s exactly how it should look.
The shell won’t begin curving upward until the next round, when you’ll stop increasing and simply work one stitch into each stitch around. From here, the crochet naturally starts forming the sides of the body.
Round 6 – Start Building Height
Work 1 single crochet in every stitch around.
Stitch Count: 30
Without any additional increases, the shell begins growing upward instead of outward.
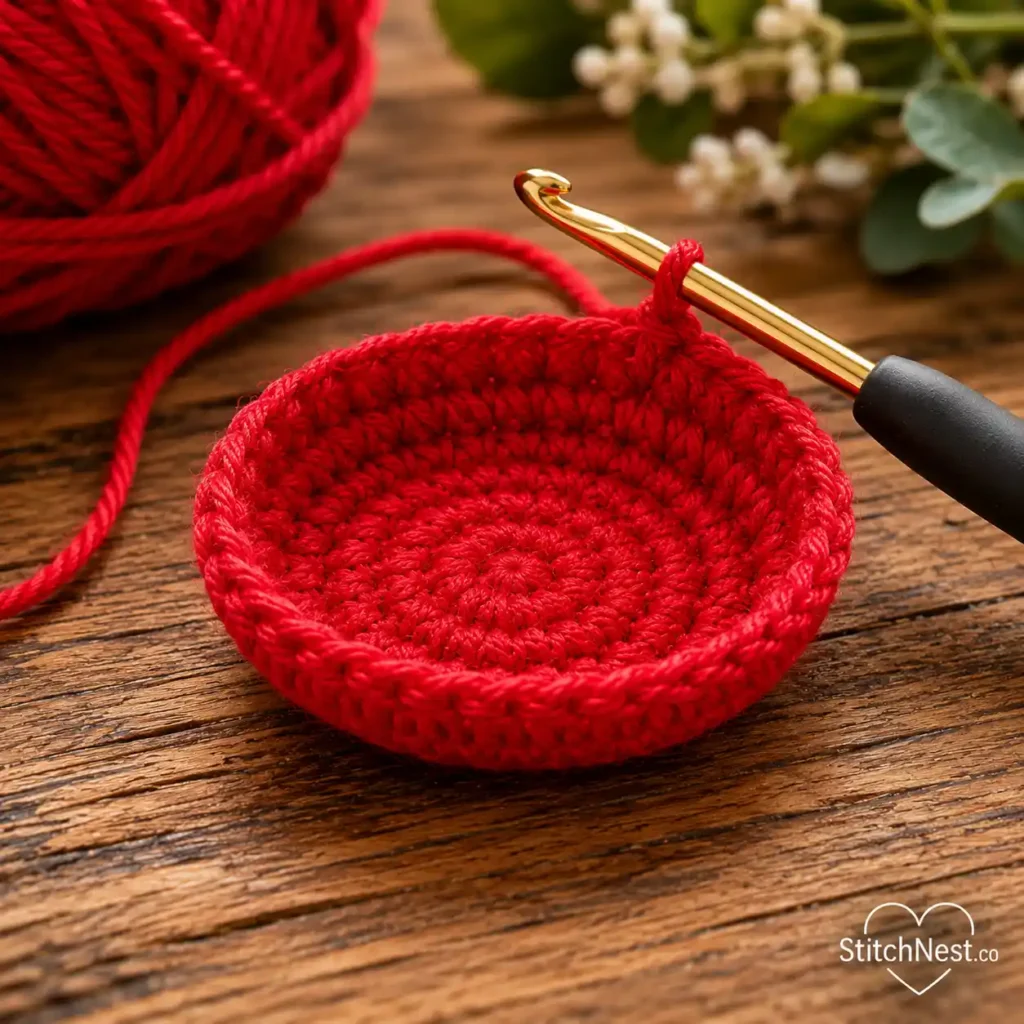
You may notice the outer edge gently curling into a shallow bowl. That’s one of the easiest signs that your ladybug is taking shape.
Sometimes it’s the smallest projects that bring the biggest smile. If you’re looking for another quick make, these crochet buttons you can make in an hour (or less!) are well worth trying.
Rounds 7–9 – Strengthen the Shell
Continue working 1 single crochet in every stitch for the next three rounds.
Stitch Count: 30 each round
Rather than rushing through these rounds, use them to settle into a comfortable rhythm.
Every round adds a little more height and gives the shell its rounded profile. Pause occasionally to compare both sides and make sure the shape remains even. If one area starts bulging outward, it’s usually a sign that an increase slipped in by mistake.
By the end of Round 9, your work should resemble a small bowl with smooth, even sides and a rounded base.
Why not add a little fall personality to your next project with this beginner-friendly DIY Halloween pumpkin appliqué tutorial?
Round 10 – Time to Add the Stuffing
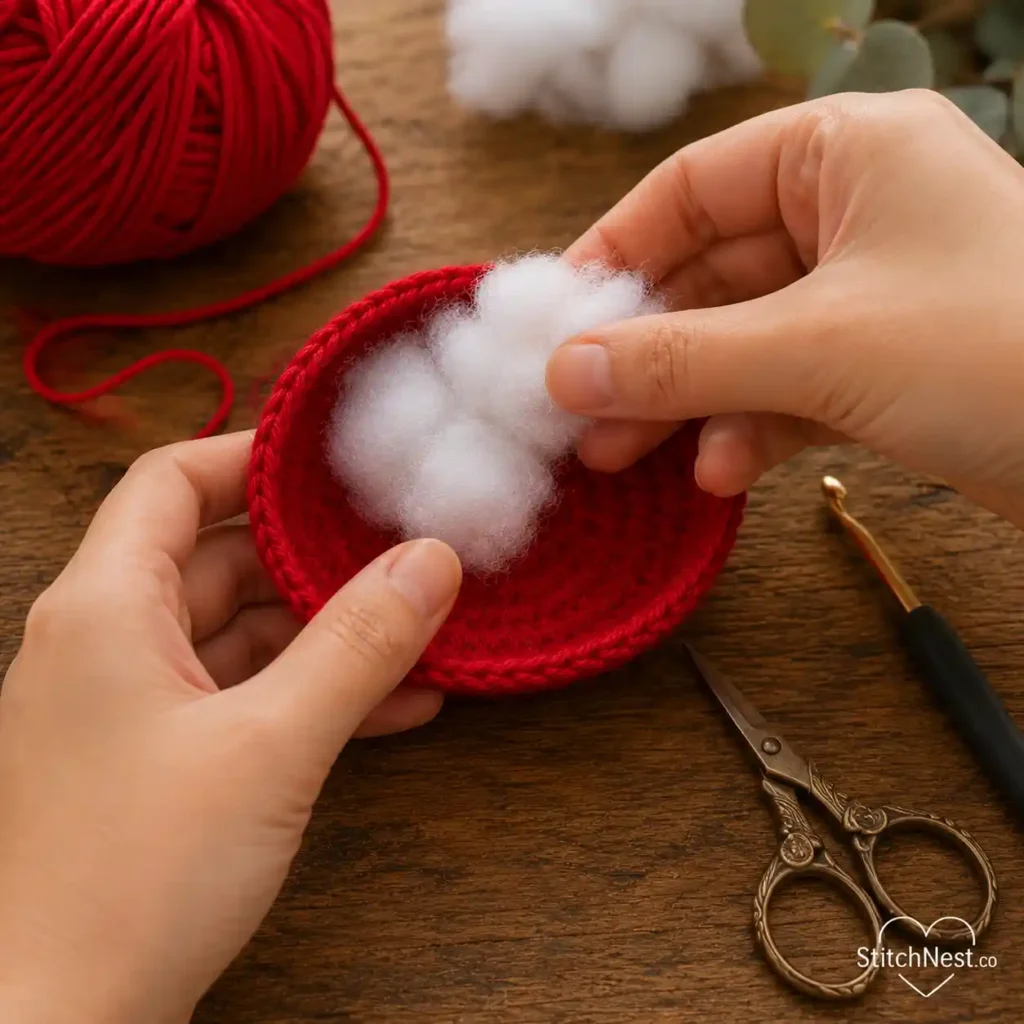
Before crocheting this round, add a small amount of fiberfill to the shell.
One of the most common beginner mistakes is waiting until the opening is almost closed before stuffing the project. At that point, it’s much harder to distribute the filling evenly, and the finished ladybug can end up looking lumpy.
Instead, use several small pieces of stuffing rather than one large handful. Push each piece gently toward the edges with the back of your crochet hook or your finger. This creates a much smoother shape and helps the shell stay nicely rounded.
This is also where the quality of your stuffing starts to matter. A premium polyester like Fairfield The Original Poly-Fil tends to stay fluffy, distribute more evenly, and bounce back after being squeezed, giving small amigurumi projects a much smoother, more professional finish than cheaper alternatives.
Once you’ve added a light layer of stuffing, work:
3 sc, dec
Repeat around.
Stitch Count: 24
You should notice the opening beginning to shrink slightly, but there should still be plenty of room to adjust the stuffing later. By this point, your ladybug should resemble a small dome rather than a bowl. The sides should feel smooth and even, with enough room left to comfortably add the remaining stuffing.
Small amigurumi projects like this are a great way to practice shaping before moving on to larger crochet toys and decorations.
Round 11 – Shape the Dome
Continue working:
2 sc, dec
Repeat around.
Stitch Count: 18
As the shell closes, gently rotate it in your hands every few stitches. This makes it easier to spot any flat areas before the opening becomes too small.
If one side looks softer than the other, add another tiny piece of stuffing exactly where it’s needed instead of filling the entire shell.
A well-shaped amigurumi usually comes from careful stuffing rather than using more stuffing.
If Halloween quilting is on your project list, be sure to check out our DIY Quilted Halloween Table Runner guide. It includes step-by-step instructions, beginner tips, and plenty of practical quilting advice.
Round 12 – Begin Closing the Bottom
Work:
1 sc, dec
Repeat around.
Stitch Count: 12
At this stage, the shell should feel comfortably firm but still have a little give when gently squeezed.
If the stuffing is stretching the stitches enough that you can clearly see through them, remove a small amount before continuing. It’s much easier to adjust the filling now than after the opening has been closed.
Round 13 – Close the Shell
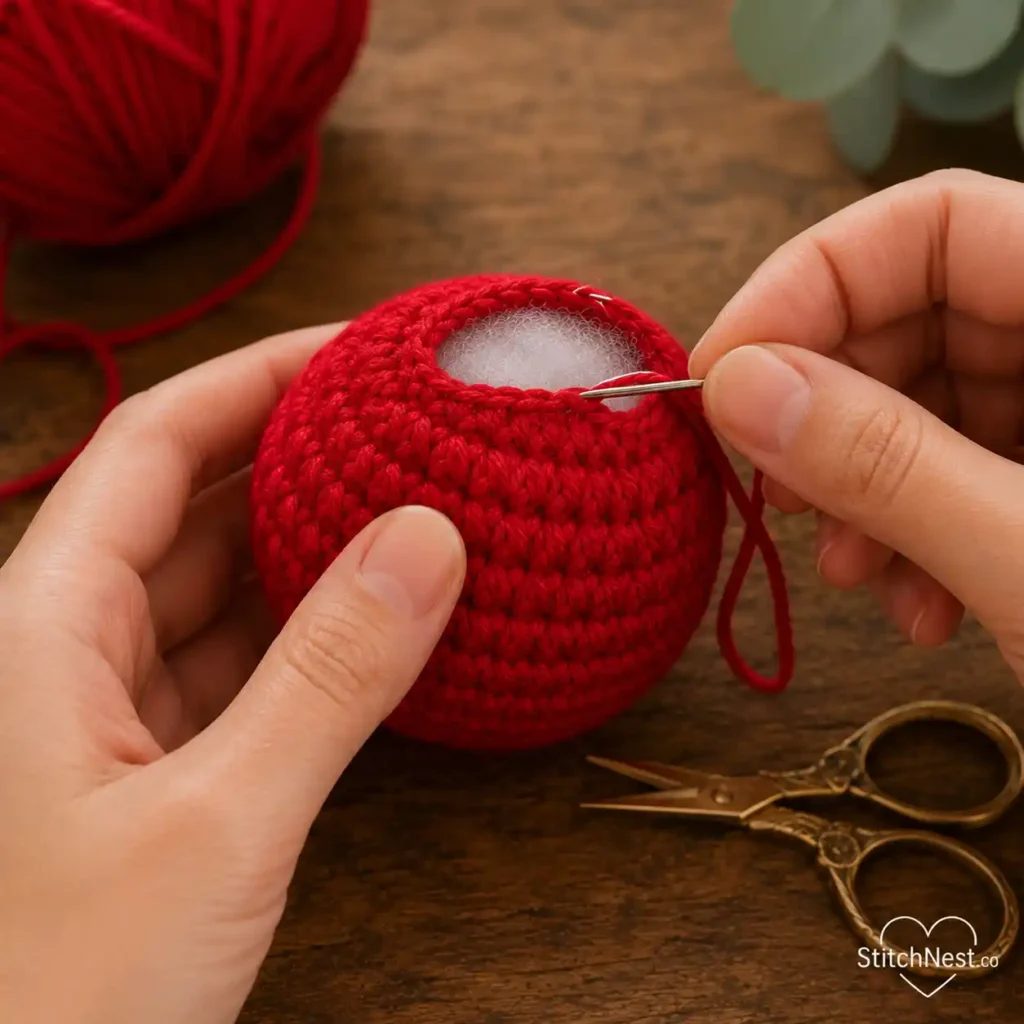
Work an invisible decrease in each stitch around.
Stitch Count: 6
Cut the yarn, leaving a tail about 8 inches long.
Thread the tail onto a yarn needle and weave it through the front loops of the remaining stitches. Pull the yarn slowly to close the opening rather than tightening it all at once. This creates a cleaner finish and reduces puckering.
Weave the remaining yarn tail back through the shell several times before trimming it. Then, set the finished shell aside for now.
If you enjoy crocheting nature-inspired designs, our DIY Crochet Hibiscus Flower Tutorial is another fun project to try next. It walks you through creating a beautifully textured tropical flower that’s perfect for decorating hats, bags, hair clips, blankets, and so much more.
Crochet the Ladybug Head
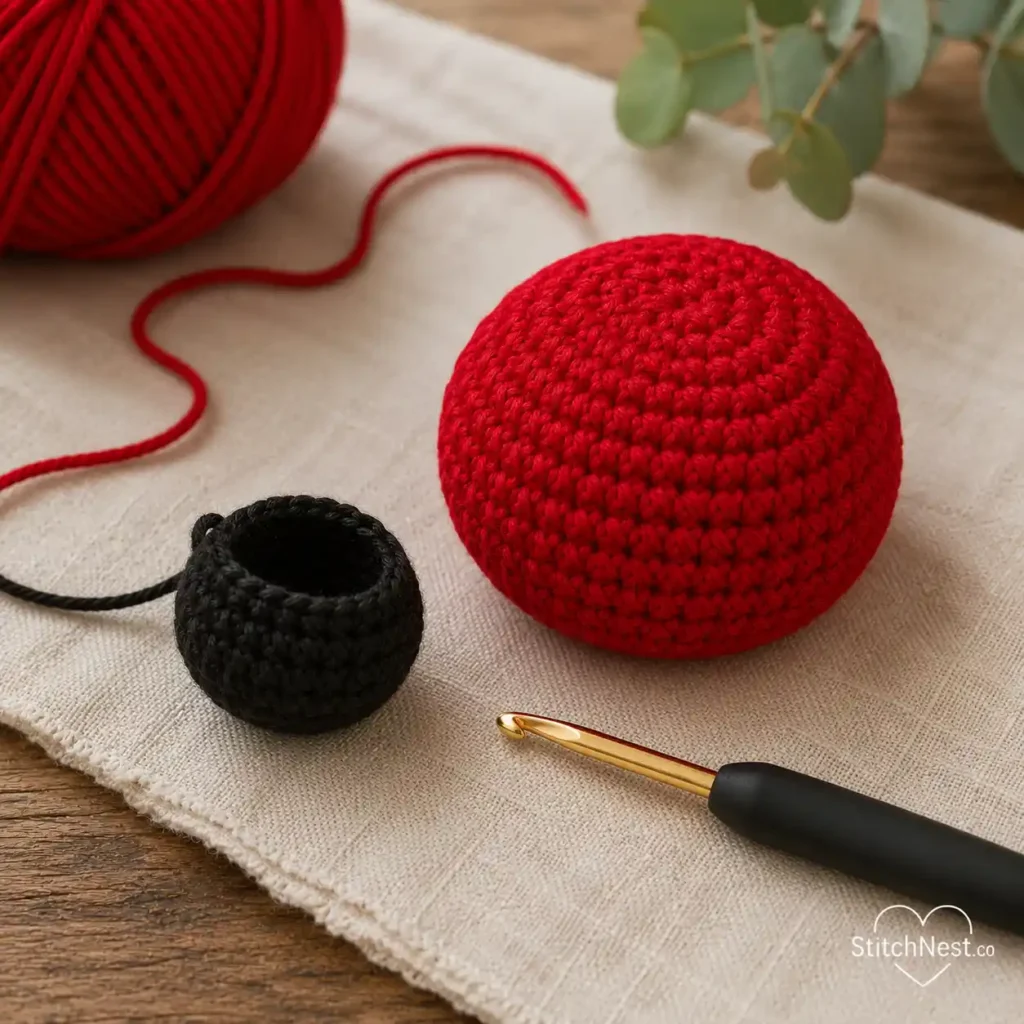
Working the head separately gives you much better control over its position and creates a more polished finished project. It also makes adding safety eyes much easier than trying to attach them after assembly.
Using black yarn, begin with a magic ring.
Round 1 – Create the Head
Work 6 single crochet into the magic ring.
Pull the center closed.
Stitch Count: 6
Just like the shell, this tiny circle forms the foundation for every round that follows.
Round 2 – Expand Evenly
Work 2 single crochet in every stitch around.
Stitch Count: 12
Your head should still lie almost flat at this point.
Round 3 – Shape the Head
Work:
1 sc, inc
Repeat around.
Stitch Count: 18
This extra increase gives the head enough width to look proportional to the shell without appearing oversized.
Rounds 4–5 – Build Height
Work 1 single crochet in every stitch around.
Stitch Count: 18 each round
Rather than making the head much taller, these rounds simply add enough depth for a gentle curve.
Before fastening off, take a moment to compare the head with the shell. The proportions should feel balanced, with the head looking noticeably smaller than the body.
Fasten off, leaving a long yarn tail for sewing.
Adding the Safety Eyes
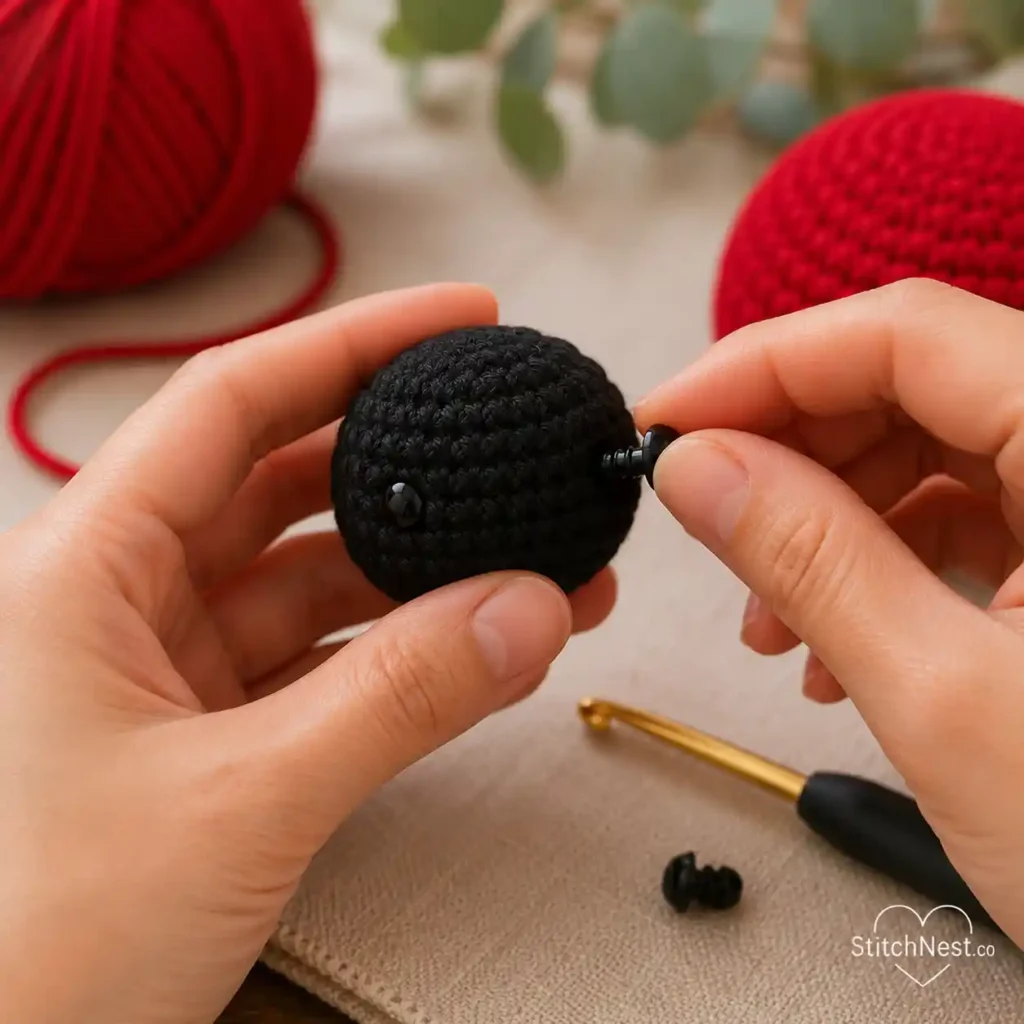
If you’re using safety eyes, install them before attaching the head to the shell.
Place the eyes between Rounds 3 and 4, leaving about five or six stitches between them, depending on the expression you’d like your ladybug to have.
Before securing the backs, look at the head from different angles. Even moving one eye by a single stitch can completely change the personality of the finished piece.
If you’re making this project for a young child, embroidered eyes are a safer alternative than plastic safety eyes.
Crochet the Ladybug Spots
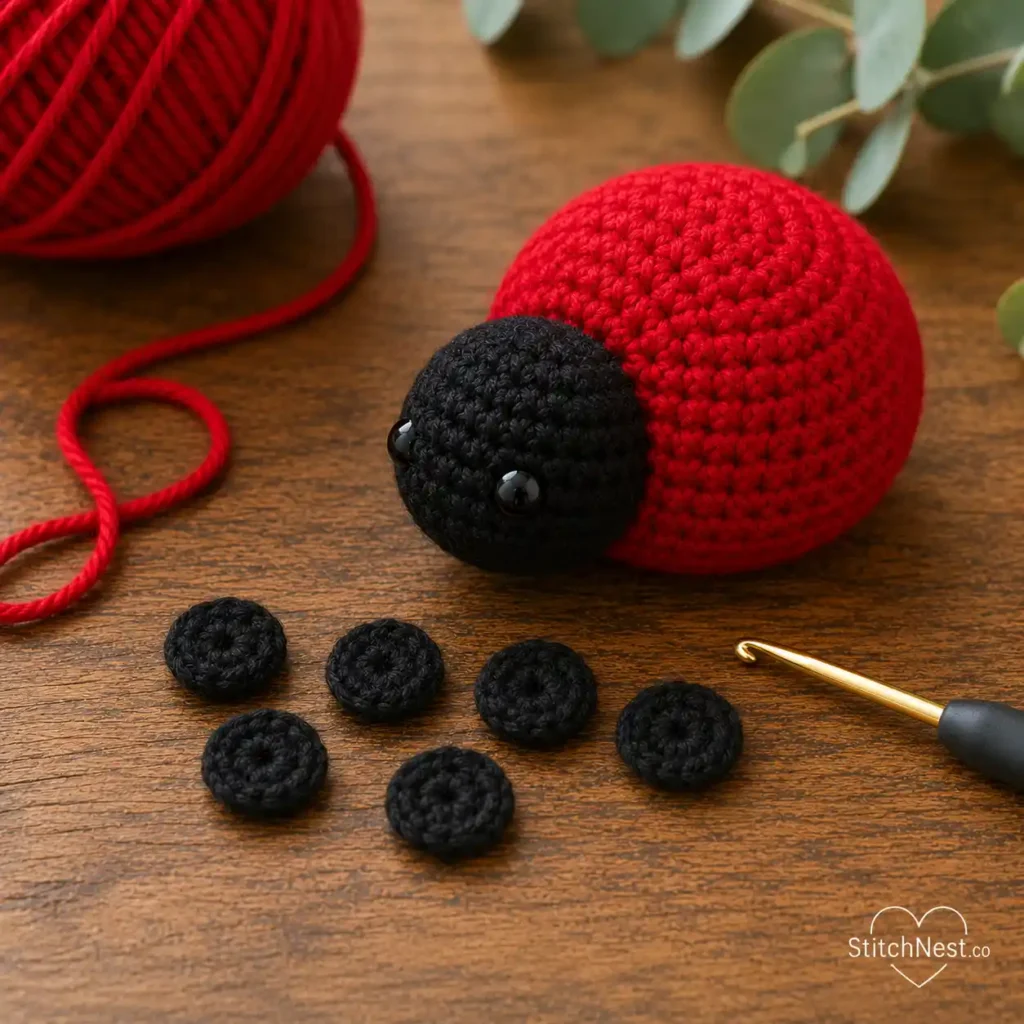
The spots may be small, but they instantly transform a simple red shell into a recognizable ladybug.
You’ll make six identical spots.
For each spot:
Create a magic ring.
Work 6 single crochet into the ring.
Pull the center closed.
Fasten off, leaving a short yarn tail for sewing.
Because the spots are so small, try keeping your tension consistent. Even tiny differences become noticeable once they’re attached to the shell.
Crochet the Antennae
Make two.
Using black yarn:
Chain 4.
Starting in the second chain from the hook, work one slip stitch into each remaining chain.
Fasten off, leaving a yarn tail for sewing.
These short chain antennae hold their shape well without becoming floppy. If they curl slightly, gently straighten them with your fingers before attaching them.
Looking for another quick beginner project? Our DIY Daisy Flower Tutorial shows you how to crochet a cheerful little flower that’s perfect for appliqués, garlands, bookmarks, gift wrapping, and adding a handmade feel to your favorite crochet projects.
How to Crochet a Ladybug – Assembling Your Ladybug
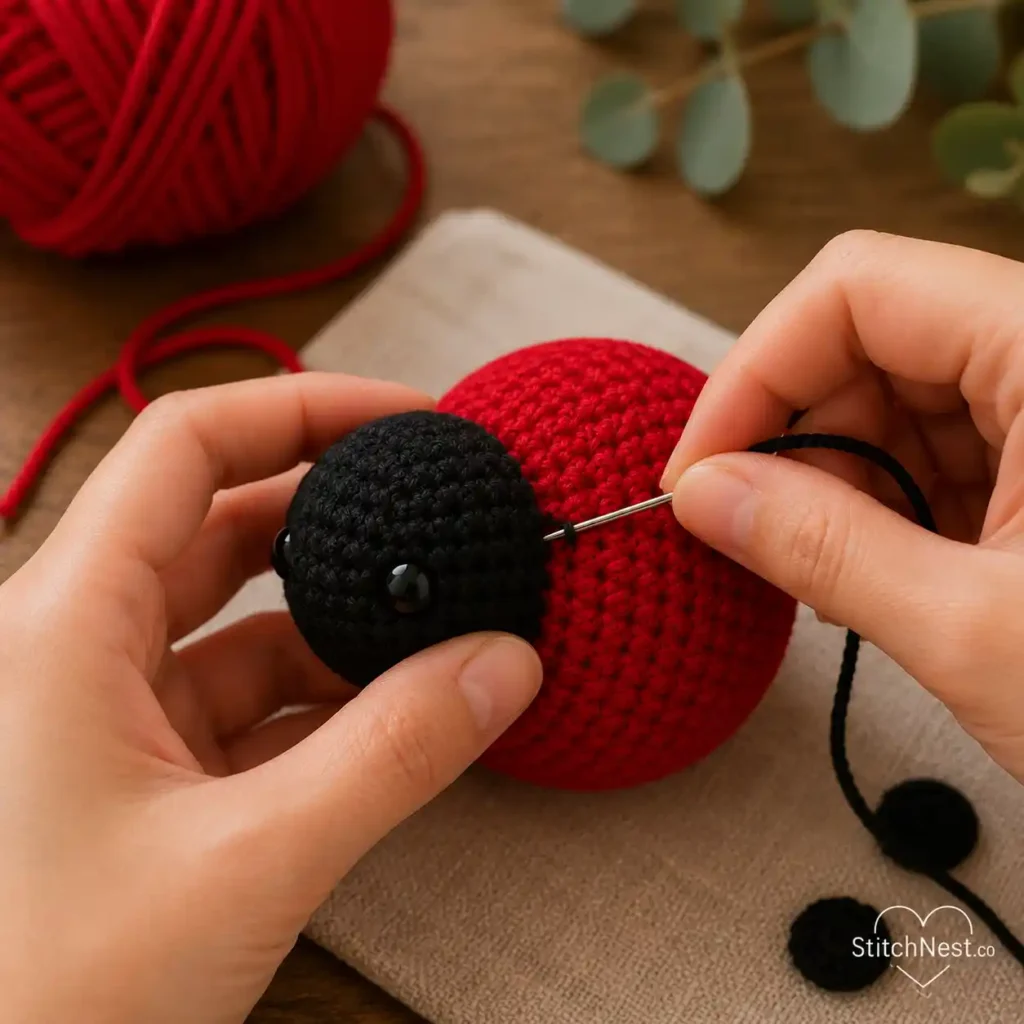
Now comes the most rewarding part, which is bringing all the individual pieces together. Start by positioning the head against the front of the shell before making any stitches. Hold it in place and look at your ladybug from the front and both sides. If the head appears slightly tilted, adjust it now rather than after sewing.
Once you’re happy with the placement, use the yarn tail to sew the head securely to the shell using small whip stitches around the edge.
If the head feels a little soft during assembly, add a tiny pinch of stuffing before closing the final few stitches. It only takes a small amount to help it hold a smooth, rounded shape.
Next, arrange the six spots on the shell before sewing them down. There’s no single correct placement, so take a moment to experiment until the spacing looks balanced. Leaving a narrow strip of red down the center creates the appearance of folded wings and gives the ladybug its classic look.
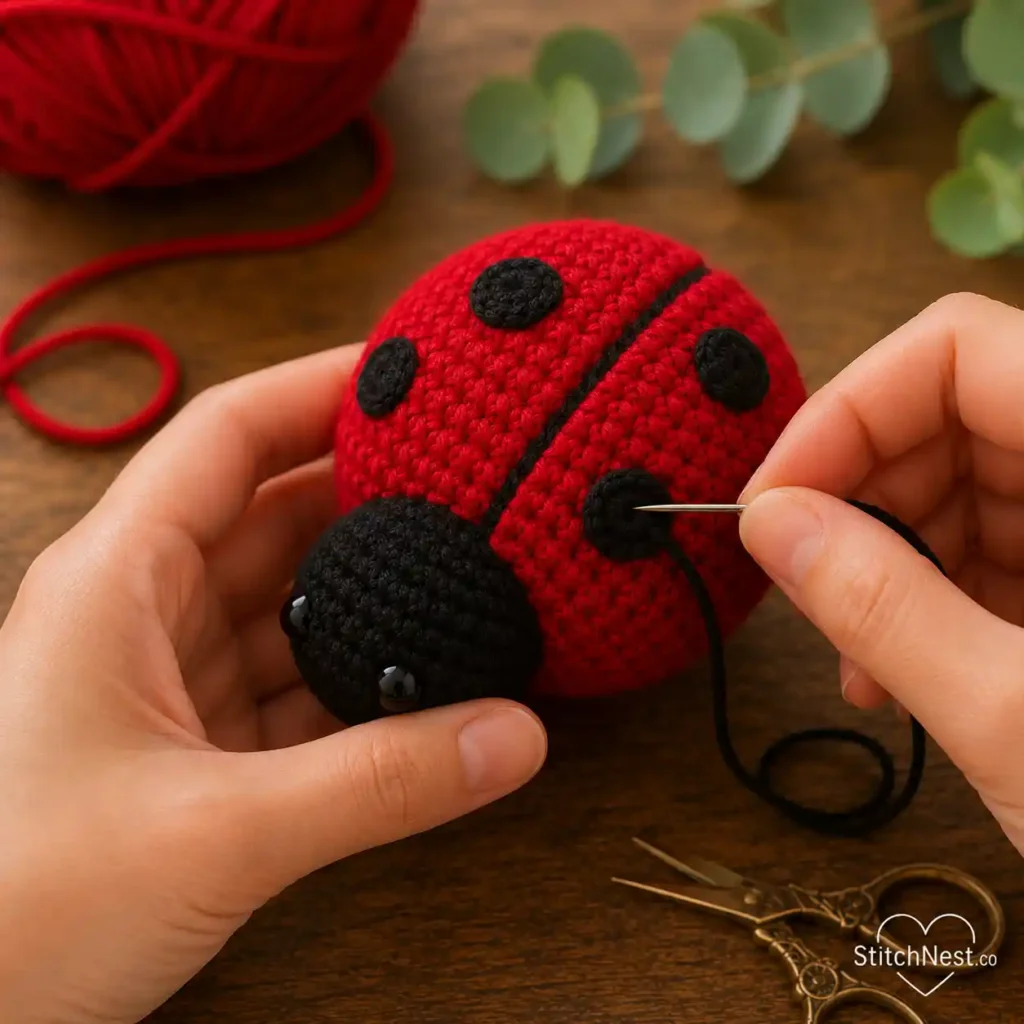
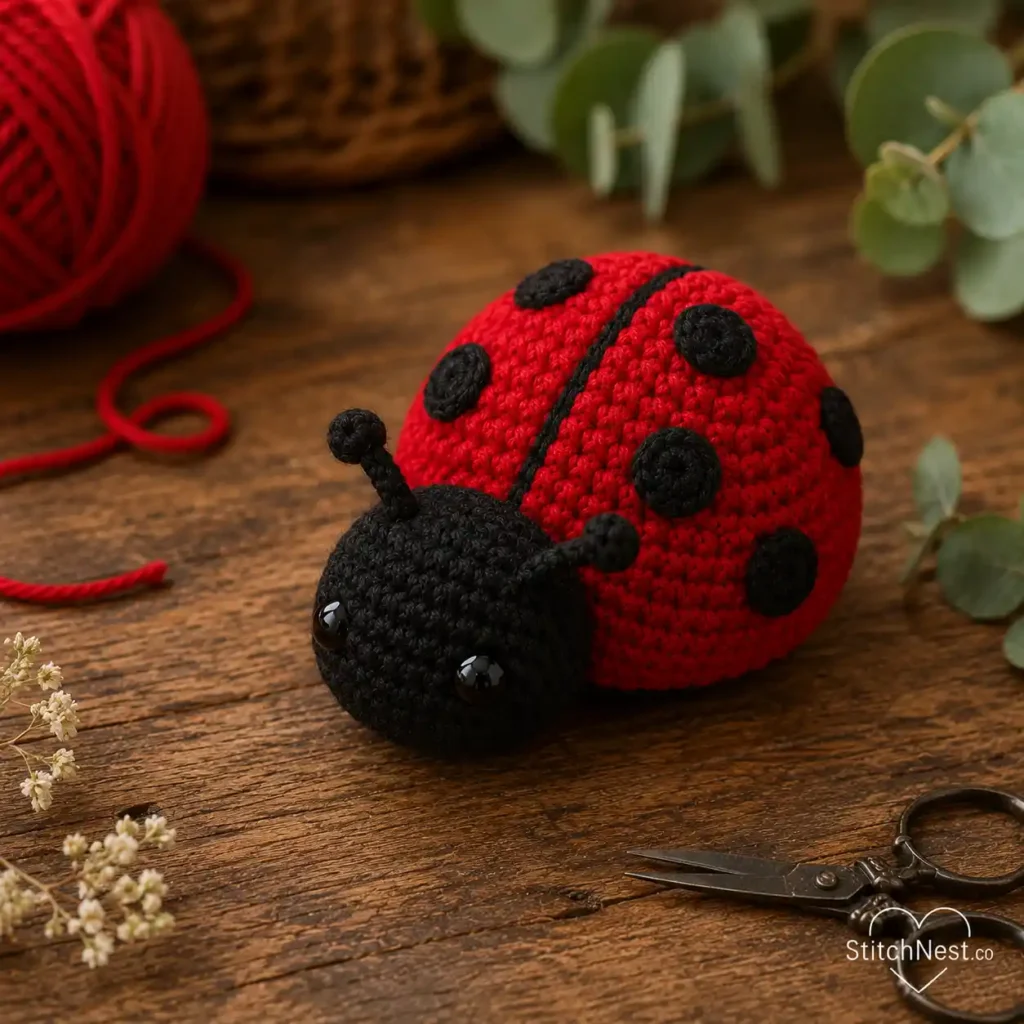
Finally, sew the antennae onto the top of the head, positioning them just slightly apart so they frame the face naturally.
Before tying off your final stitches, gently rotate the finished ladybug in your hands. This quick check makes it easy to spot anything that needs a small adjustment before the project is complete.
Don’t worry if your first placement isn’t perfect. Most experienced crocheters hold the head in place, step back for a quick look, then reposition it once or twice before sewing. Taking an extra minute here often makes the finished project look much more balanced.
Add the Finishing Details
At this point, your ladybug should already have its signature shape, but a few small finishing touches will make it look much more polished. If you’ve used safety eyes, consider adding tiny white embroidered highlights just above the outer edge of each eye. A single short stitch is often enough to make the face feel more expressive without overpowering the design.
Take a moment to gently reshape the shell with your hands. Roll it lightly between your palms and smooth out any uneven stuffing inside. This simple step helps the filling settle naturally and gives the body a more rounded appearance.
Finally, trim any remaining yarn tails after weaving them securely into the project. If a tail feels loose, weave it through a few extra stitches before cutting it. Spending another minute here helps your ladybug hold up much better over time.
If you like your finished projects looking especially polished, blocking mats and rust-resistant T-pins can help shape crocheted pieces before assembly. Although this little ladybug doesn’t require full blocking, they’re incredibly useful for flowers, appliqués, granny squares, and many other crochet projects you’ll make later.
Before You Call It Finished
If you enjoyed making this little ladybug, a complete amigurumi starter kit is a great next purchase. Most kits include stuffing, safety eyes, stitch markers, yarn needles, and other essentials you’ll use across dozens of future crochet projects, making them excellent value for beginners building their craft supplies.
And before you admire your finished project, give it one final inspection. Look at the ladybug from the front, the sides, and the top. The head should sit straight against the shell, the spots should look balanced, and the antennae should point in similar directions.
Give the shell a gentle squeeze. It should feel firm enough to hold its shape without feeling overly stuffed. If you notice a slightly flat area, you can often massage the stuffing into place with your fingers instead of reopening the project.
These final adjustments only take a minute or two, but they’re often what separate a homemade project from one that looks professionally finished.
Common Mistakes (And How to Fix Them)
My shell doesn’t look perfectly round.
This is one of the most common concerns for beginners, and it’s usually caused by uneven tension or a missed stitch during one of the increase rounds.
Start by counting your stitches. If the stitch count is correct, gently reshape the shell with your hands after stuffing. Small adjustments often make a surprising difference. If the shell still looks uneven, don’t be discouraged. Every amigurumi project helps improve your tension, and you’ll naturally notice smoother shaping as you gain more experience.
I can see the stuffing through my stitches.
This usually means the stitches are either too loose or the body has been overstuffed.
Try removing a small amount of stuffing first. If the gaps are still visible, consider using a crochet hook that’s half a size smaller the next time you make this pattern. A tighter fabric does a much better job of hiding the filling.
My rounds seem to drift to one side.
Continuous rounds naturally create a slight spiral, so a little movement is completely normal. Using a stitch marker and moving it after every round makes it much easier to stay on track. If the spiral becomes very noticeable, double-check that you’re starting each new round in the correct stitch.
The head looks crooked.
Before sewing, it’s always worth taking a few seconds to position the head and check it from different angles.
If you’ve already attached it and it sits slightly off-center, don’t panic. Carefully remove a few stitches, adjust the position, and continue sewing. It’s a small fix that can completely change the finished look.
My ladybug feels lumpy.
Lumps almost always come from adding one large handful of stuffing instead of several smaller pieces.
Breaking the fiberfill into small sections lets it spread much more evenly inside the shell. If you notice a lump after finishing, gently massage the stuffing with your fingers to help redistribute it.
Once you start making small crochet projects like this, it’s surprisingly easy to collect hooks, yarn, stitch markers, stuffing, and finished pieces. A well-designed crochet project bag keeps everything organized and makes it easy to take your work wherever you go without losing supplies.
Creative Ways to Use Your Crochet Ladybug
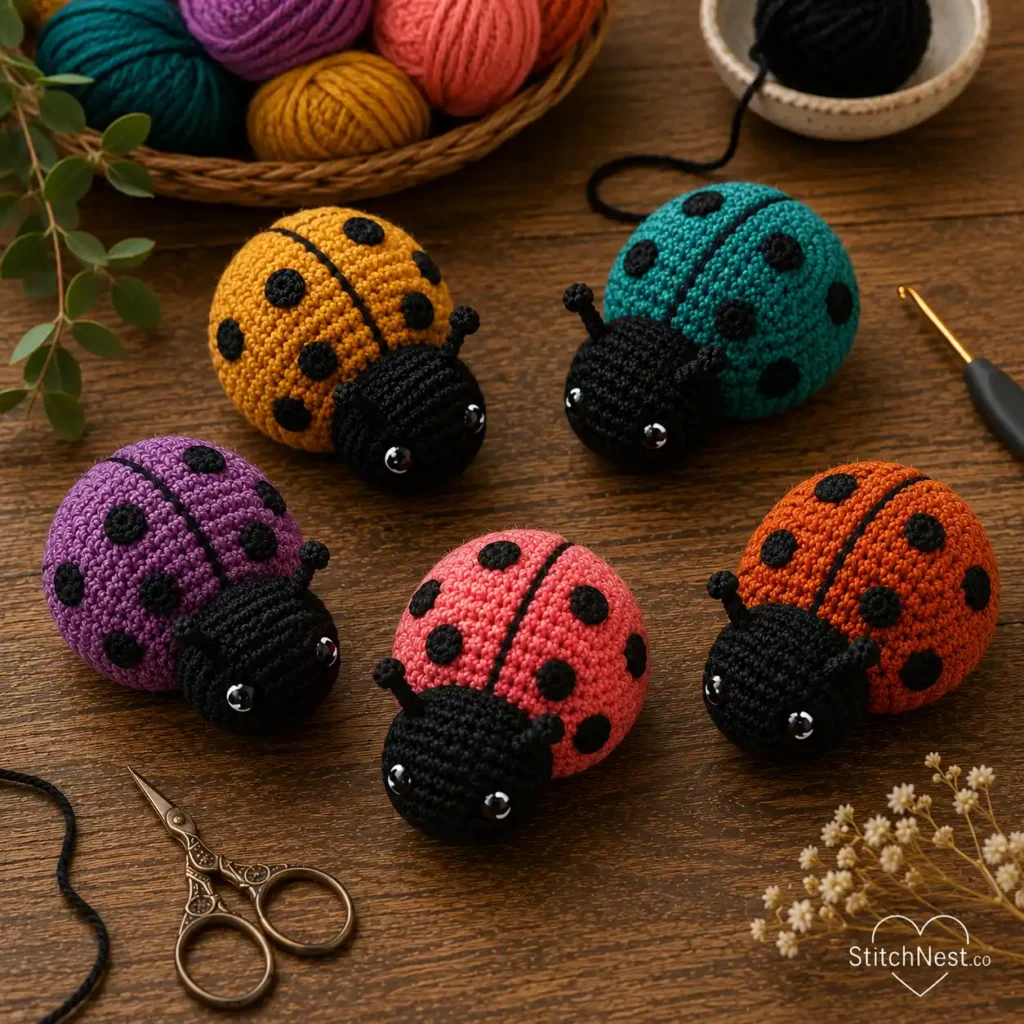
One of the nicest things about this project is how easy it is to personalize.
- You can sew a small key ring to the top, and you’ve got a cheerful handmade keychain that adds a pop of color to your everyday essentials.
- Attach one to the corner of a backpack or tote bag if you want an accessory that’s sure to stand out.
- Crochet several in different sizes and hang them from a nursery mobile or spring garland. Mixing bright reds with softer shades of pink, coral, or burgundy creates a collection that feels coordinated without every ladybug looking exactly the same.
- These little ladybugs also make wonderful additions to handmade greeting cards, wreaths, baby blankets, and seasonal table decorations. Since they work up quickly, they’re a great way to use leftover yarn from larger projects.
Caring for Your Crochet Ladybug
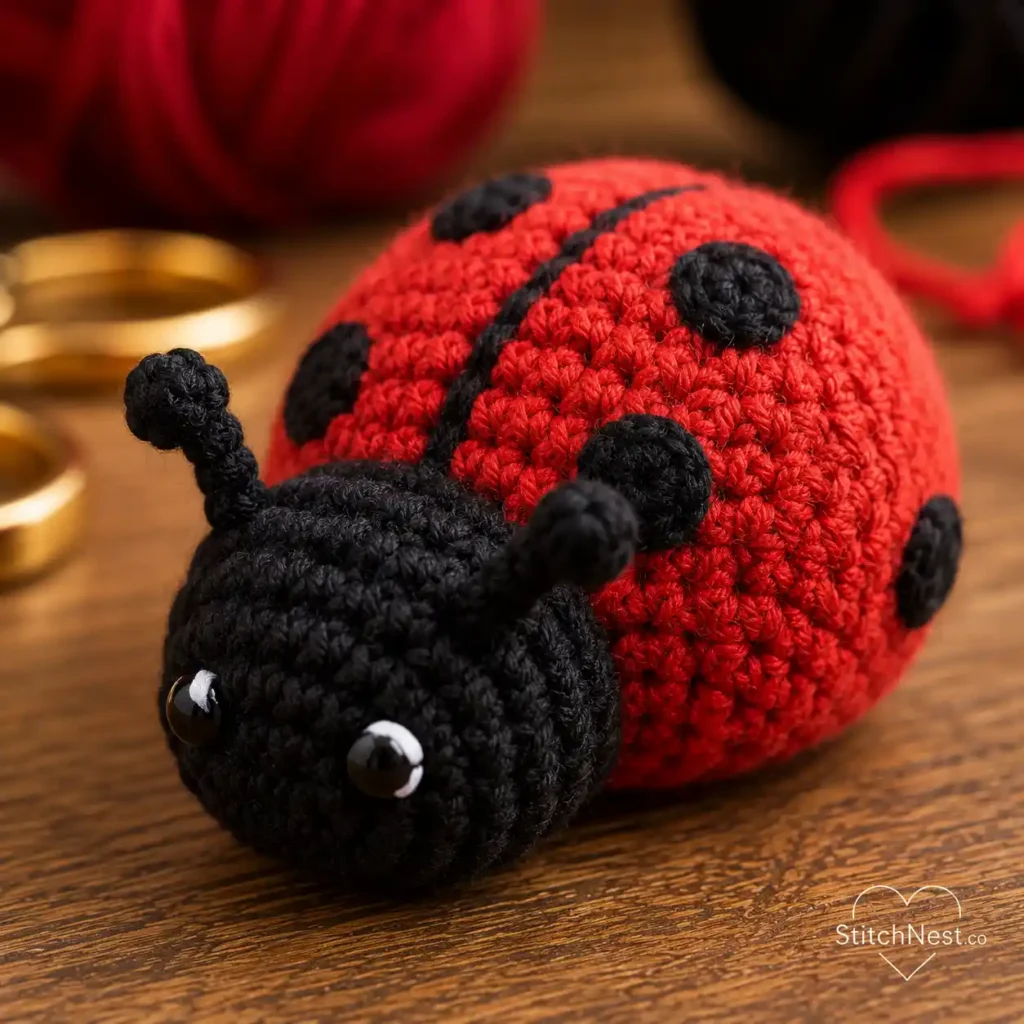
A little care goes a long way in keeping your finished project looking its best.
If it gets dusty, gently wipe it with a slightly damp cloth or hand wash it in cool water using a mild detergent. Avoid twisting or wringing the project, as this can distort the stuffing and stretch the stitches.
After washing, reshape the shell with your hands and leave it to air dry on a clean towel. Letting it dry naturally helps it keep its rounded form.
If your ladybug is being used as a decoration rather than a toy, storing it away from direct sunlight will also help preserve the yarn color over time.
Small projects like this are often where the biggest crochet lessons happen. Even though this ladybug only uses a handful of basic stitches, you’ve practiced shaping, color changes, invisible decreases, stuffing, and assembling multiple pieces into one finished design. Those are the same core techniques you’ll use again and again as you build your amigurumi skills.
Every small amigurumi teaches something new, and this little ladybug is no exception. You’ve learned how to build a three-dimensional shape, control stitch counts, shape with increases and decreases, and assemble separate pieces into one finished project. Those skills carry over into countless other crochet patterns, so don’t be surprised if this tiny ladybug becomes the start of a much bigger collection.
If you enjoyed this tutorial, you’ll feel right at home with our crochet butterfly and dragonfly guides next. They build on many of the same techniques you’ve learned here and are a wonderful way to keep practicing your skills one small project at a time.