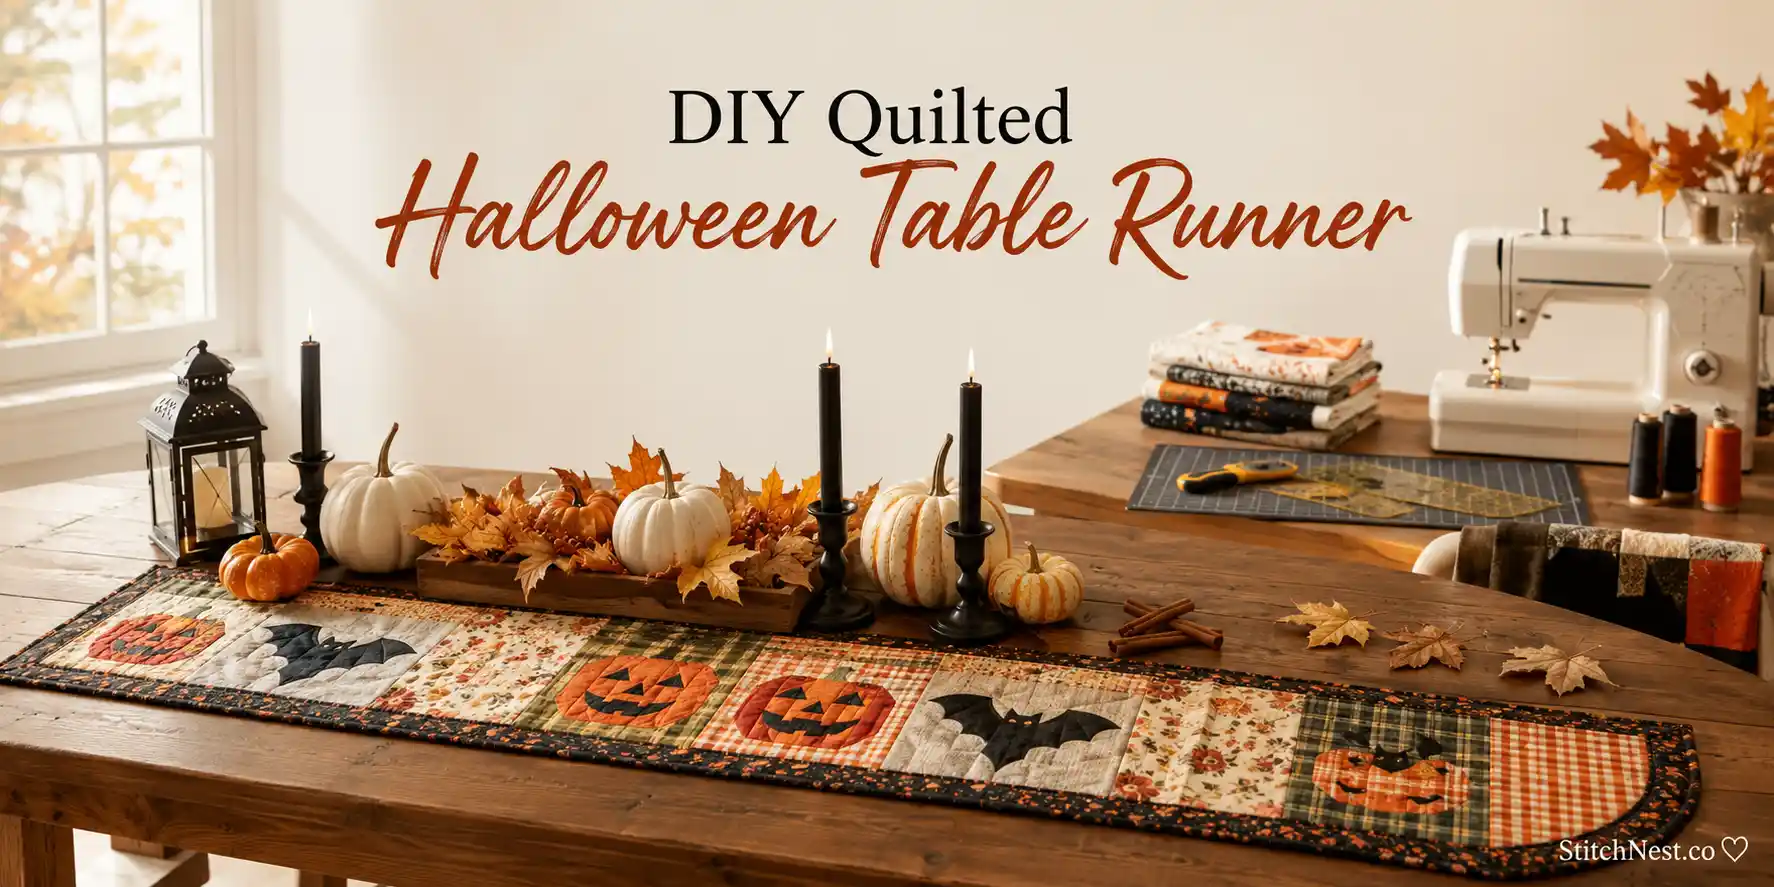
There’s something about pulling out handmade Halloween décor that instantly makes your home feel cozy. This DIY quilted Halloween table runner does exactly that. It adds just enough festive charm to your dining table, coffee table, or entryway without taking over the entire space, and it’s a project you can bring back year after year. The best part? You don’t need to be an expert quilter to make one. In this guide, we’ll walk you through every step, from choosing fabrics and cutting pieces to quilting, binding, and getting that crisp, finished look.
Why You’ll Love Making Your Own Halloween Table Runner
There are plenty of Halloween table runners you can buy, but making your own gives you complete control over the look. It’s also one of those projects that doesn’t demand weeks of work. Most people can finish it over a weekend, making it perfect if you’re looking for a seasonal project without committing to an entire quilt.
You’ll also love that this pattern is incredibly forgiving. Unlike quilts made from dozens of intricate blocks, a table runner is small enough that you can practice new techniques without feeling overwhelmed.
One thing we recommend is choosing fabrics that you’ll still enjoy seeing every October. Trendy novelty prints are fun, but mixing them with timeless patterns like gingham, buffalo check, tiny florals, or subtle polka dots helps your table runner stay stylish for years instead of feeling dated after one season.
Ways to Style Your Finished Halloween Table Runner
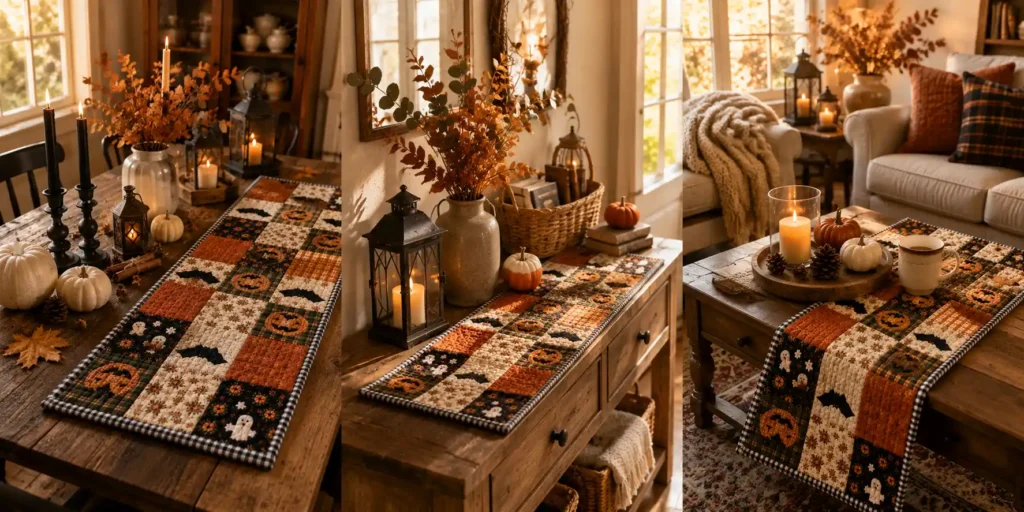
One of the nicest things about a quilted table runner is how versatile it is. You’re not limited to the dining table, and moving it around your home is an easy way to refresh your seasonal décor. Here are a few favorite places to use it:
Dining Table
This is the obvious choice, but try layering your runner over a neutral tablecloth instead of placing it directly on the table. The contrast helps the quilting stand out and makes your centerpiece look more intentional.
Coffee Table
A shorter runner works beautifully beneath candles, stacked books, or a small pumpkin arrangement. Just remember to keep open flames safely away from fabric if you’re decorating with real candles.
Entryway Console
Your entry table is one of the first things guests notice. A Halloween runner paired with a lantern, faux pumpkins, and a vase of dried stems instantly creates a welcoming display.
Love crocheting? Our DIY crochet hibiscus flower tutorial walks you through every step and shows you how to create a realistic bloom you can add to bags, hats, hair clips, and more.
Kitchen Island
Even if you don’t have a formal dining room, a quilted runner can warm up a kitchen island without taking away valuable workspace. We like using narrower runners here so there’s still plenty of room for everyday cooking.
Sideboard or Buffet
If you decorate a dessert table or snack station for Halloween parties, your handmade runner becomes the perfect backdrop for treats, serving trays, and seasonal decorations.
A little tip from experience: don’t feel like you have to cover the entire table. Leaving several inches of exposed wood on both sides often looks cleaner than making the runner too wide.
Things You’ll Need
Gather your supplies before you begin so you can enjoy the sewing instead of stopping halfway through to hunt for a missing tool.
- Halloween quilting cotton fabrics (fat quarters or yardage)
- Cotton batting
- Rotary cutter, acrylic ruler, and self-healing cutting mat
- Sewing machine with coordinating thread
- Wonder clips or quilting pins
- Steam iron and ironing board
That’s all you need to get started. If you’re missing any of these essentials, we’ve included a few of our favorite quilting tools throughout the tutorial exactly where you’ll use them. You can also take the help of our free quilt fabric calculator!
Before You Begin
Before you start cutting into your favorite Halloween fabrics, take a few minutes to prepare everything properly. It might feel like an extra step, but it’ll save you from uneven blocks, puckered seams, and frustrating do-overs later.
The first thing you should do is decide where your table runner is going.
For a standard dining table, a runner between 14–18 inches wide and 36–54 inches long works beautifully. If you’re decorating a coffee table or console table, you can easily shorten the design without changing the overall pattern.
A good rule of thumb is to let the runner hang about 6–10 inches over each end of the table. It creates a balanced look without overwhelming the furniture.
Want a project you can finish in an afternoon? This cute crochet ghost is one of our fastest and most satisfying seasonal makes.
Next, give your fabrics a quick press before cutting. Even brand-new quilting cotton often has fold lines from packaging, and cutting through wrinkles almost always leads to pieces that aren’t quite square.
Some quilters also like to use spray starch before cutting. You certainly don’t have to, but if you’re working with lightweight cotton, it adds just enough stiffness to make cleaner, more accurate cuts.
We always recommend cutting all your pieces in one session before heading to the sewing machine. Constantly switching between cutting and sewing slows you down much more than you might expect.
Choosing Your Halloween Fabrics
Halloween quilts don’t have to be bright orange and jet black, unless that’s exactly the look you’re after. Try picking one dominant print, two supporting prints, and a few coordinating solids. This gives your table runner plenty of personality without making it feel too busy.
Some combinations that always work well include:
- Pumpkin prints with cream and charcoal solids
- Black-and-white buffalo check with orange florals
- Tiny bats paired with mustard and rust fabrics
- Vintage Halloween prints mixed with linen-look neutrals
- Moody florals with broad purple and black accents
If you’re using several novelty prints, scatter them throughout the runner instead of placing similar fabrics side by side. This helps the eye move naturally across the design and keeps one section from looking too heavy.
Here’s a tip: Lay your fabrics out on the floor or snap a quick photo with your phone before sewing. Sometimes you’ll notice two prints blending together or one fabric standing out more than you’d planned. It’s much easier to rearrange them now than after everything is stitched together.
If you’re just building your fabric stash, a coordinated Halloween fat quarter bundle takes the guesswork out of matching prints. Plus, the colors are designed to complement one another, making layout much easier.
Cutting Your Fabric
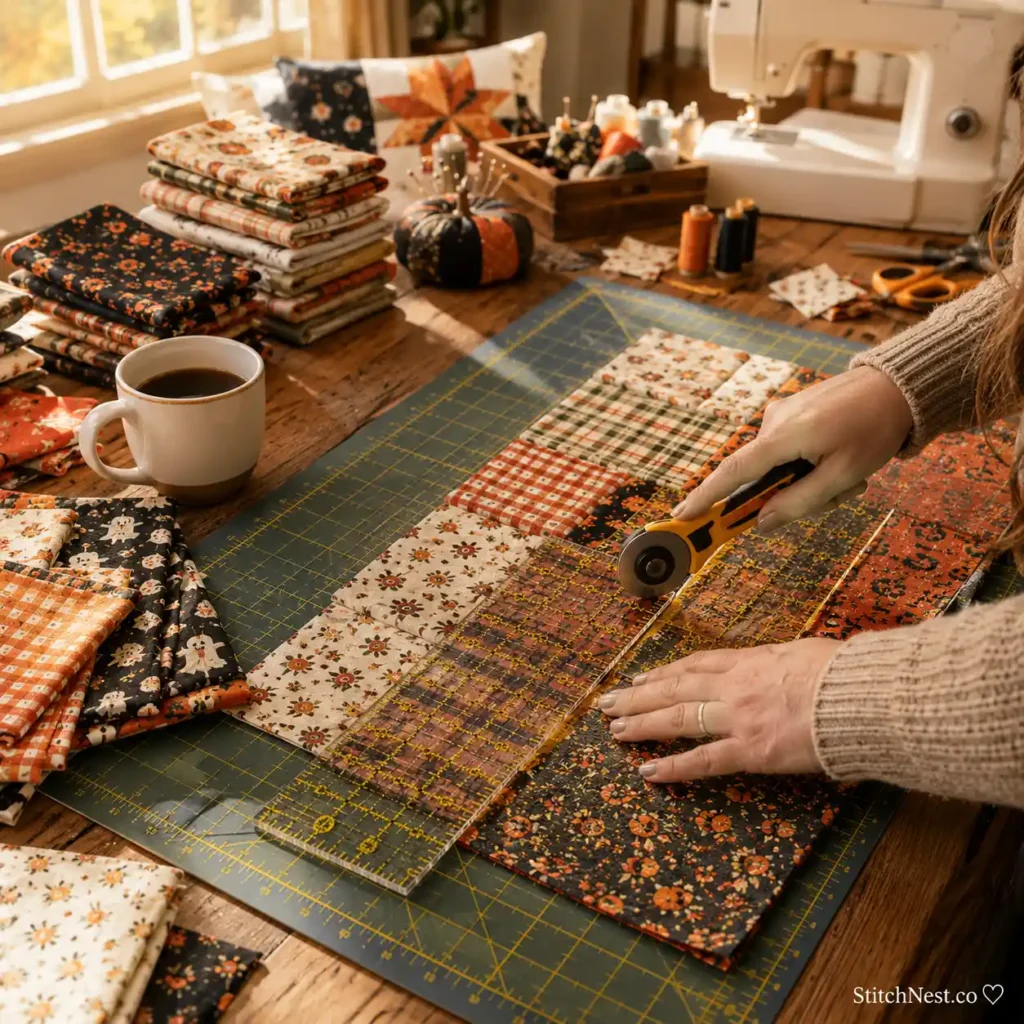
Accurate cutting is one of the biggest factors in getting a polished-looking table runner. Even if you’re only off by a tiny amount on each piece, those little differences add up across multiple rows. By the time you reach the opposite end, you may find corners refusing to line up.
For this beginner-friendly runner, you’ll need:
- 24 squares measuring 5″ × 5″
- 2 border strips measuring 2½” × the length of your runner
- 2 end border strips measuring 2½” × the finished width
- Backing fabric approximately 2 inches larger on every side
- Cotton batting cut to the same size as the backing
Always measure twice before making your first cut. It sounds obvious, but nearly every quilter has accidentally trimmed the wrong side of a favorite fabric at least once.
A rotary cutter gives much cleaner edges than fabric scissors, especially when you’re cutting multiple layers. Just be sure to replace the blade when it starts snagging instead of slicing smoothly. A dull blade can stretch the fabric slightly and leave fuzzy edges.
See how beautiful quilts can become cozy everyday wear with these quilted housecoat patterns.
Plan Your Layout Before Sewing
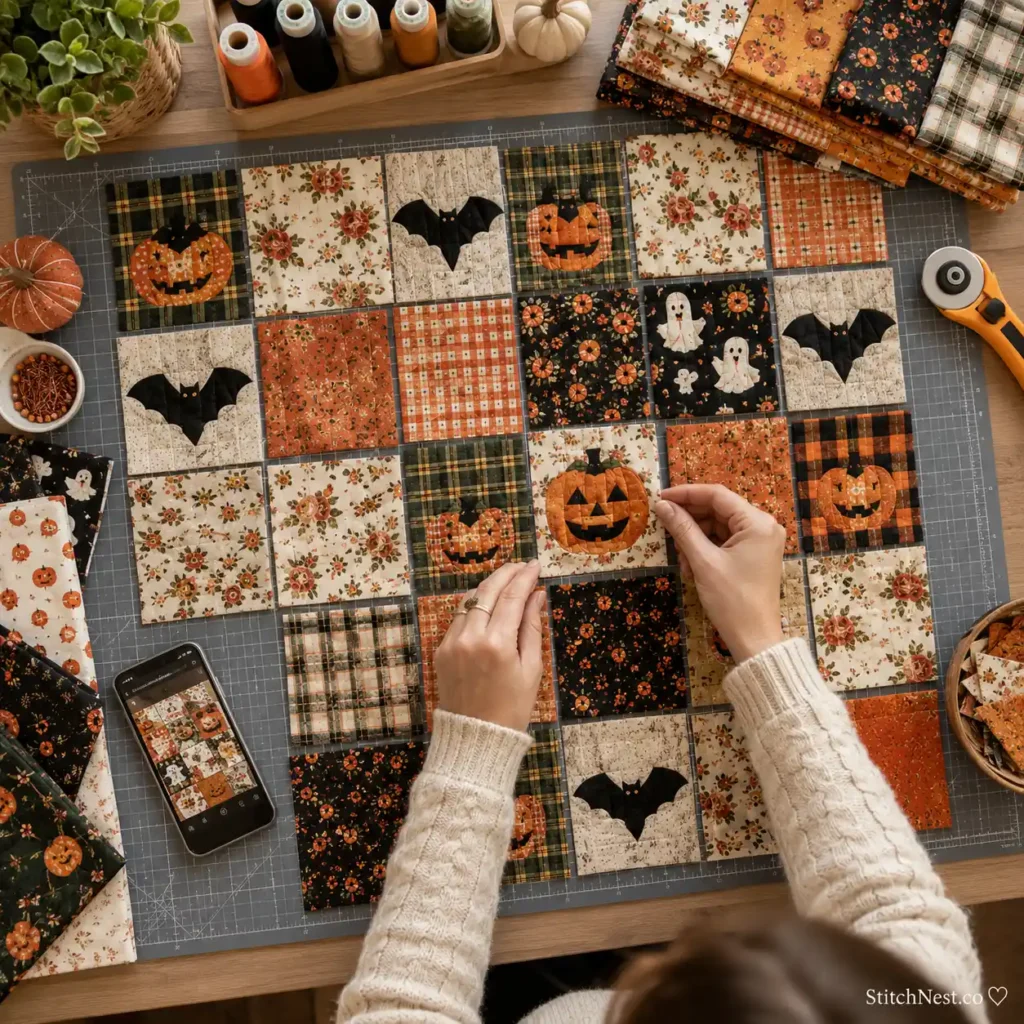
This is the fun part. Arrange all your fabric squares on a table, design wall, or even directly on the floor before you sew a single seam.
Move pieces around until the colors feel balanced. Try not to cluster all the orange prints in one corner or all the dark fabrics in the center. Mixing lights and darks across the runner creates much more visual interest.
Now take a photo once you’re happy with the arrangement. Trust us, this little trick saves a surprising amount of confusion later. If a stack of squares gets bumped or your curious pet decides to “help,” you’ll know exactly where every piece belongs.
Another tip we swear by is stacking each row separately after you’ve finalized the layout. Keep Row 1 together, then Row 2, and so on. It sounds simple, but it prevents a lot of accidental mix-ups once you start sewing.
Maybe try this lovely DIY daisy flower tutorial as well. It’s great for beginners!
DIY Quilted Halloween Table Runner Steps
Step 1: Sew the Squares into Rows
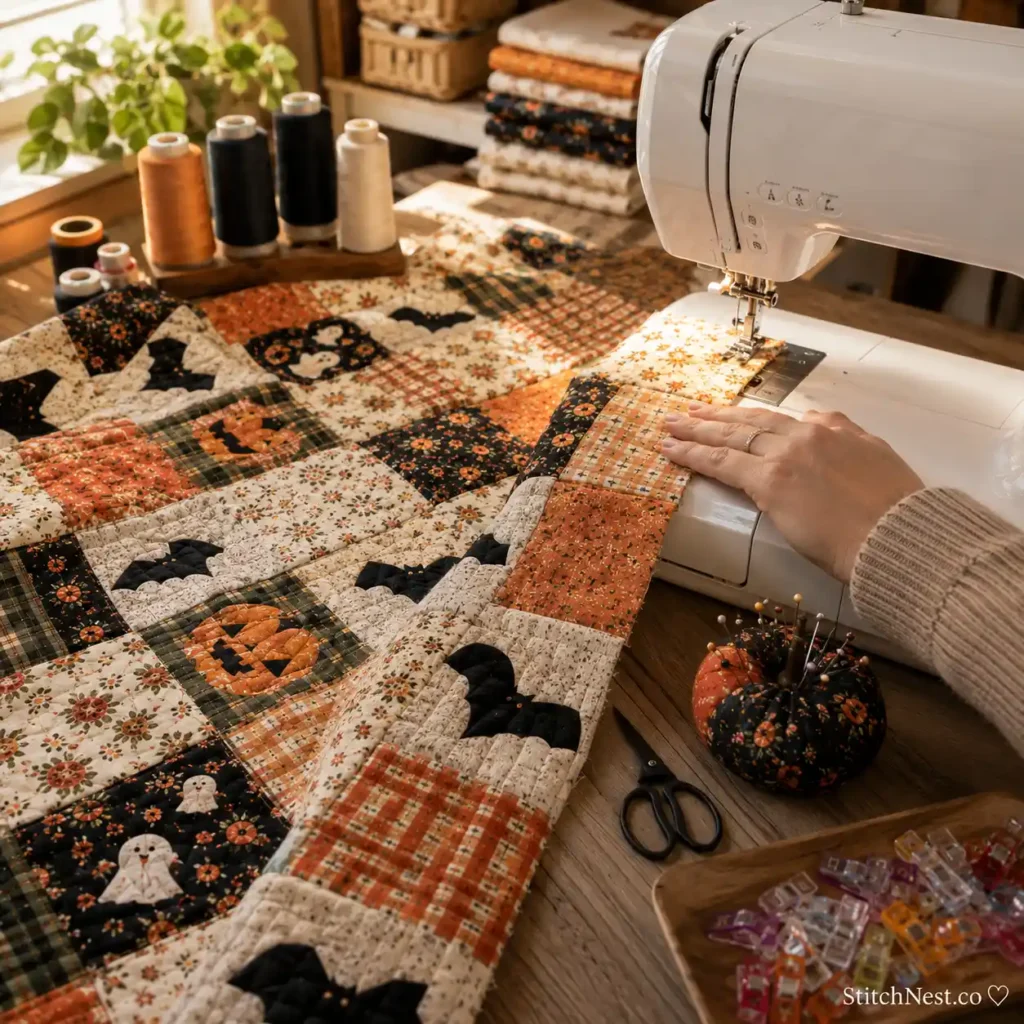
Start with your first row. Place the first two squares right sides together and sew them using a ¼-inch seam allowance.
Open the pieces and add the third square the same way. Continue until you’ve completed the entire row.
Repeat the process for every remaining row. Don’t rush through this stage. After sewing each seam, give it a quick press before attaching the next square. It keeps the fabric flatter and makes matching intersections much easier later.
If you’re new to quilting, it’s worth checking your seam allowance after the first few pieces. A seam that’s even slightly wider or narrower than ¼ inch can throw off your finished measurements surprisingly quickly.
Beginner Mistake: Don’t stretch the fabric as it feeds through your sewing machine. Let the feed dogs do the work. Pulling from the front or back can distort the pieces and leave you with rows that won’t line up.
Step 2: Join the Rows Together
Once every row is complete, it’s time to connect them. Place the first two rows right sides together and carefully match every seam intersection.
You can pin these points if you’d like, but we usually prefer using clips or placing a single pin exactly where the seams meet. It holds everything securely without slowing you down too much.
Sew the rows together using the same ¼-inch seam allowance. Then press the seam flat, and attach the next row.
Keep repeating until your patchwork top is complete.
If two seam intersections are off by a millimeter or two, don’t panic. That’s completely normal, especially on your first quilting project. Focus on keeping the overall quilt top flat rather than chasing absolute perfection.
Remember, a finished handmade runner with tiny imperfections has far more character than one that never gets finished because you’re trying to make every corner flawless.
If you’re liking this one, then you’ll have loads more fun trying this DIY crochet dragonfly tutorial! Don’t miss out!
Step 3: Add the Borders
Now that your patchwork center is finished, it’s time to frame it with borders. This simple step instantly makes the runner look more polished and gives the eye a place to rest between the patterned blocks and the edge of the quilt.
Start by sewing the long side borders onto the runner first.
Place one border strip right sides together with the quilt top, pin or clip the ends, then sew using the same ¼-inch seam allowance you’ve been using throughout the project.
Repeat for the opposite side before moving on to the shorter end borders.
After the long borders are attached, add the top and bottom border strips the same way.
Once everything is sewn together, press the seams toward the borders. This helps reduce bulk in the center and gives the runner a cleaner finish.
Bonus Tip: Before attaching each border, measure the center of your runner instead of the edge. Sometimes the quilt top stretches slightly during sewing, and measuring the center gives you a much more accurate border length.
If your border ends up slightly longer than the quilt top, don’t trim the quilt to fit the border. Instead, trim the border strip to the correct size before sewing. You’ll end up with much straighter edges.
If you’re looking for a beginner-friendly amigurumi project, our DIY Crochet Ladybug Tutorial teaches you how to crochet an adorable 3D ladybug with step-by-step instructions, helpful tips, and plenty of finishing advice.
Step 4: Make the Quilt Sandwich
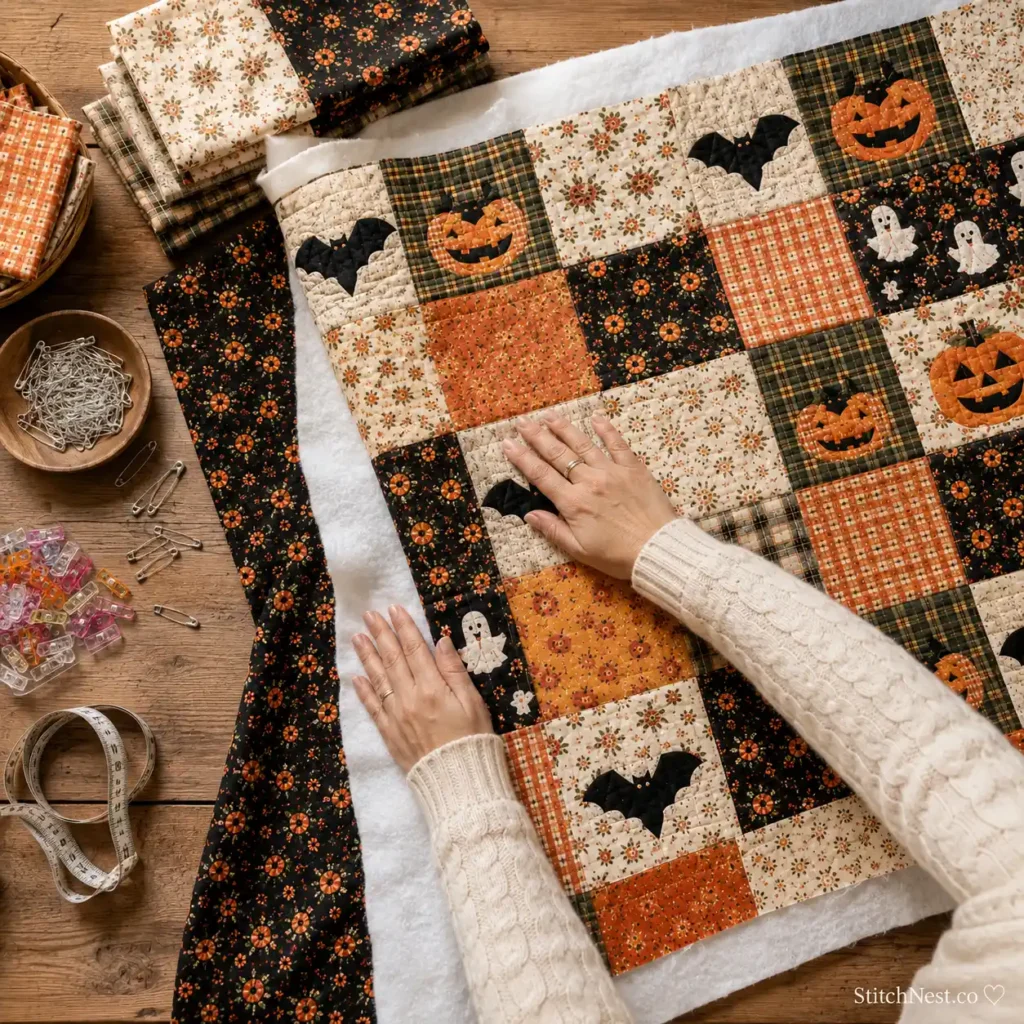
This is where your project starts looking like an actual quilt. Lay your backing fabric wrong side up on a large, clean surface. Smooth out every wrinkle before placing the batting on top. Here’s a beginner’s guide on choosing quilt batting you can check out for help!
Next, position your quilt top right side up over the batting. Take a few extra minutes here to smooth each layer from the center outward. Any wrinkles trapped inside now will stay there after quilting.
Your backing fabric should extend at least 2 inches beyond the quilt top on every side. The extra fabric gives everything room to shift slightly during quilting without leaving exposed batting around the edges.
Once you’re happy with the placement, secure all three layers. You can use curved safety pins, spray basting adhesive, or large quilting stitches.
For a project this size, safety pins are usually the easiest option because they’re reusable and don’t leave sticky residue behind.
Pro Tip: Start pinning from the center and work outward. This pushes excess fabric toward the edges instead of trapping bubbles in the middle.
Step 5: Quilt the Layers Together
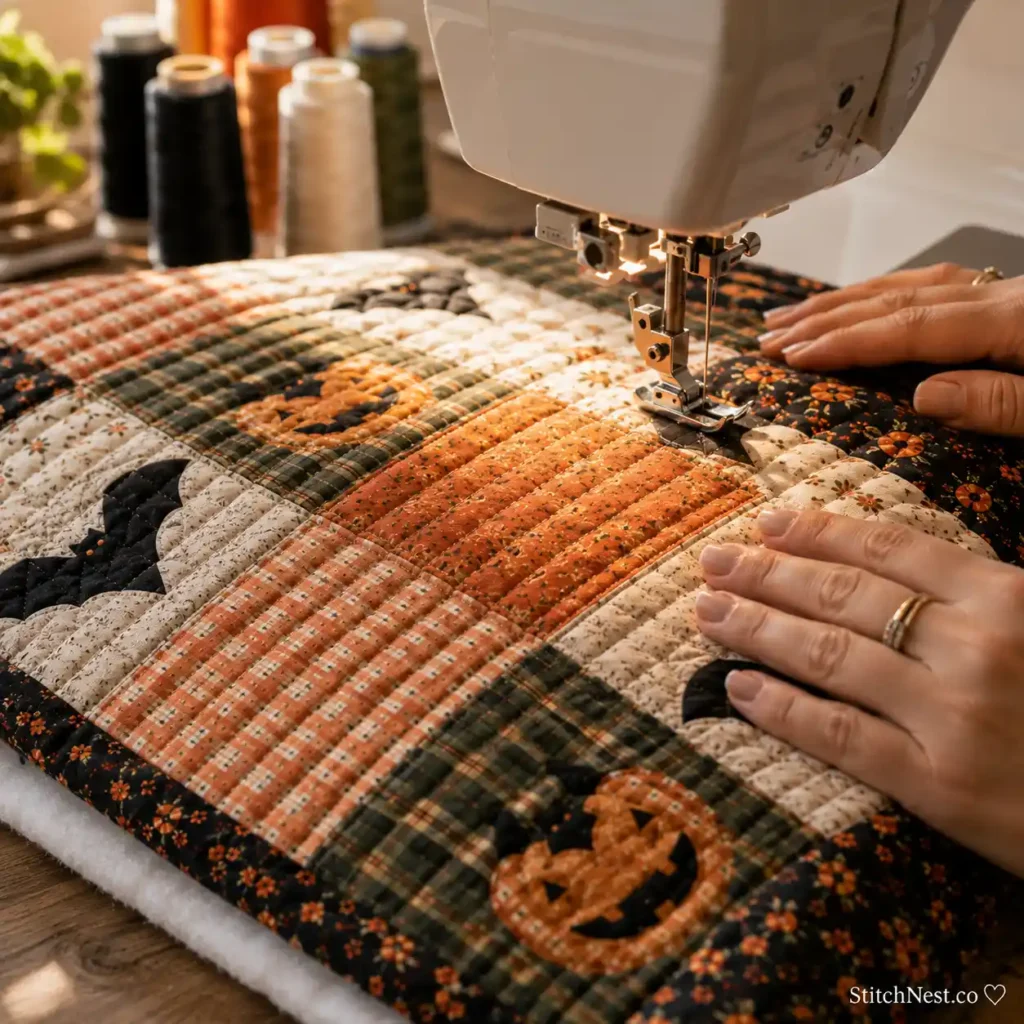
Now comes one of the most satisfying parts of the project.
Quilting isn’t just decorative; it’s what holds the quilt top, batting, and backing together so the runner stays durable through years of use. If this is your first table runner, keep the quilting simple.
Straight-line quilting is clean, timeless, and much easier than intricate free-motion designs.
Start sewing from the center of the runner and gradually work toward the outside edges.
Working outward helps prevent the layers from bunching as you sew.
Space your quilting lines about 1½–2 inches apart, depending on the loft of your batting and the look you’re going for.
You don’t have to quilt every single square individually. Long continuous lines often look cleaner and take much less time to sew.
Some beginner-friendly quilting designs include:
- Straight vertical lines
- Straight horizontal lines
- Diagonal quilting
- Crosshatch quilting
- Stitching in the ditch along the seams
If your sewing machine has a walking foot, now’s the perfect time to use it. It feeds all three layers evenly and helps prevent the backing fabric from shifting.
Beginner Mistake: Resist the urge to quilt large decorative swirls on your first project. Curved stitching takes practice, and it’s much easier to keep straight lines looking neat than trying to correct uneven loops later.
A walking foot isn’t essential for a small project like this, but it’s one of those tools that makes quilting noticeably smoother. If you think you’ll be making quilts regularly, it’s well worth adding to your sewing kit.
Step 6: Trim the Edges
Once you’ve finished quilting, your runner probably won’t have perfectly even edges anymore.
That’s completely normal. The quilting process causes the layers to shift slightly, even if everything was carefully pinned.
Using your rotary cutter and acrylic ruler, trim all four sides until they’re perfectly square.
Take your time here. A clean trim makes attaching the binding much easier and gives the finished runner those crisp, professional-looking edges.
We recommend trimming one side at a time instead of trying to cut everything in one pass. You’ll have much better control and are less likely to remove too much fabric accidentally.
A clear quilting ruler with easy-to-read markings makes squaring up projects much more accurate, especially if you’re still getting comfortable with rotary cutting.
Step 7: Attach the Binding
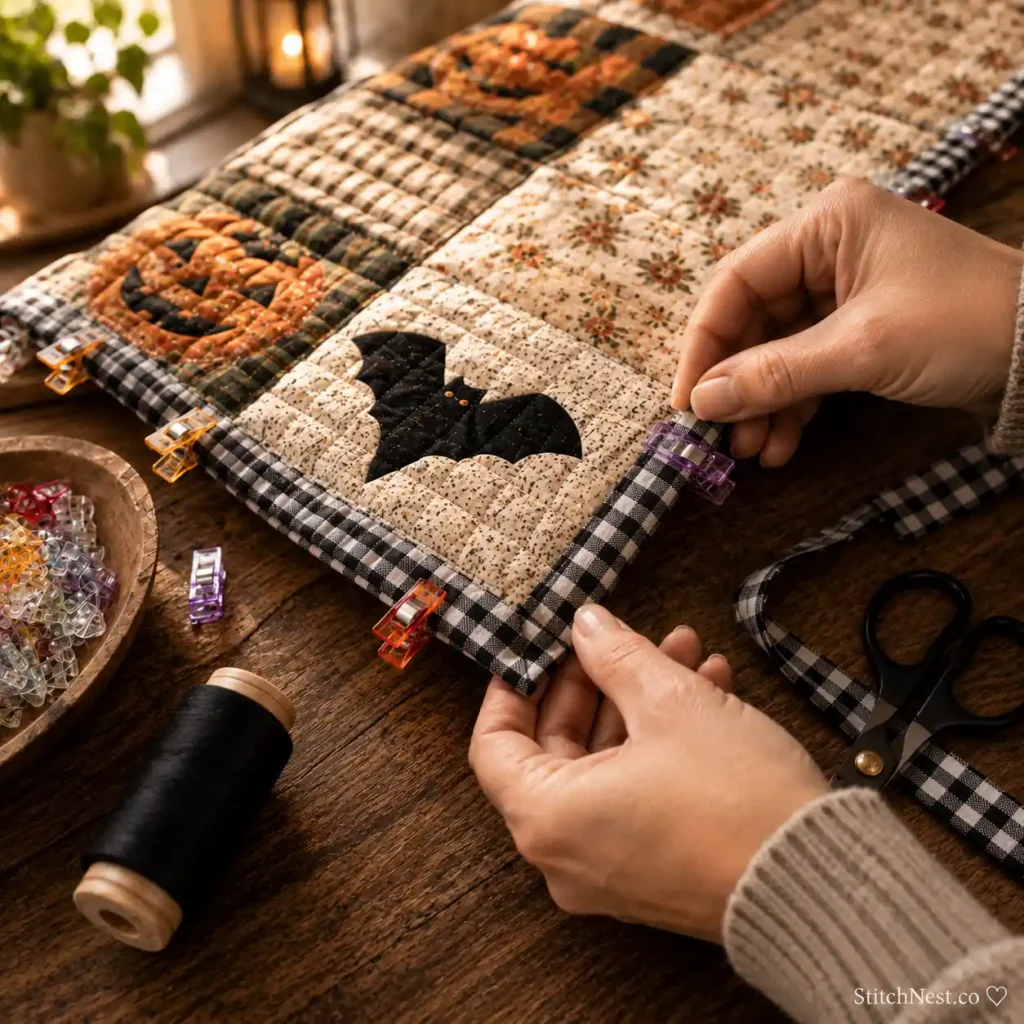
Binding is what finishes the raw edges of your quilt and gives everything a polished, durable border.
Fold your binding strips in half lengthwise with the wrong sides together and press them well.
Starting near the middle of one long edge, align the raw edges of the binding with the raw edge of the quilt.
Clip or pin it in place before sewing around the entire runner. When you reach each corner, stop about ¼ inch before the edge, backstitch, then create a neat mitered corner before continuing onto the next side.
Don’t worry if mitered corners feel awkward at first. Almost every quilter needs a couple of projects before they become second nature.
Once the binding is sewn to the front, fold it over to the back of the runner, and either hand stitch or machine stitch it into place.
Hand stitching takes a little longer, but it creates an almost invisible finish that many quilters prefer for decorative pieces.
Machine stitching is much quicker and perfectly suitable if the runner will be used often.
Practical Tip: Wonder Clips are especially useful here because they hold the folded binding securely without stretching it or leaving pinholes in the fabric.
If you’ve never used Wonder Clips before, binding is where you’ll really appreciate them. They grip multiple fabric layers securely, especially around corners where traditional pins can feel bulky.
Once you’ve finished this project, try making a few crochet hearts. They’re beginner-friendly, easy to customize, and useful in all kinds of handmade gifts.
Give Your Runner a Final Press
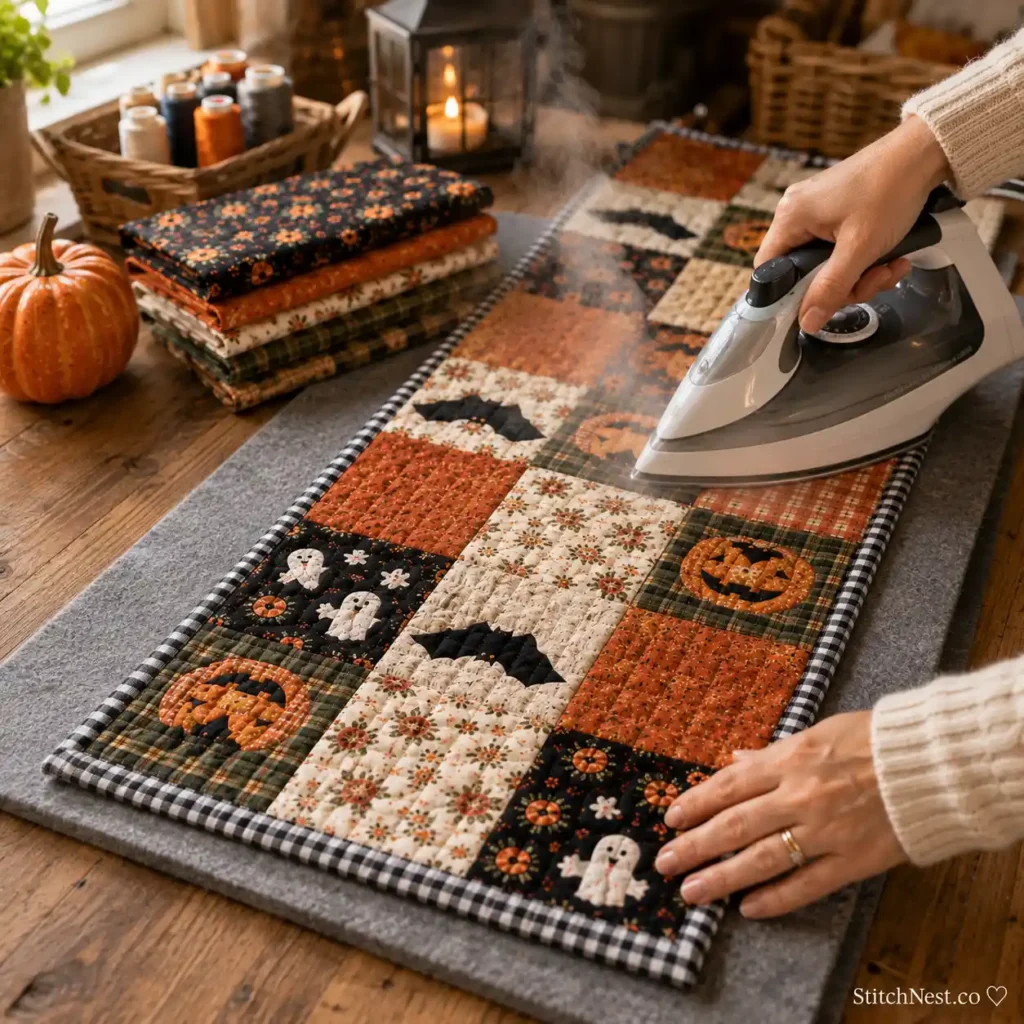
You’ve done the hard work, and now it’s time for the finishing touch.
Give your table runner one final press using a steam iron. Start in the center and work your way toward the edges, smoothing the fabric as you go. This helps flatten the quilting, crisp up the binding, and gives the entire project that freshly finished look.
If you’ve hand-stitched the binding, avoid dragging the iron back and forth over the stitches. Instead, press gently by lifting and lowering the iron. This keeps everything neat and prevents unnecessary strain on your thread.
Once you’re finished, let the runner cool completely before folding or displaying it. Warm fabric can hold slight wrinkles if it’s moved immediately after pressing.
Loved this one? Then you’ll have way more fun making this 7-step crochet butterfly! It’s just as simple!
Easy Ways to Customize Your Halloween Table Runner
Once you’ve made one, you’ll probably start thinking about your next version before this one even leaves the sewing table.
The beauty of this project is how easily you can make it your own. Here are a few ideas:
Add Appliqué
Simple pumpkin, ghost, witch hat, or bat appliqués instantly add personality. Fuse them onto the quilt top before quilting, then stitch around the edges for extra durability. Here’s a DIY Halloween pumpkin applique anyone can make!
Try Decorative Quilting
Once you’re comfortable with straight-line quilting, experiment with spiderweb patterns, echo quilting around pumpkins, or gentle wavy lines for added texture.
Use Different Shapes
Instead of squares, make your runner using half-square triangles, flying geese blocks, or simple pumpkin quilt blocks for a more traditional quilted look.
Sometimes all it takes is a few appliqué pieces to turn a simple quilt into something truly memorable. If you’re looking for fresh inspiration, don’t miss these appliqué quilt patterns full of color and creativity.
Add Seasonal Embroidery
Small embroidered details like tiny stars, spider webs, or little Halloween phrases can make your runner feel even more handmade.
Finish with Tassels
If your décor leans toward farmhouse or rustic, add black, cream, or orange tassels to each corner for a fun finishing detail.
The nice thing about table runners is that they don’t require a huge fabric investment, so don’t be afraid to experiment with different styles. Even small design changes can make each version feel completely different.
Frequently Asked Questions
Can beginners make a quilted Halloween table runner?
Absolutely. This is one of the best quilting projects for beginners because it’s small enough to finish in a weekend but still teaches you the basics of cutting, piecing, quilting, and binding.
What’s the best fabric to use?
100% quilting cotton is the easiest option. It’s stable, easy to sew, and comes in endless Halloween prints and coordinating solids.
Do I need a quilting machine?
Not at all. A regular home sewing machine works perfectly for a table runner. Just keep your quilting design simple if you’re new to quilting.
How long does it take to make?
Most beginners can finish a table runner in a weekend. If you already have your fabrics cut and ready to go, you may even finish it in a single afternoon.
Now that you’ve mastered the basics, why not try something you can use all year long? Our butterfly appliqué ideas are a great next project.
A DIY quilted Halloween table runner is one of those projects that’s just as enjoyable to make as it is to display. It’s beginner-friendly, doesn’t require a huge amount of fabric, and gives you a finished piece you’ll look forward to bringing out every fall.
Don’t worry about achieving perfection on your first attempt. Focus on accurate cutting, consistent seams, and taking your time through each step. Those small habits make a much bigger difference than complicated quilting techniques.
Once you’ve finished this runner, you’ll already have the skills to tackle matching placemats, quilted pillow covers, wall hangings, or even your first full-size quilt.