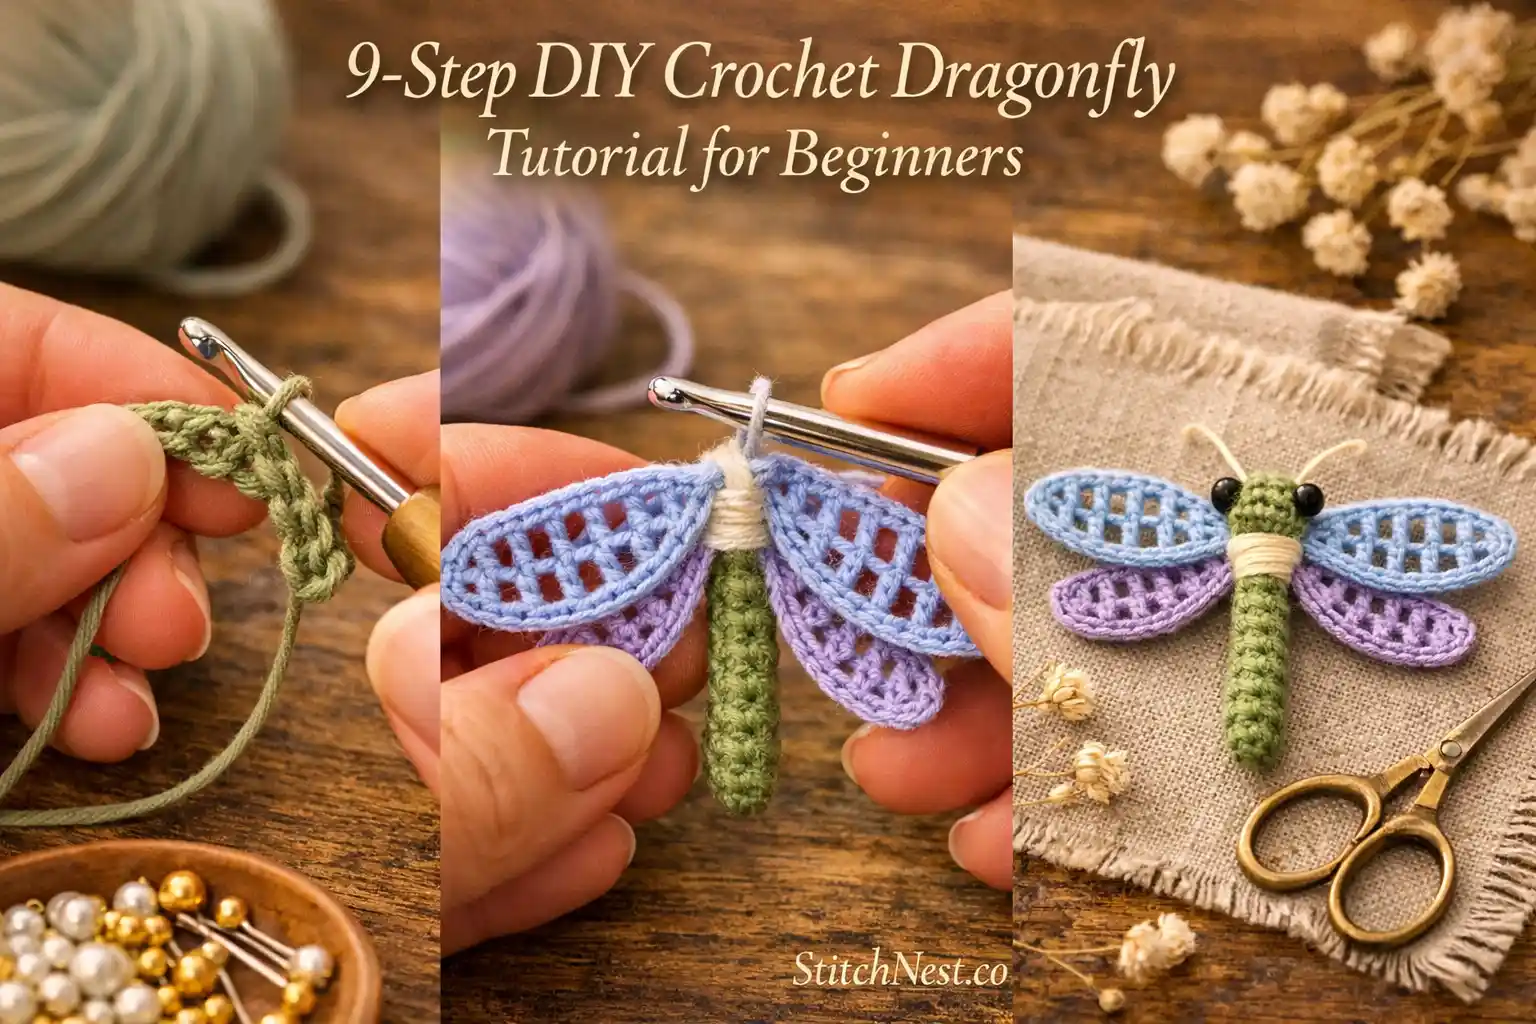
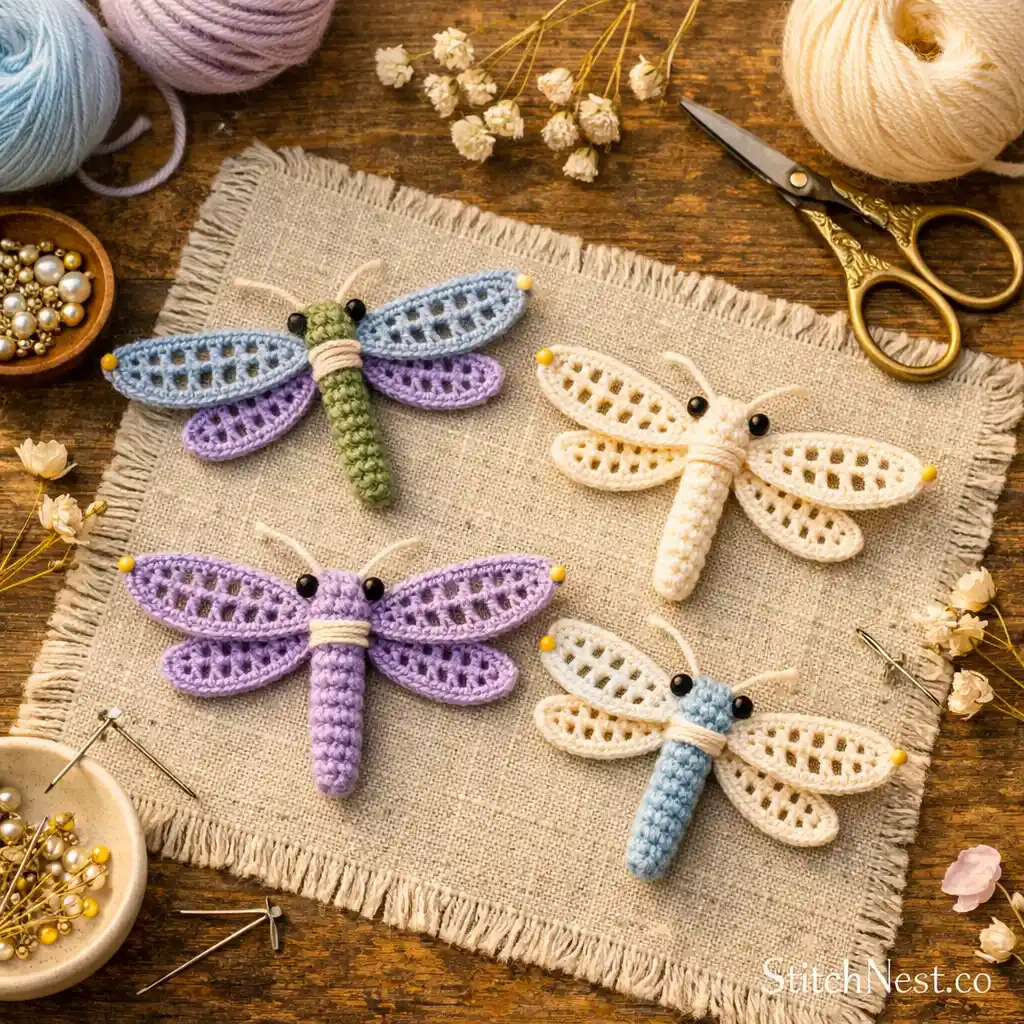
If you have been looking for a crochet project that feels delicate, relaxing, and genuinely fun to make, this DIY crochet dragonfly tutorial is a great place to start. The wings work up quickly, the body uses very simple stitch combinations, and the finished piece looks far more detailed than the actual process feels. Once you finish one, it becomes very easy to start experimenting with different yarn colors, metallic threads, bead accents, or applique uses. Since the project is small, you also get the chance to practice cleaner tension, neater stitch placement, and shaping without committing to a large crochet piece.
Things You Will Need
- Fine cotton yarn or crochet thread
- 2.5 mm to 3.5 mm crochet hook
- Yarn needle
- Sharp embroidery scissors
- Stitch markers
- Blocking mat or towel
- Optional beads for decoration
Ready to upgrade your crochet tools? The Clover Amour Crochet Hook Set is one of the smoothest hook sets available and a favorite among experienced crocheters. It glides through cotton yarn beautifully and helps reduce hand fatigue during longer projects.
Turn Your Crochet Dragonfly Into Something You’ll Actually Use
Crochet Dragonfly Bookmark
The long body shape works beautifully as a bookmark, especially when paired with lighter cotton thread. Slightly stiffening the wings with gentle blocking helps the dragonfly sit flatter between pages.
Crochet Dragonfly Bag Charm
You can attach a small keyring through the top stitches and instantly turn the dragonfly into a lightweight summer bag charm. Metallic yarn details look especially pretty for this.
Crochet Dragonfly Hair Clip
Smaller dragonflies work beautifully on snap clips or bobby pins. We usually find that tighter stitches around the body section help the shape hold up better during regular wear.
Crochet Dragonfly Applique
You can stitch the finished dragonfly onto denim jackets, crochet dresses, tote bags, crochet blankets, or even pillow covers for extra texture and detail.
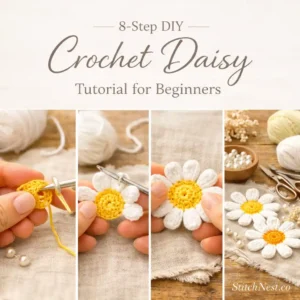
Maybe try this lovely DIY daisy flower tutorial as well. It’s great for beginners!
DIY Crochet Dragonfly Tutorial Easy
Step 1: Make the Foundation Chain
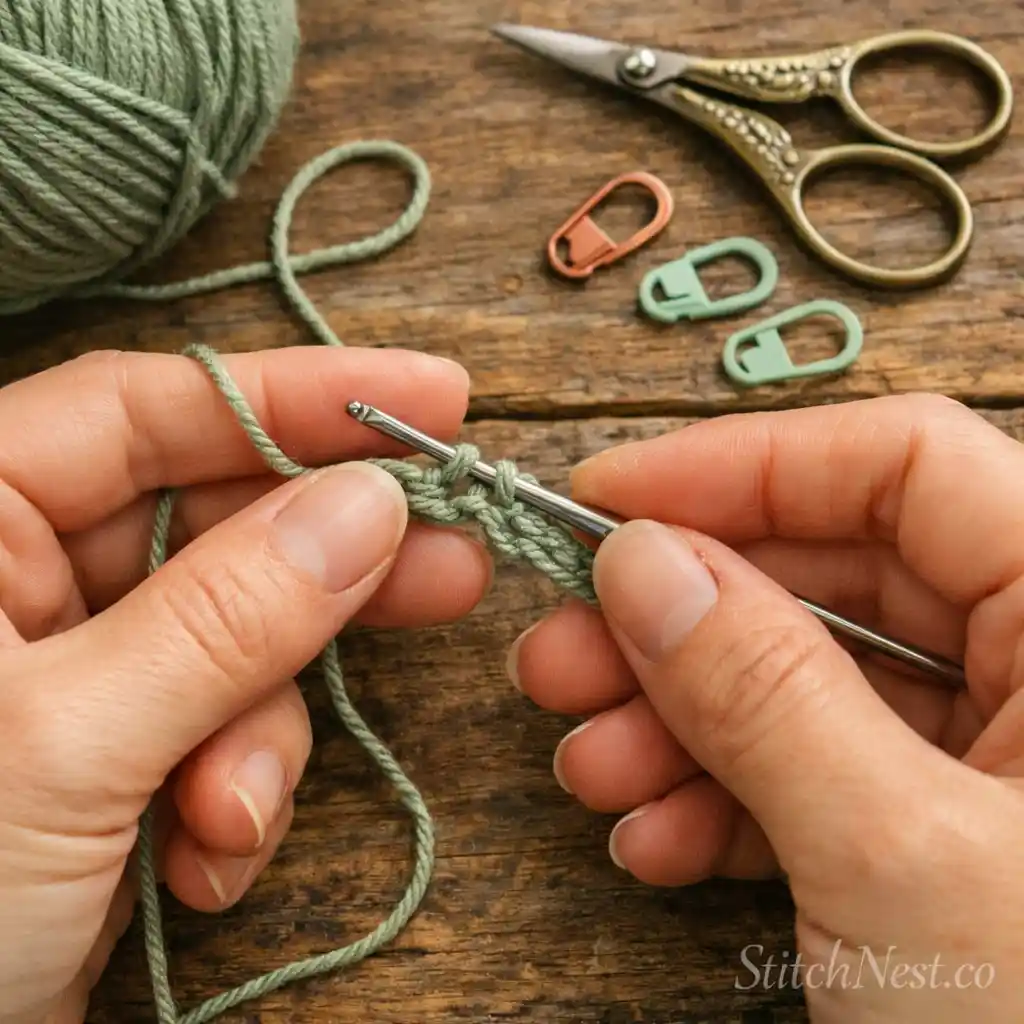
Start by chaining 12 to 15 stitches, depending on how long you want the dragonfly body to look. Keep your chain relaxed instead of overly tight because the body needs a little flexibility once the wings are attached later.
One thing experienced crocheters often notice is that tighter starting chains can cause the body to curve awkwardly. If your tension naturally runs tight, going up half a hook size for the foundation chain usually fixes that immediately.
Step 2: Crochet the Dragonfly Body
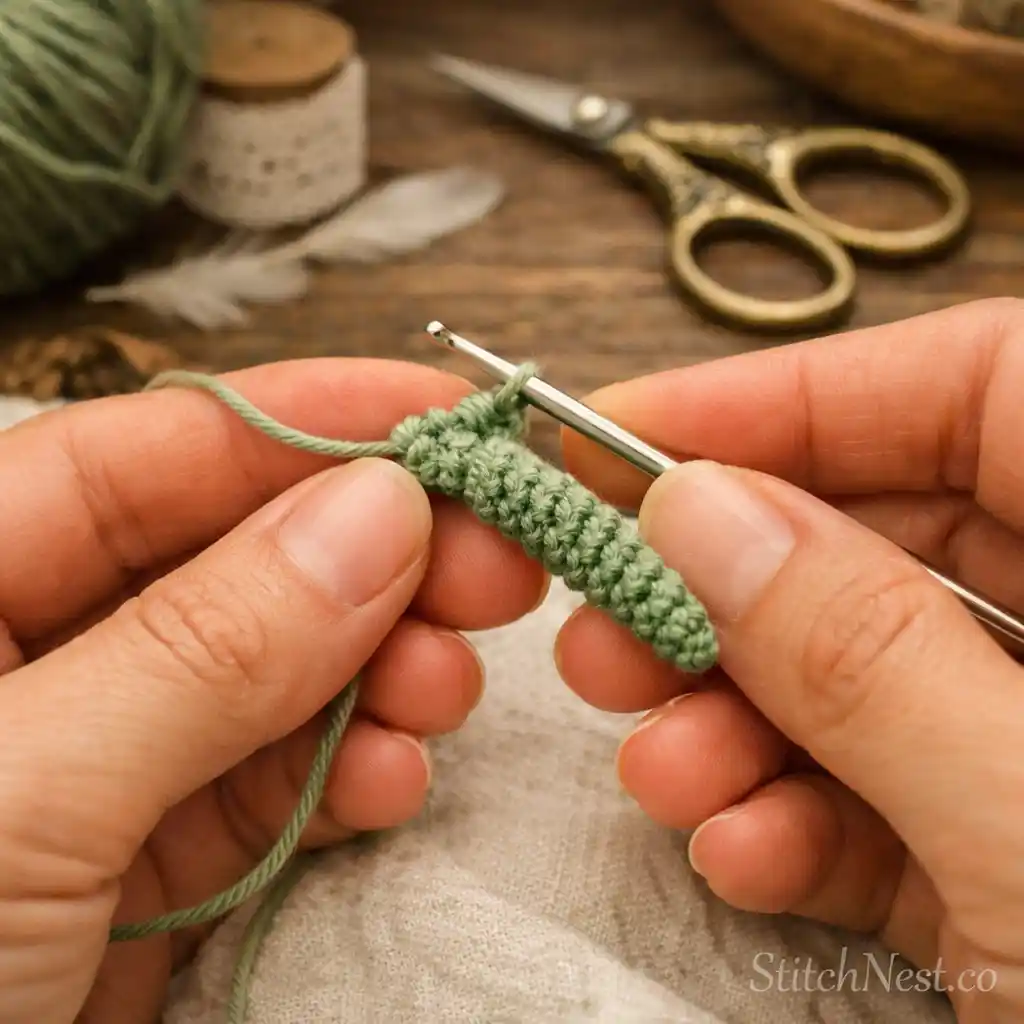
Work slip stitches or single crochets back across the chain to create a slim, structured body. Toward the middle section, add one or two half double crochets to create a slightly thicker center area before tapering again near the tail.
This small shaping detail gives the dragonfly a much cleaner silhouette instead of looking like one straight cord. We usually avoid overly bulky stitches here because thinner bodies make the wings stand out more naturally afterward.
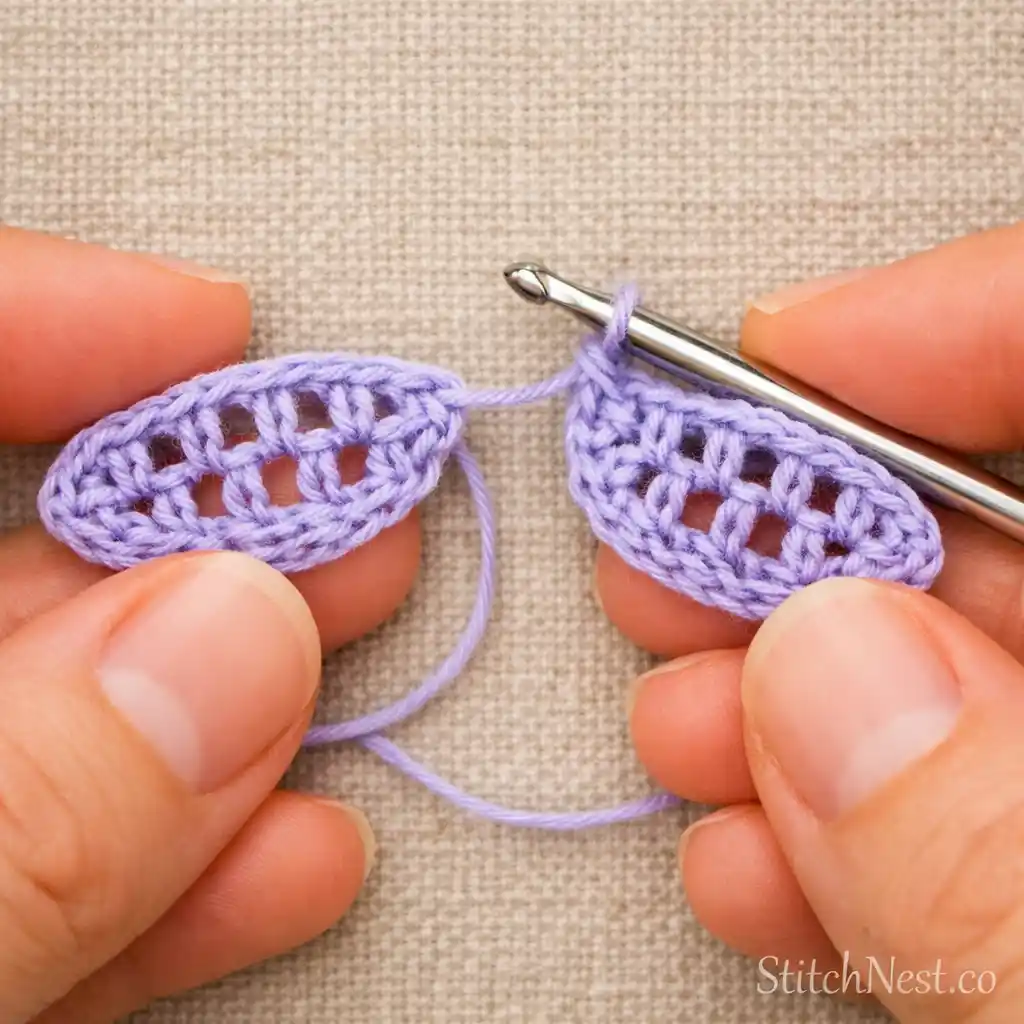
Step 3: Create the First Upper Wing
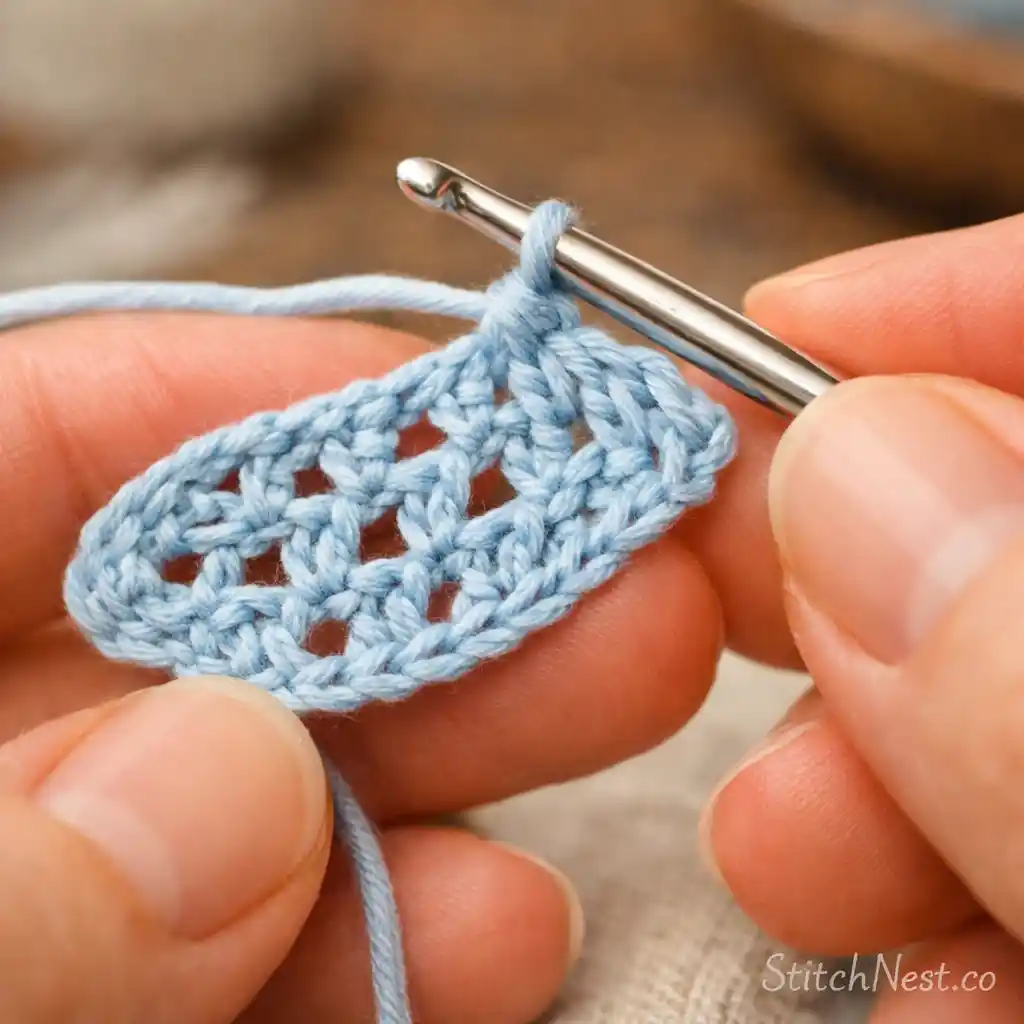
Attach yarn near the upper third of the dragonfly body and chain 8 to 10 stitches. Work double crochets back into the chain to form the first wing shape. The wing should feel airy and slightly open instead of dense and stiff.
Here’s a helpful crochet tip. Lifting your hook slightly higher during the taller stitches keeps the wing from curling inward later. Dragonfly wings almost always look better with relaxed stitch tension.
Love crocheting flowers? Our DIY crochet hibiscus flower tutorial walks you through every step and shows you how to create a realistic bloom you can add to bags, hats, hair clips, and more.
Step 4: Form the Second Upper Wing
Repeat the same process on the opposite side so both upper wings stay balanced. Try to match the stitch height and chain count carefully because uneven upper wings become noticeable very quickly once the dragonfly is complete.
Did you know dragonfly wings usually look more realistic when they are slightly angled upward instead of completely flat? Small shaping adjustments with your fingers later help a lot here.
If Halloween quilting is on your project list, be sure to check out our DIY Quilted Halloween Table Runner guide. It includes step-by-step instructions, beginner tips, and plenty of practical quilting advice.
Step 5: Crochet the Lower Wings
Move slightly lower on the body and repeat the wing process again, but make these wings slightly smaller than the upper set. Using fewer chain stitches naturally creates a softer, layered dragonfly shape.
One thing that improves the final look immediately is keeping the lower wings a little tighter than the top wings. That contrast gives the dragonfly much more visual balance.
Crocheting at night or with darker yarn? The Brightech LightView Pro Magnifying Floor Lamp with Magnifier provides bright, natural lighting that makes stitches much easier to see and reduces eye strain during long crochet sessions.
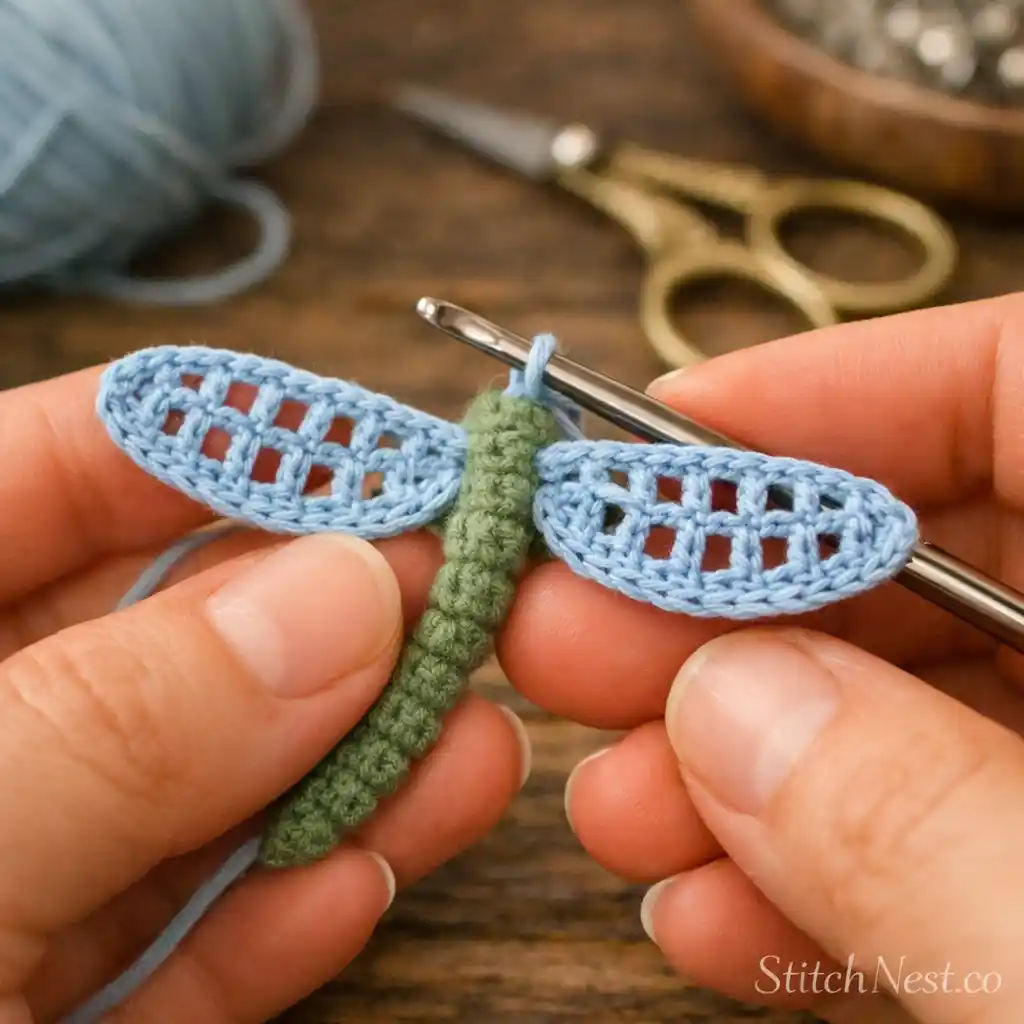
Step 6: Secure and Tighten the Center
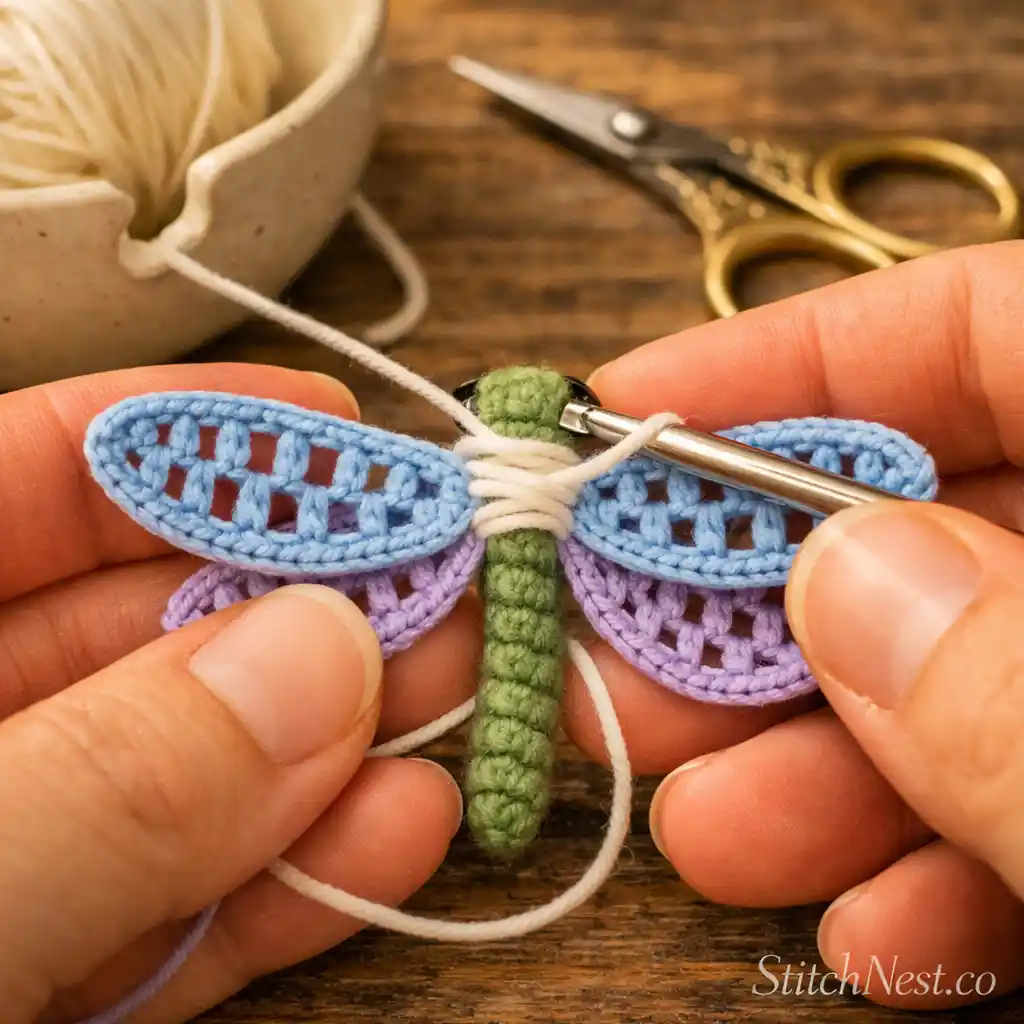
Once all four wings are attached, weave the working yarn carefully around the center body section a few times to secure the wings firmly in place. Pull snugly enough to shape the dragonfly but not so tightly that the wings bunch inward.
This step changes the entire appearance of the project. The dragonfly suddenly starts looking structured and finished instead of loose, separate pieces.
If you’re looking for a beginner-friendly amigurumi project, our DIY Crochet Ladybug Tutorial teaches you how to crochet an adorable 3D ladybug with step-by-step instructions, helpful tips, and plenty of finishing advice.
Step 7: Add Antennae
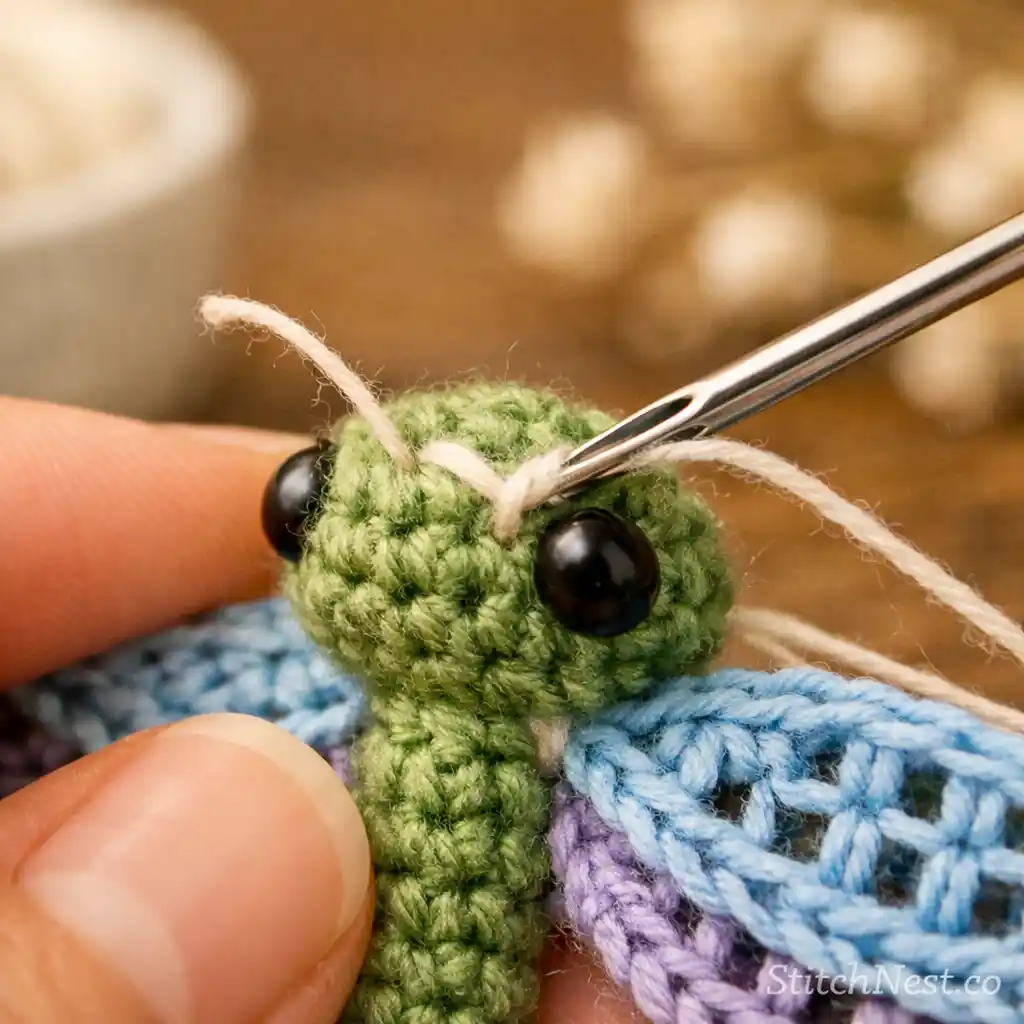
Cut a separate strand of yarn and thread it through the head section. Tie a small knot and leave two delicate strands extending outward to create the antennae.
We usually trim the antennae gradually instead of cutting them immediately very short because tiny adjustments help the proportions look much cleaner afterward.
Want a project you can finish in an afternoon? This cute crochet ghost is one of our fastest and most satisfying seasonal makes.
Step 8: Shape and Block the Wings
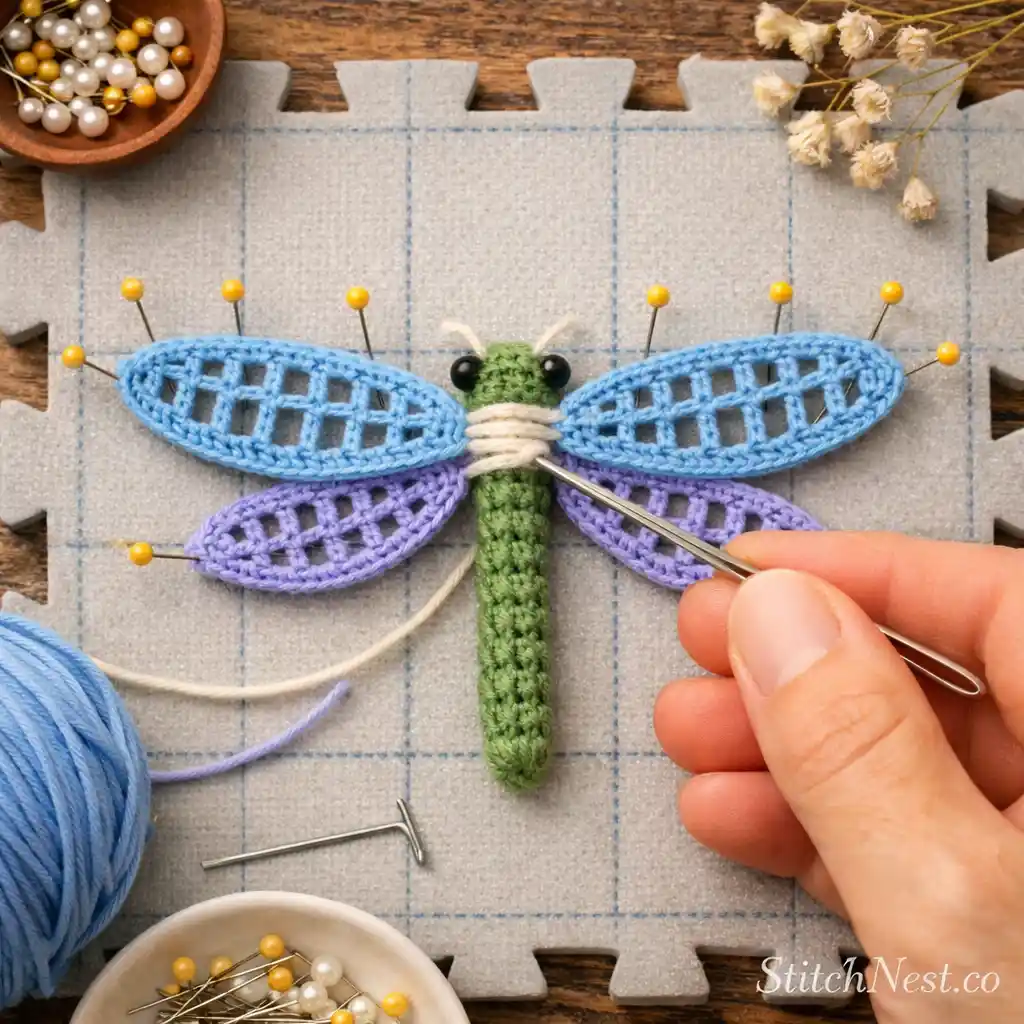
Lay the dragonfly flat on a towel or blocking mat and gently spread the wings outward evenly. If needed, lightly steam block the wings or pin them into shape overnight.
Blocking matters much more than many beginners expect with winged crochet projects. Even small adjustments help the dragonfly look dramatically cleaner and more symmetrical.
Want perfectly shaped dragonfly wings? A KnitIQ Blocking Mats & T-Pins Set makes blocking faster and gives delicate crochet projects a much cleaner, professional finish.
Step 9: Finish and Style Your Crochet Dragonfly
Once everything is dry and secure, weave in any remaining tails using a yarn needle. Now you can leave the dragonfly as decor or attach it to clips, bags, bookmarks, cardigans, or garlands.
One thing many crocheters notice after finishing their first dragonfly is how quickly the process becomes relaxing and repetitive in the best way. After the first piece, your wings naturally start becoming more balanced and cleaner without much effort.
Once you’ve finished this project, try making a few crochet hearts. They’re beginner-friendly, easy to customize, and useful in all kinds of handmade gifts.
Practical Tips for Cleaner DIY Crochet Dragonfly Tutorial
- If your wings start curling inward too much, the tension is usually slightly tight during the taller stitches. Relaxing the yarn feed or lifting the hook slightly higher during double crochets often fixes this immediately.
- Stitch markers help tremendously during symmetrical projects like dragonflies because they make wing placement much easier to balance on both sides of the body.
- Blocking becomes especially important with winged crochet projects. Even beautifully stitched dragonflies can look uneven until the wings are shaped and pinned properly afterward.
- Leaving slightly longer yarn tails during assembly makes weaving and securing the center body much easier later, instead of struggling with tiny ends.
If you crochet regularly, this is worth every penny. A Stanwood Large Metal Yarn Ball Winder turns messy skeins into neat yarn cakes that feed smoothly and help prevent tangles. It’s one of the best long-term investments for any crocheter.
Common Mistakes to Avoid
Dragonfly wings naturally look better with slightly airy stitch spacing because the openness gives the finished piece more delicacy and movement. Another issue happens when both wings are worked with uneven tension. Even one extra chain or tighter repeat can make the dragonfly appear lopsided once laid flat. Counting stitches carefully during each wing section helps prevent that problem early.
Many people also skip blocking because the project feels small and decorative. In reality, blocking is often what transforms crochet dragonflies from slightly curled motifs into polished pieces with beautifully shaped wings.
Yarn choice matters more than expected here, too. Very fuzzy yarn tends to hide stitch definition and makes the wings lose their crisp shape visually. Smooth cotton yarn usually creates the cleanest result for projects like this.
Once you finish your first dragonfly, it becomes very easy to start experimenting with colors, metallic thread, bead details, or layered wing combinations. Take your time with the shaping, enjoy the rhythm of the stitches, and you will end up with a delicate crochet piece that looks far more intricate than the process actually feels.
Loved this one? Then you’ll have way more fun making this 7-step crochet butterfly! It’s just as simple!