If you’re just getting into crochet, this is one of the easiest and most rewarding projects to start with. A scrunchie works up quickly, doesn’t require complex shaping, and lets you practice basic stitches without pressure.
Here’s how to crochet a simple scrunchie. You’ll end up with something cute, useful, and gift-worthy, all in under an hour. Once you make one, you’ll probably want to make a few more in different colors.
Beginner Crochet Supplies Checklist
- Crochet Hook Set
- Beginner-Friendly Yarn (Cotton/Acrylic)
- Yarn Needles
- Stitch Markers
- Small Scissors
- Measuring Tape
How to Crochet a Simple Scrunchie
Step 1: Gather Your Materials
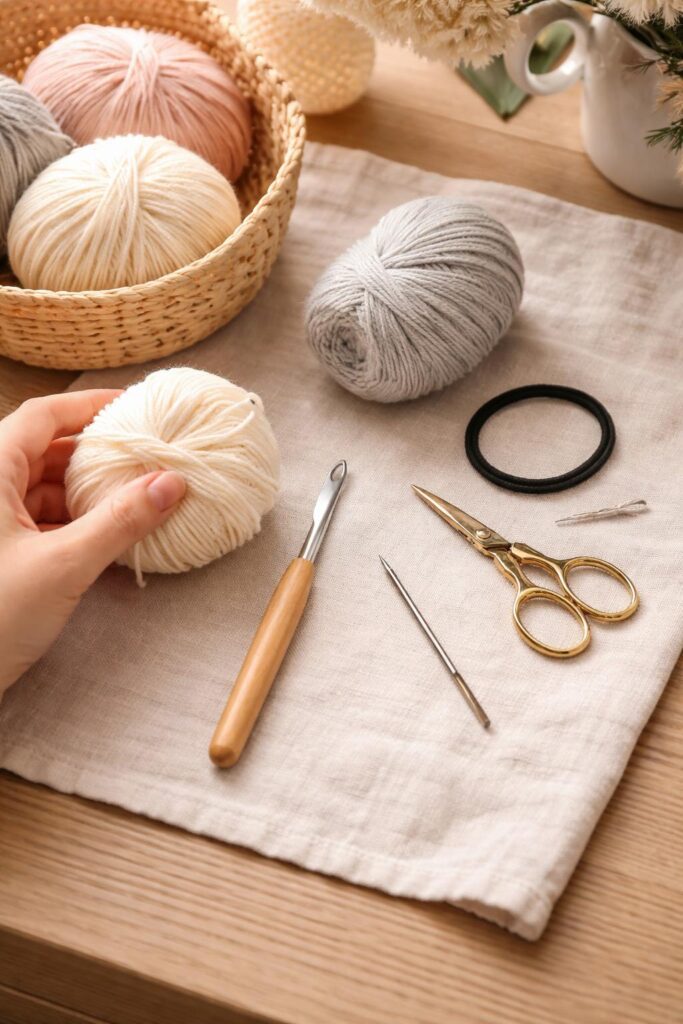
Start by keeping everything within reach so you don’t have to pause midway. You’ll need a hair elastic, medium-weight yarn, and a crochet hook (around 4–5 mm works well). A yarn needle and scissors will come in handy for finishing touches. Simple, right?
Step 2: Attach Yarn to the Elastic
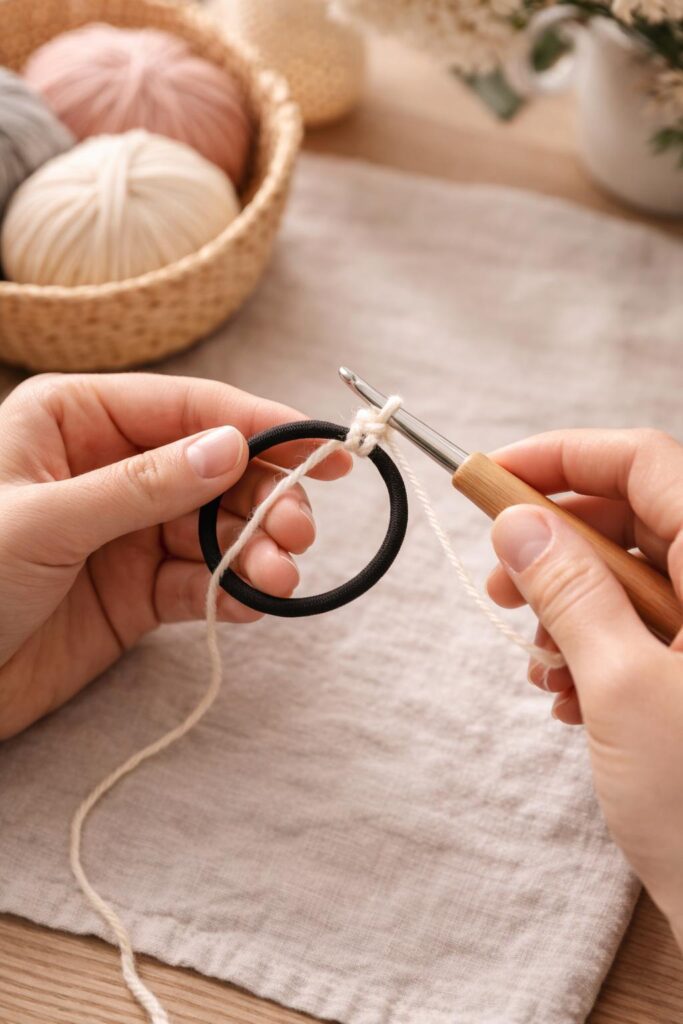
Wrap your yarn around the hair elastic and secure it with a slip knot. This step might feel slightly awkward at first, but it sets the foundation for the entire scrunchie. Keep your grip relaxed so the stitches don’t get too tight.
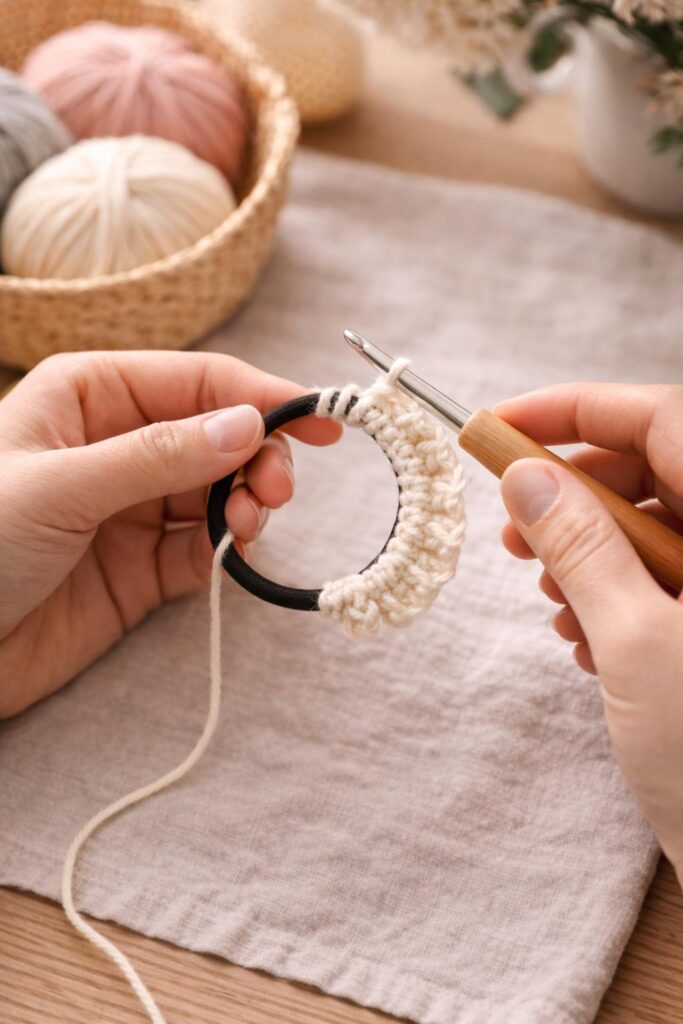
Step 3: Start Your First Round of Stitches

Work single crochet stitches all the way around the elastic, covering it completely. Then push the stitches close together so no part of the elastic shows through. It creates a neat base and gives the scrunchie a fuller look.
Step 4: Build Volume with Double Crochets
Now switch to double crochet stitches into each stitch around. This is where the scrunchie starts to fluff up and take shape. If you want extra volume, you can even add two stitches into one space.
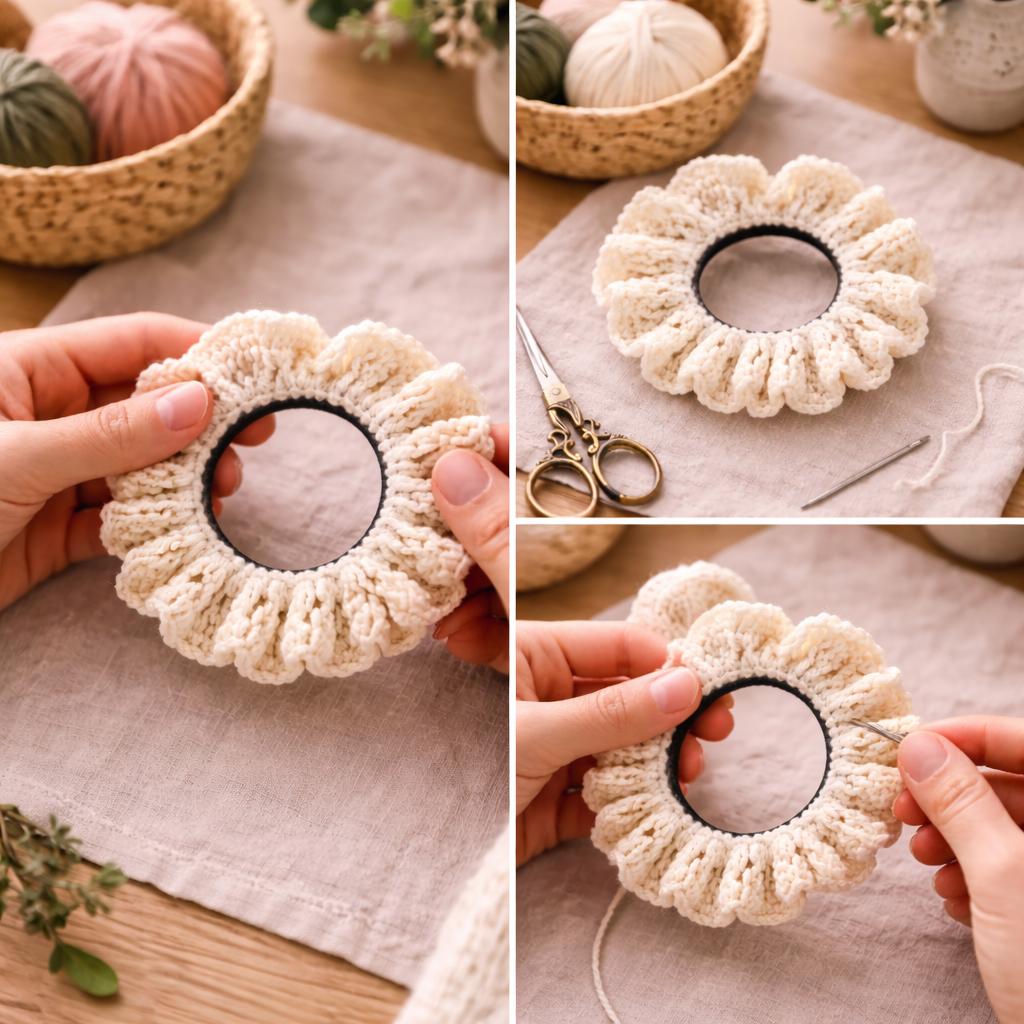
Step 5: Continue Around for Fullness
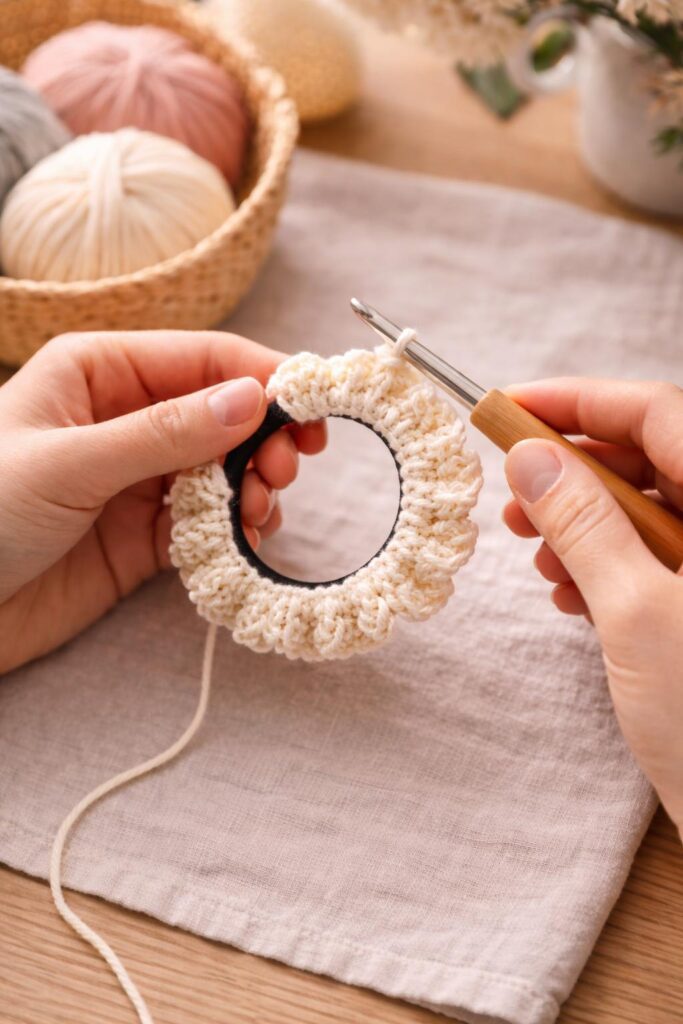
Keep going in rounds until you’re happy with how full the scrunchie looks. You’ll notice it naturally gathering and forming soft folds. There’s no strict rule here, just stop when it feels right to you.
Step 6: Finish Off Neatly

Once you’re done, cut the yarn and pull it through the last loop to secure it. Use your yarn needle to weave in the loose ends so nothing comes undone later. Taking an extra minute here makes a big difference in the final look.
Step 7: Shape and Adjust
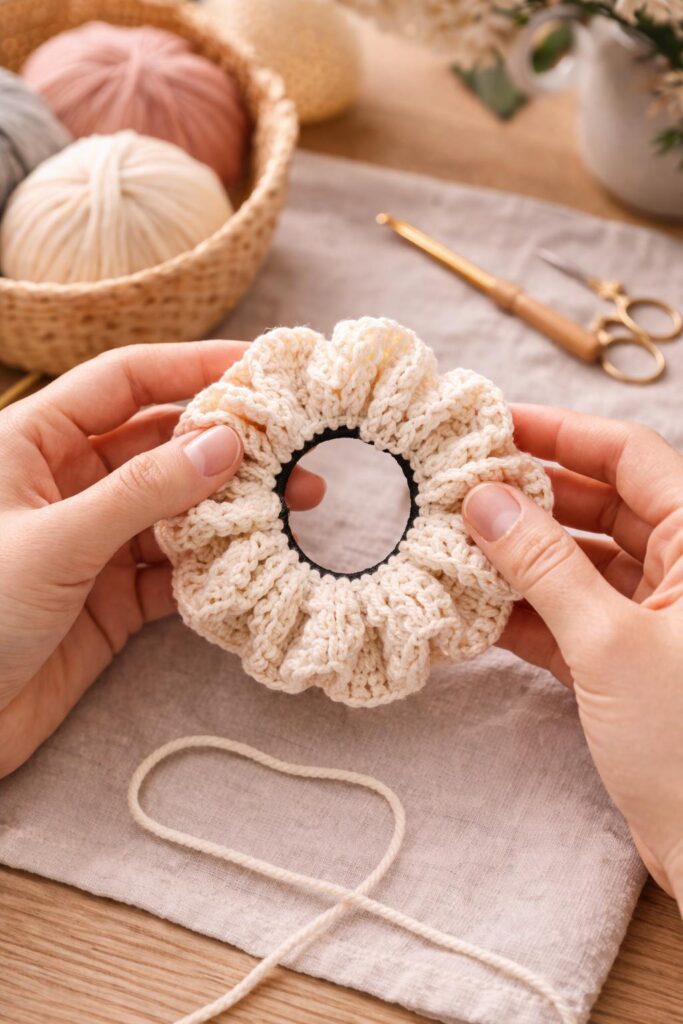
Gently stretch and fluff your scrunchie to even out the stitches. This helps the folds settle naturally and gives it that soft, finished appearance. It should feel secure but still stretchy.
Well, what are you waiting for? Now that you know how to crochet a scrunchie, it’s time to give it a try on your own. Don’t forget to share what you think in the comments below. And if you get stuck, just retrace the steps slowly!
Do check out these easy crochet projects you can make in an hour.