
Jelly roll quilts are one of the easiest ways to start quilting without spending hours cutting fabric before you even begin sewing. Since the strips are already precut and coordinated, you can focus more on piecing, layout, and enjoying the actual quilting process. That is a big reason why jelly roll quilts work so well for beginners, but even experienced quilters come back to them when they want something relaxing and satisfying to finish. Let’s take a look at free ones you can make!
Things You’ll Need
- Rotary cutter with a self-healing cutting mat
- High-quality cotton fabric bundles
- Acrylic quilting rulers for precise shapes
- Sewing machine with quilting foot attachment
- Soft batting for a cozy finished feel
Free Jelly Roll Quilt Patterns
1. How to Make a One-Block Jelly Roll Quilt
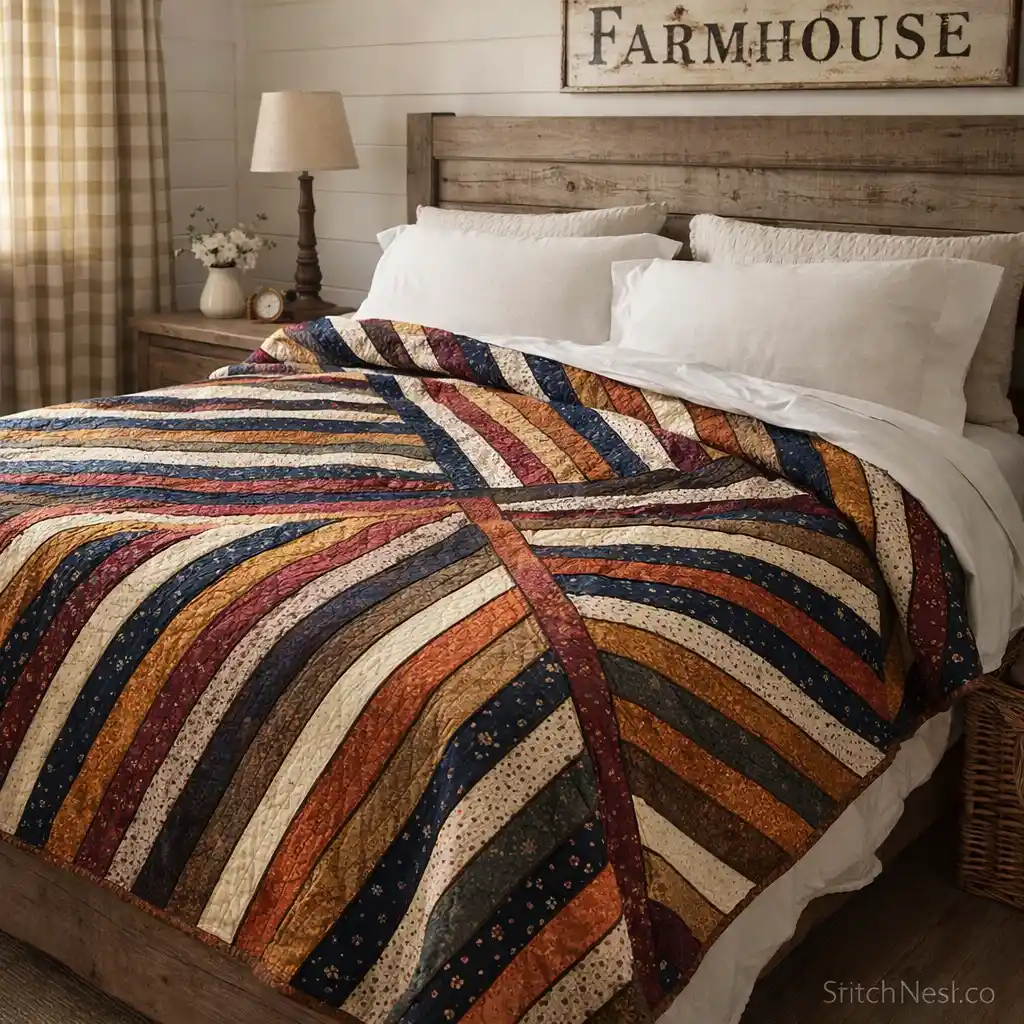
Skill level: Beginner
Time required: 5 to 8 hours
One block jelly roll quilts are a great starting point because the repeated layout removes a lot of guesswork while still creating a finished quilt that looks thoughtfully designed. The fabric strips naturally create movement across the quilt without needing complicated piecing techniques. Hearthside Comforts explains the block construction clearly, which makes the entire quilt feel approachable from the very beginning.
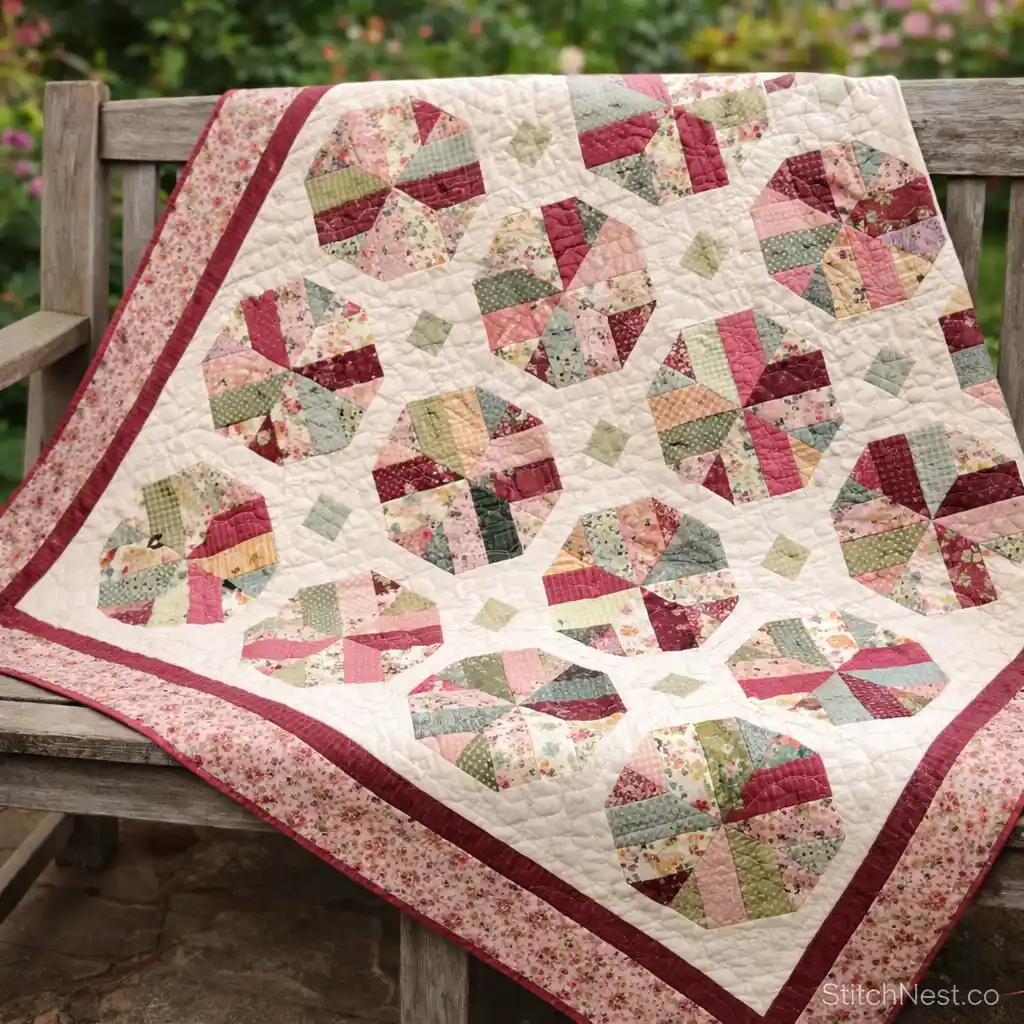
2. Free Jelly Roll Quilt Spinner Pattern
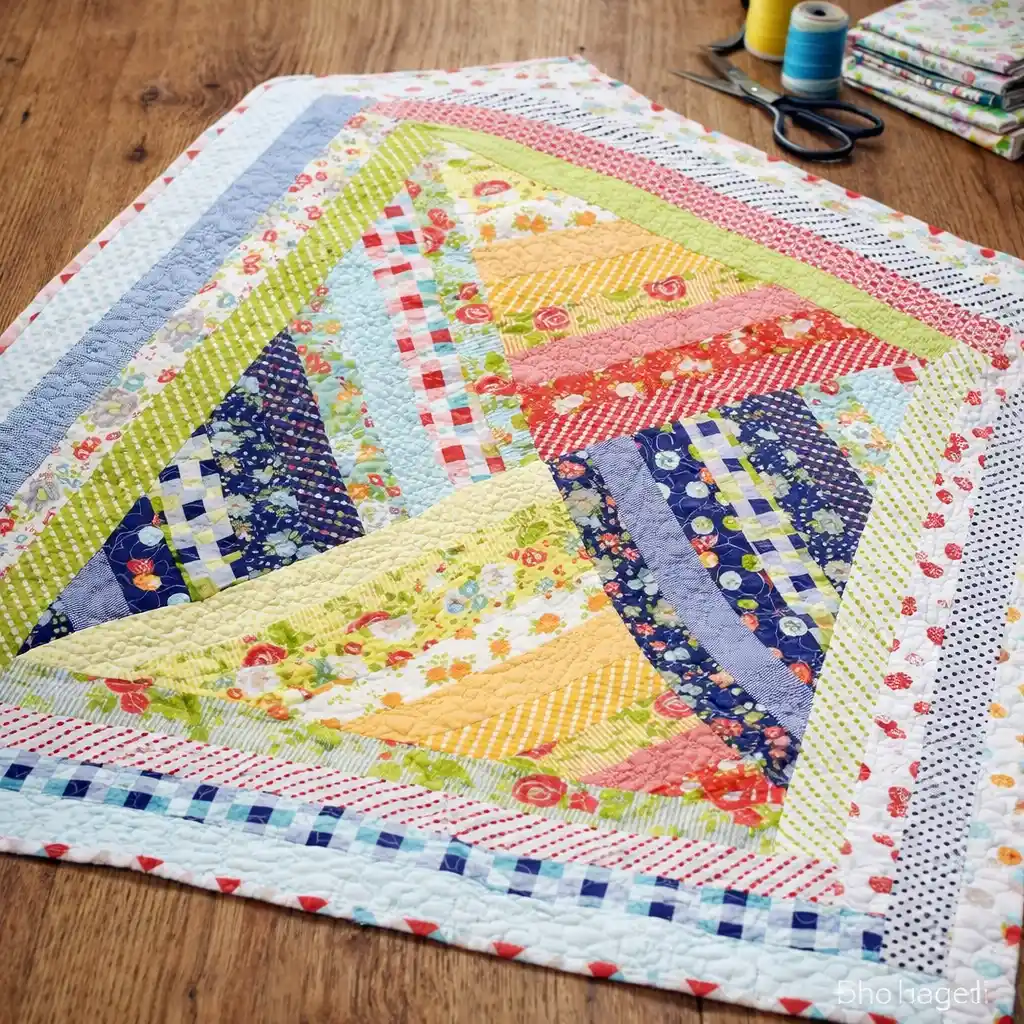
Skill level: Beginner to Intermediate
Time required: 6 to 9 hours
Spinner quilts create a sense of movement that makes the finished layout feel much more detailed than the actual piecing process. Since the design relies heavily on strip direction and contrast, color placement becomes just as important as sewing accuracy. A common mistake is using fabrics with very similar tones, which can make the spinner effect disappear visually once the blocks are assembled. The Little Mushroom Cap breaks the pattern down here.
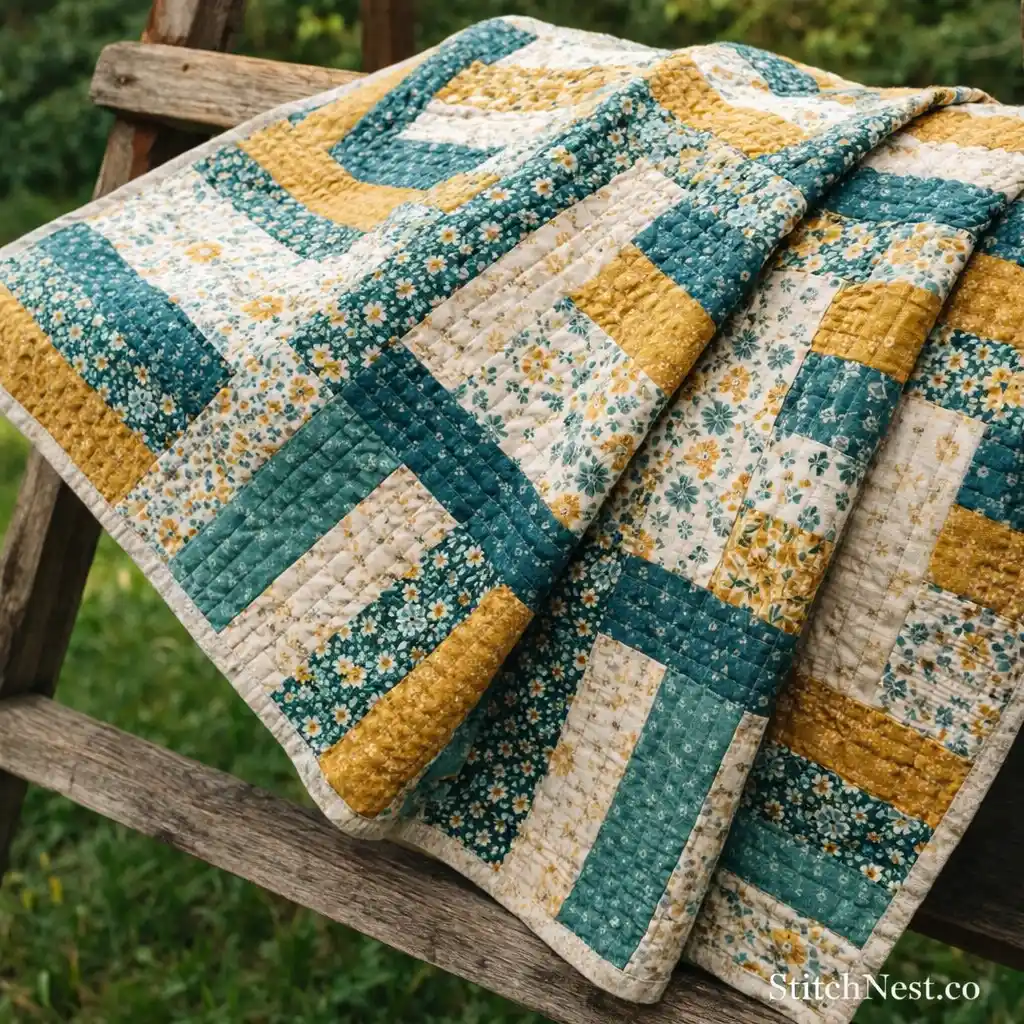
3. Window Panes Jelly Roll Quilt Pattern
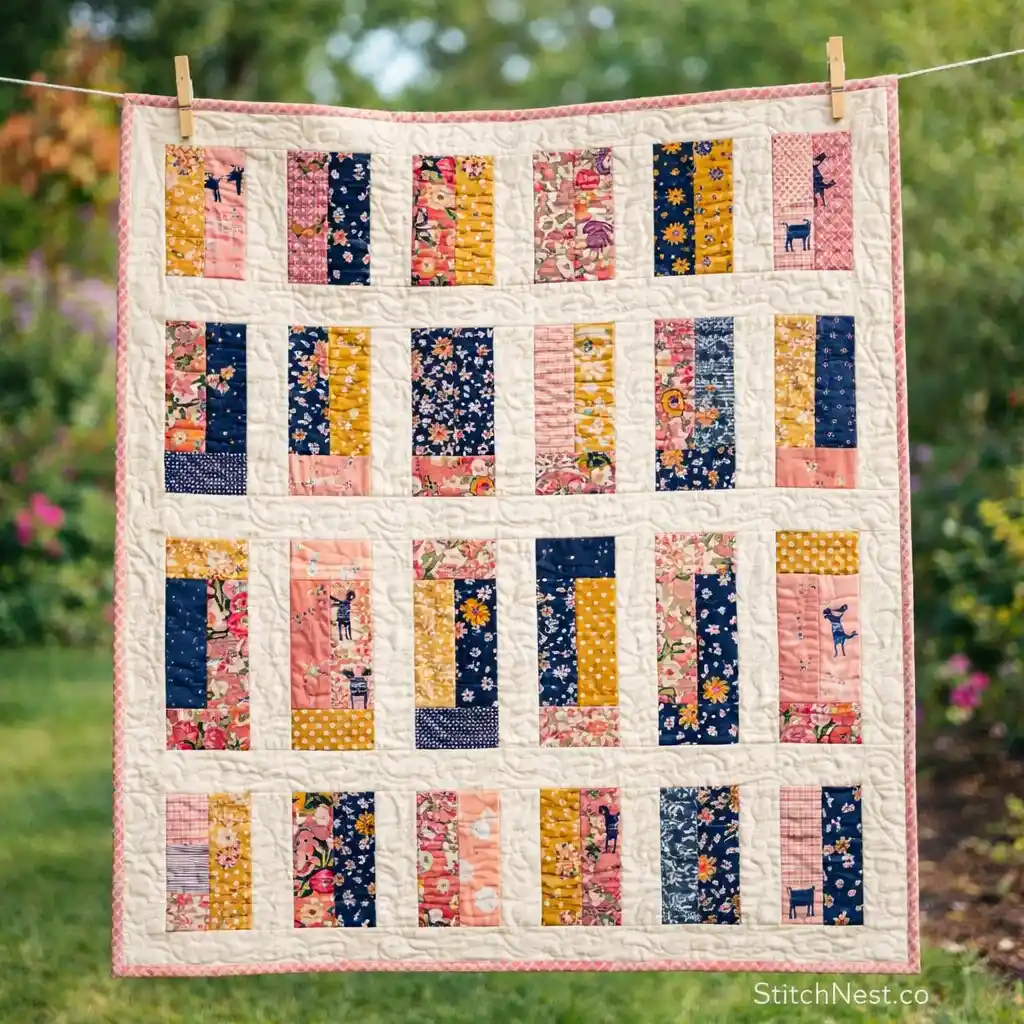
Skill level: Intermediate
Time required: 7 to 10 hours
Window pane quilts have a clean geometric style that works beautifully with jelly roll strips because the long fabric lines naturally frame the design. The layout feels modern without requiring overly difficult construction, but keeping seam intersections aligned makes a noticeable difference in the final appearance. Here’s the DIY!
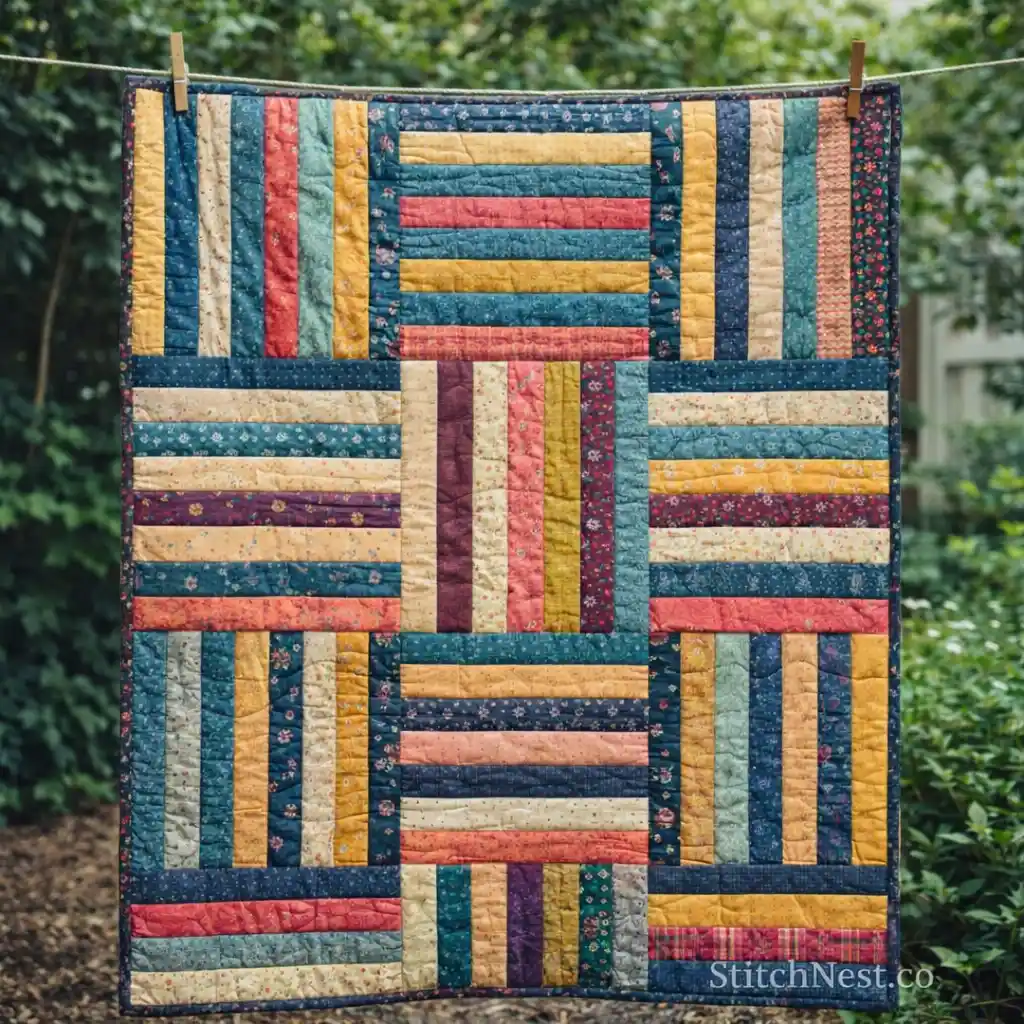
4. FREE Jelly Roll Quilt Pattern
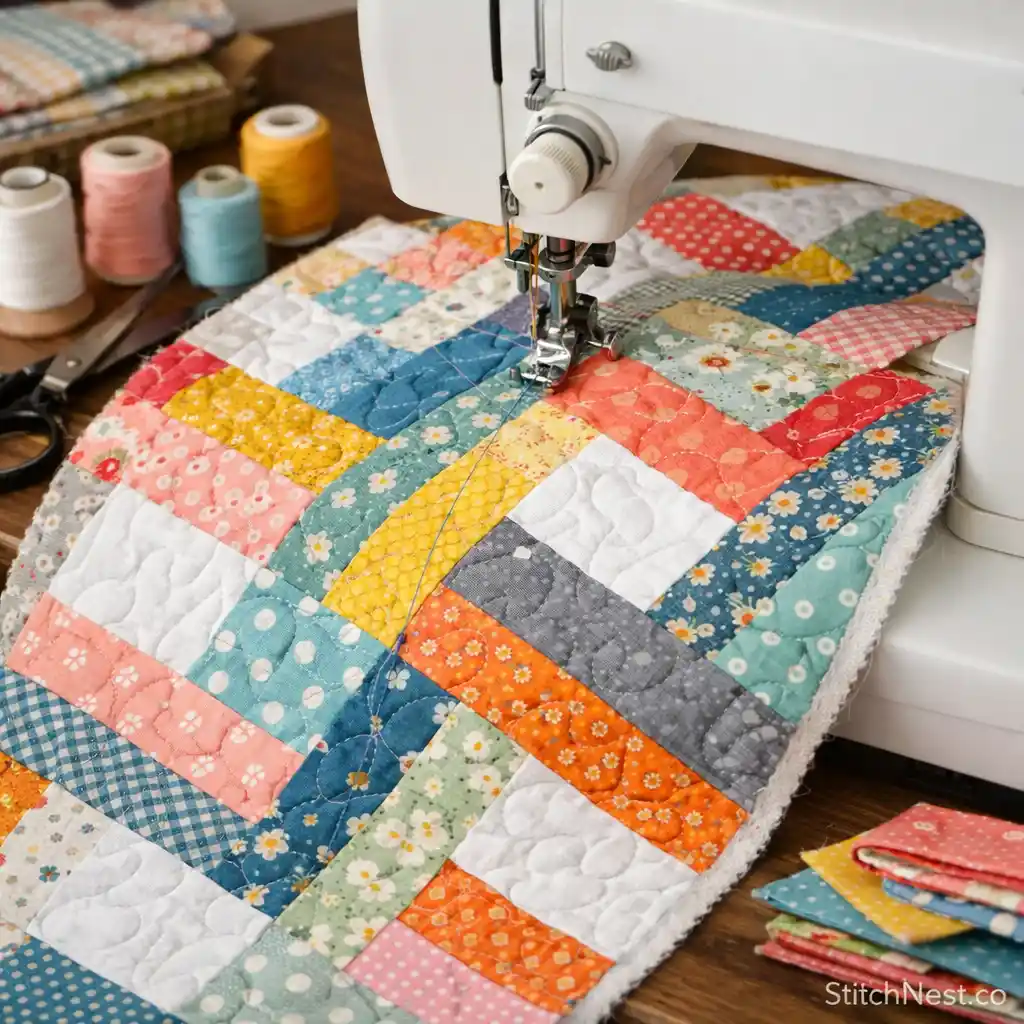
Skill level: Beginner
Time required: 5 to 7 hours
This style keeps the piecing simple while allowing the jelly roll fabrics to do most of the visual work. Since the strips are already coordinated, the quilt comes together quickly without needing much fabric planning beforehand. One helpful habit is trimming blocks regularly instead of waiting until the entire top is assembled because small inaccuracies add up faster with strip quilts. Fat Quarter Shop keeps the process straightforward and beginner friendly while still creating a finished quilt that looks polished.
Nothing freshens up a table quite like flowers made from fabric. If you’re in the mood for more spring-inspired quilting ideas, these floral quilt table runner patterns are filled with bright, cheerful designs you’ll want to sew right away.
5. Strip Quilt Jelly Roll Pattern Reboot
Skill level: Beginner
Time required: 4 to 6 hours
Strip quilts are one of the fastest ways to turn jelly rolls into a finished quilt because the layout depends more on repetition and balance than complicated blocks. The simplicity also gives you more room to play with fabric placement and color flow. Diary of a Quilter explains the DIY in a very relaxed and practical way that feels easy to follow.
6. An Easy & Quick Jelly Roll Quilt Pattern
Skill level: Beginner
Time required: 4 to 6 hours
Quick jelly roll quilts are perfect when you want something cozy and satisfying without committing to a long project timeline. The repetitive sewing rhythm becomes very relaxing once the strips start building into larger sections. You can check out the pattern by I See Stars Quilting here. And don’t forget to try out these lovely French roses quilts!
7. How To Sew A Jelly Roll Quilt
Skill level: Beginner
Time required: 5 to 8 hours
This tutorial focuses more on understanding the basic construction process, which makes it especially useful if you are completely new to jelly roll quilting. The layout stays approachable, but the finished quilt still looks layered and colorful once assembled. DIY Joy keeps the process beginner friendly and easy to understand without overwhelming the reader with technical details.
Every quilter needs a running list of future projects. Check out these quilt ideas for inspiration, new techniques, and patterns worth adding to your sewing queue.
8. Hexaround Free Jelly Roll Quilt DIY Pattern
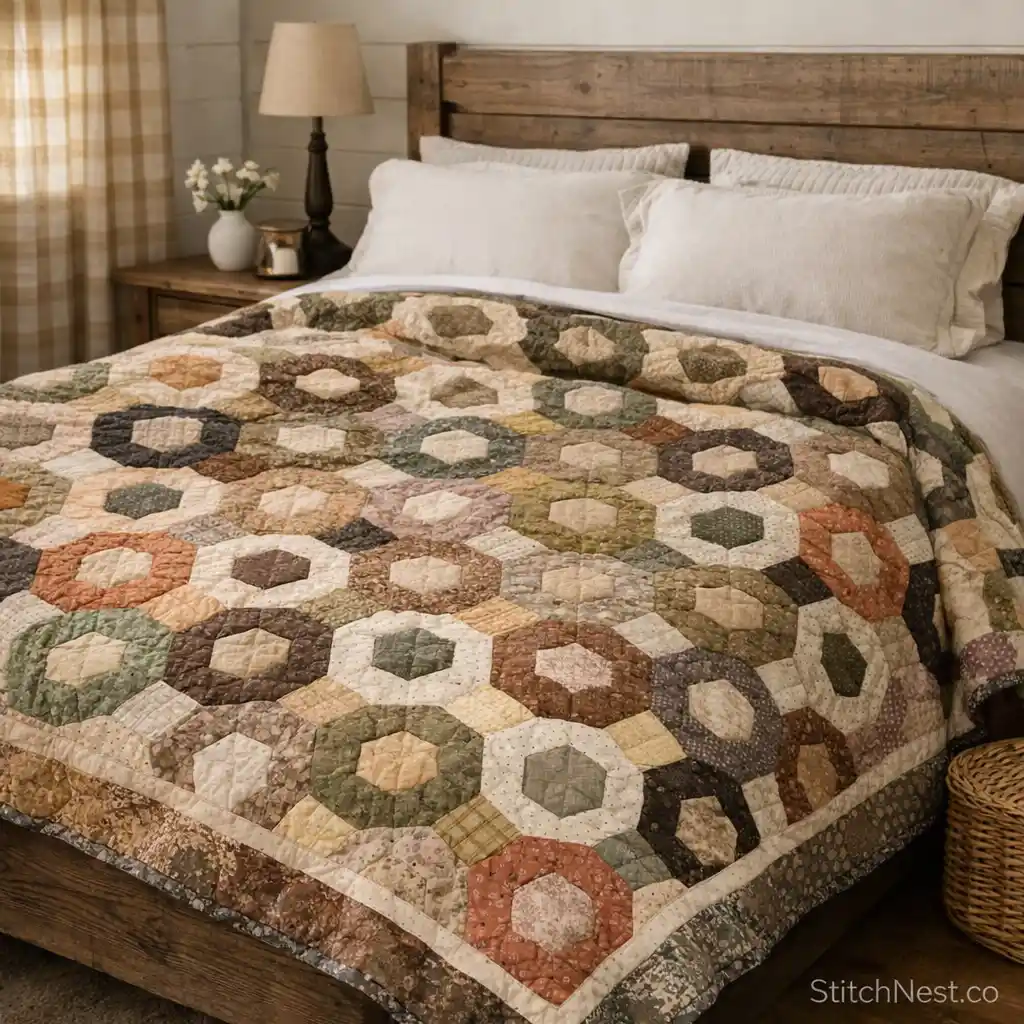
Skill level: Intermediate
Time required: 7 to 10 hours
Hexagon inspired jelly roll quilts create a softer geometric look that feels more intricate than standard strip layouts. Even though the finished quilt appears detailed, most of the structure still comes from repeated strip piecing and careful arrangement. You know, taking extra time with layout planning helps the hexagon shapes stand out much more clearly across the quilt. Just follow this step by step guide.
9. How to Make an Easy Jelly Roll Quilt
Skill level: Beginner
Time required: 4 to 7 hours
This easy jelly roll quilt pattern focuses on simplicity and speed while still giving the finished quilt enough texture and movement to feel visually interesting. Since the strips already coordinate, the project becomes more about clean sewing and balanced placement than fabric matching. Pressing seams flat after every few rows helps the quilt top stay much easier to handle during assembly. On Williams Street explains the process in a way that feels calm, practical, and very beginner friendly.
If you love classic quilt designs that never seem to go out of style, these granny square quilt patterns deserve a spot on your sewing list.
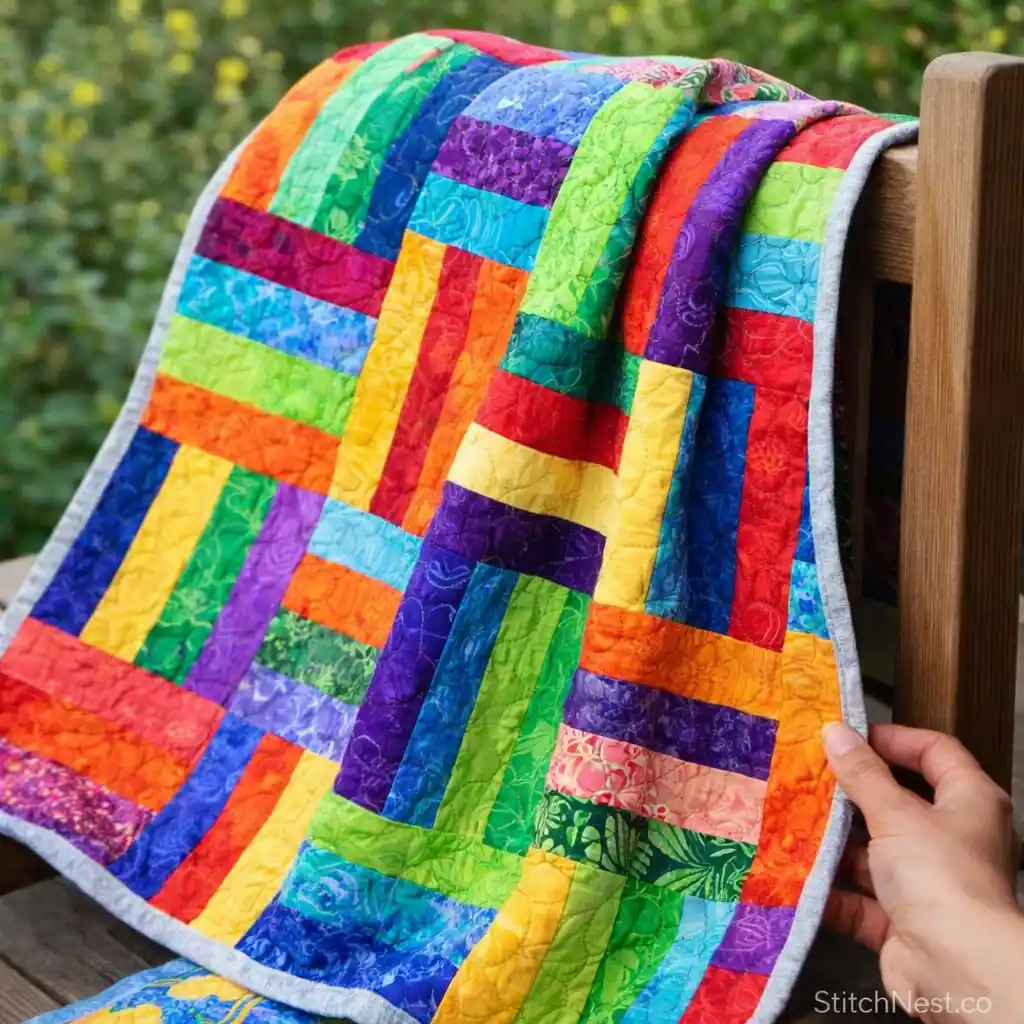
10. Colorful Jelly Roll Quilt
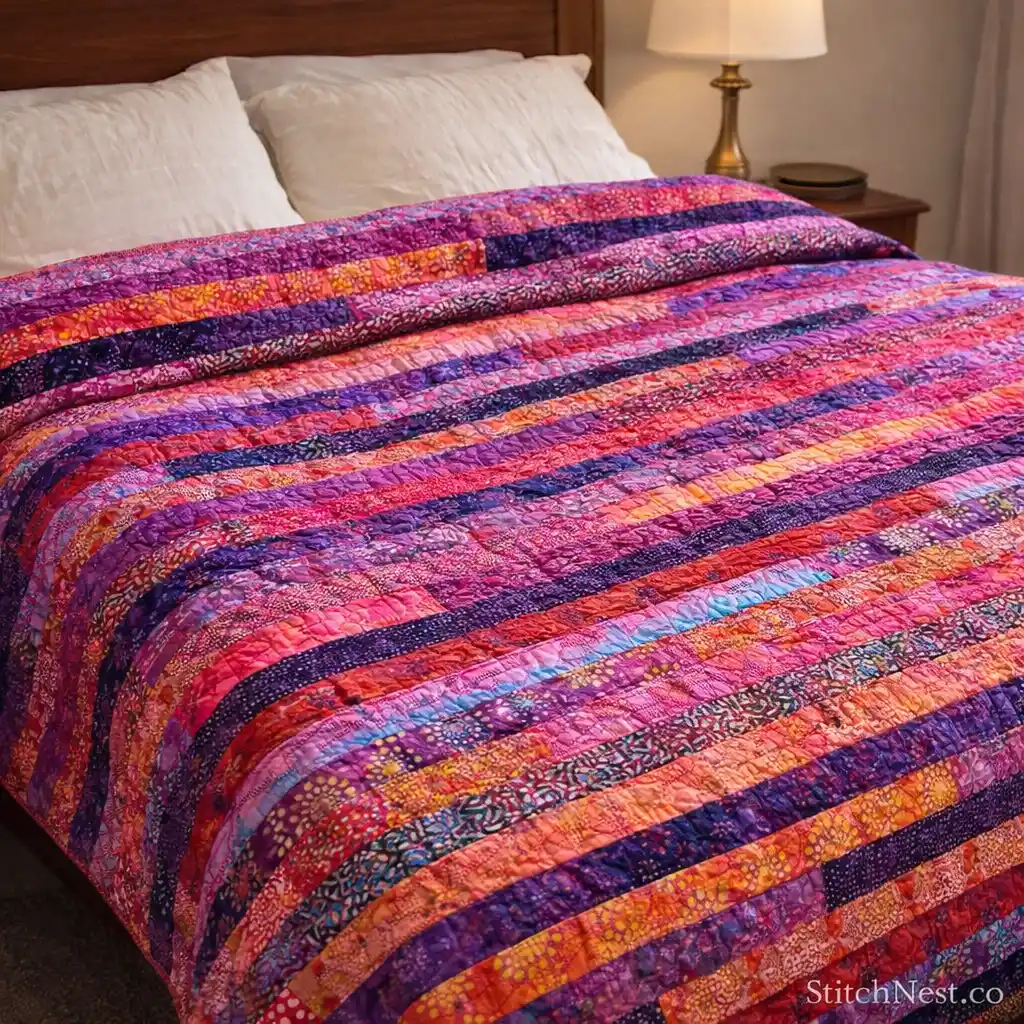
Skill level: Beginner to Intermediate
Time required: 6 to 9 hours
Colorful jelly roll quilts are especially satisfying because the fabric strips naturally create variety and movement across the entire quilt surface. Bright collections can look busy very quickly, though, so spacing stronger colors throughout the layout usually creates a more balanced final result, as shown in the pattern here. One thing experienced quilters often do is step back from the design wall occasionally to check whether certain shades are clustering too heavily in one area.
If you enjoy timeless quilt blocks that never seem to go out of style, take a look at these Liberty Star quilt patterns for even more inspiration.
Common Mistakes When Making a Jelly Roll Quilt
- Sewing long strips too quickly, which can stretch the fabric and create waves across the quilt top
- Using highly similar fabric tones that make the block or strip pattern disappear visually
- Skipping regular pressing while piecing, causing bulky seams and uneven rows later on
- Forgetting to square up blocks or sections before final assembly
- Letting bold prints cluster together too heavily instead of distributing them across the quilt evenly
If you love classic quilt blocks that never seem to go out of style, these Ohio Star quilt patterns are well worth a look.
Practical Tips to Make Jelly Roll Quilts Look More Balanced
Jelly roll quilts usually come together much more smoothly when you spend a little extra time arranging strips before sewing. Even though precut collections are coordinated, spreading out similar colors and prints helps the quilt feel more balanced once assembled. It also helps to press seams regularly instead of waiting until the end because long strip sections become harder to flatten later on.
Many quilters find that shorter chain piecing sessions improve accuracy since fabric strips are easier to control before fatigue sets in. If the quilt starts feeling visually crowded, adding a few calmer strips between bold quilt prints often helps the layout breathe naturally.
Jelly roll quilts are fast, satisfying projects that make quilting feel approachable without sacrificing the cozy handmade look people love. The precut strips remove much of the preparation work, which means you can spend more time enjoying the piecing and watching the design come together row by row. Why don’t you try these flower quilts next?

I read this piece of writing fully about the resemblance of
latest and previous together, it’s awesome article.