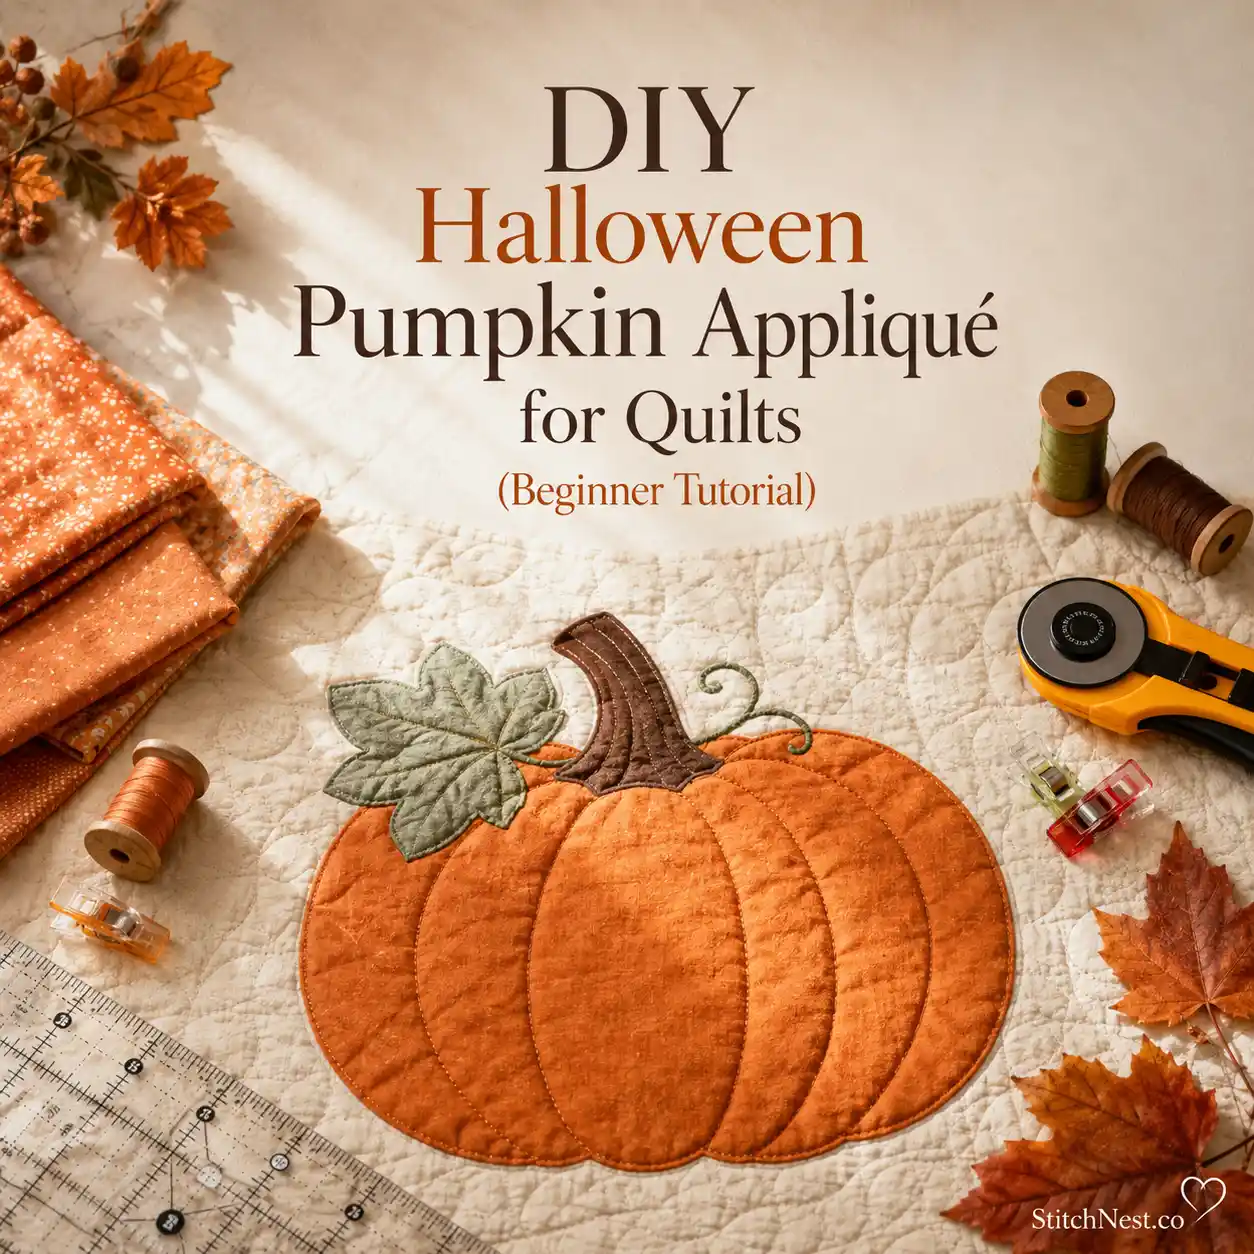
Halloween decorating doesn’t have to mean buying a cart full of seasonal décor you’ll pack away in a few weeks. A simple DIY Halloween pumpkin appliqué lets you add a cozy fall touch to quilts, tote bags, table runners, pillows, tea towels, and just about any fabric project you already have planned. If you’ve never tried appliqué before, don’t worry; we’ll work through every step together, from choosing fabrics to stitching smooth curves, so you can finish with a pumpkin you’ll be proud to sew onto anything.
Why You’ll Love This Pumpkin Appliqué
Pumpkin appliqués are one of those projects you’ll find yourself returning to every fall. They’re quick enough to finish in an afternoon, use up fabric scraps that might otherwise sit forgotten, and give every handmade project a little seasonal personality. One thing you’ll notice pretty quickly is that appliqué doesn’t demand perfection. A slightly wavy curve or a stitch that’s a hair out of line usually disappears once the whole project comes together. That’s part of what makes it such a relaxing technique to learn.
A pumpkin can become the centerpiece of a throw pillow, a cluster of smaller pumpkins can decorate a table runner, or you can scatter different sizes across a quilt for a charming patchwork effect. Once you’ve made your first one, you’ll already have the skills to create dozens more.
What You’ll Need
You don’t need an elaborate sewing room to make a beautiful appliqué. Most of these supplies are already staples for quilting and sewing, and investing in quality basics makes the entire process smoother.
- Rotary cutter with a self-healing cutting mat
- High-quality cotton fabric bundles
- Sewing machine with quilting foot attachment
- Soft batting for a cozy finished feel
A sharp pair of fabric scissors makes a noticeable difference when cutting rounded pumpkin pieces. Dull blades often leave tiny jagged edges that become harder to stitch smoothly.
If you enjoy quilting, a rotary cutter, self-healing cutting mat, and acrylic quilting ruler make cutting multiple pumpkins faster and far more accurate than scissors alone.
Choosing Fabrics for the Best Results
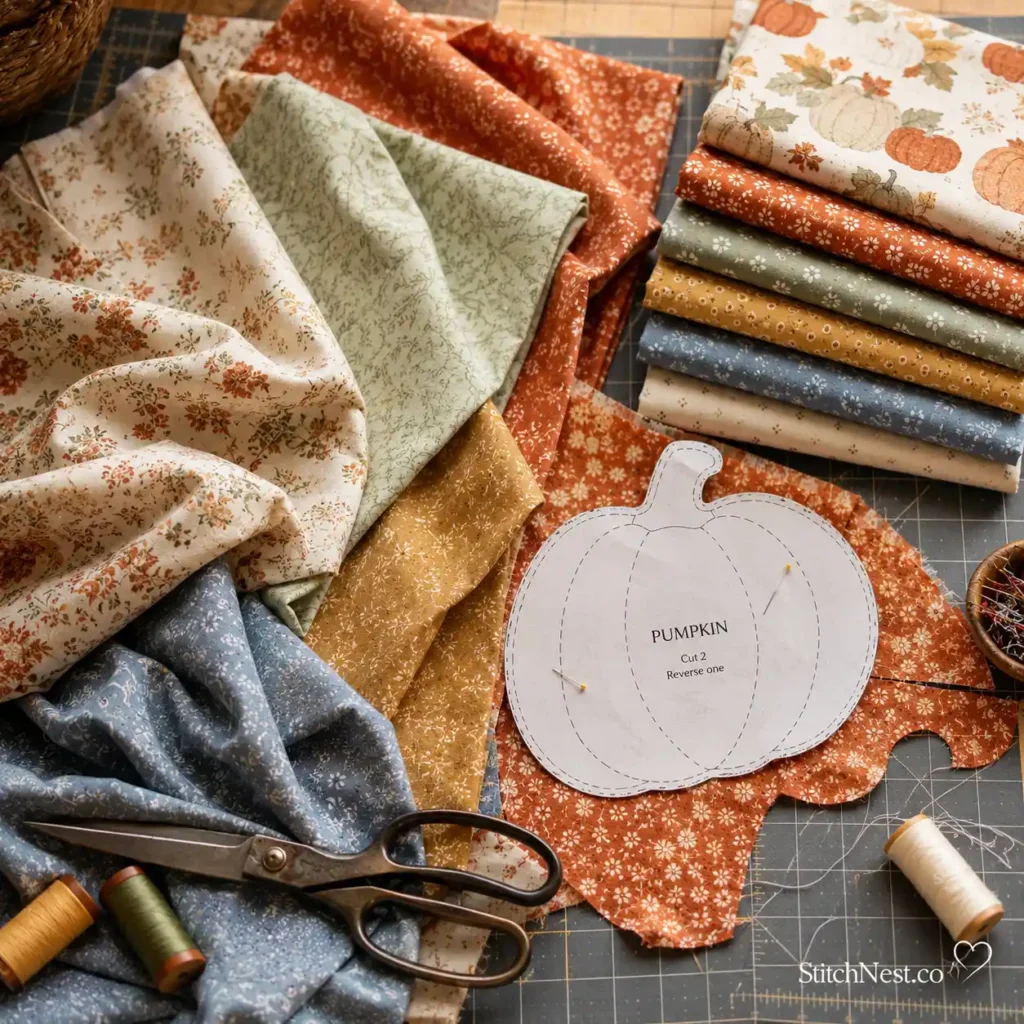
One mistake many beginners make is choosing fabric based only on color. Texture, print scale, and fabric weight all affect how your finished pumpkin looks.
Quilting cotton is the easiest fabric to work with because it presses beautifully, doesn’t stretch much, and holds crisp edges after fusing. Medium-sized prints usually create the nicest pumpkin shape. Large floral patterns often disappear once the pumpkin is cut out, and tiny busy prints can make the shape feel visually cluttered.
Don’t feel limited to bright orange, either. Soft cream pumpkins create a farmhouse look, muted sage green feels modern, and rich mustard or rust fabrics fit beautifully into fall décor. If you have a few orange scraps sitting in your fabric bin, lay them next to each other before choosing one. You’ll often find that a lightly mottled print or a tiny tone-on-tone design gives the pumpkin more character than a completely solid fabric.
For the stem, darker browns with a woodgrain-style print create a natural appearance. Small green prints work nicely for leaves because they add texture without distracting from the pumpkin itself.
If your project will be washed often, prewashing your fabrics is worth the extra few minutes. Cotton naturally shrinks after the first wash, and prewashing helps keep your appliqué lying flat long after it’s stitched.
This coordinated fall fat quarter bundle gives you plenty of fabric for several pumpkins, matching leaves, and future fall projects without buying large cuts of fabric you’ll never fully use.
Picking the Right Fusible Web
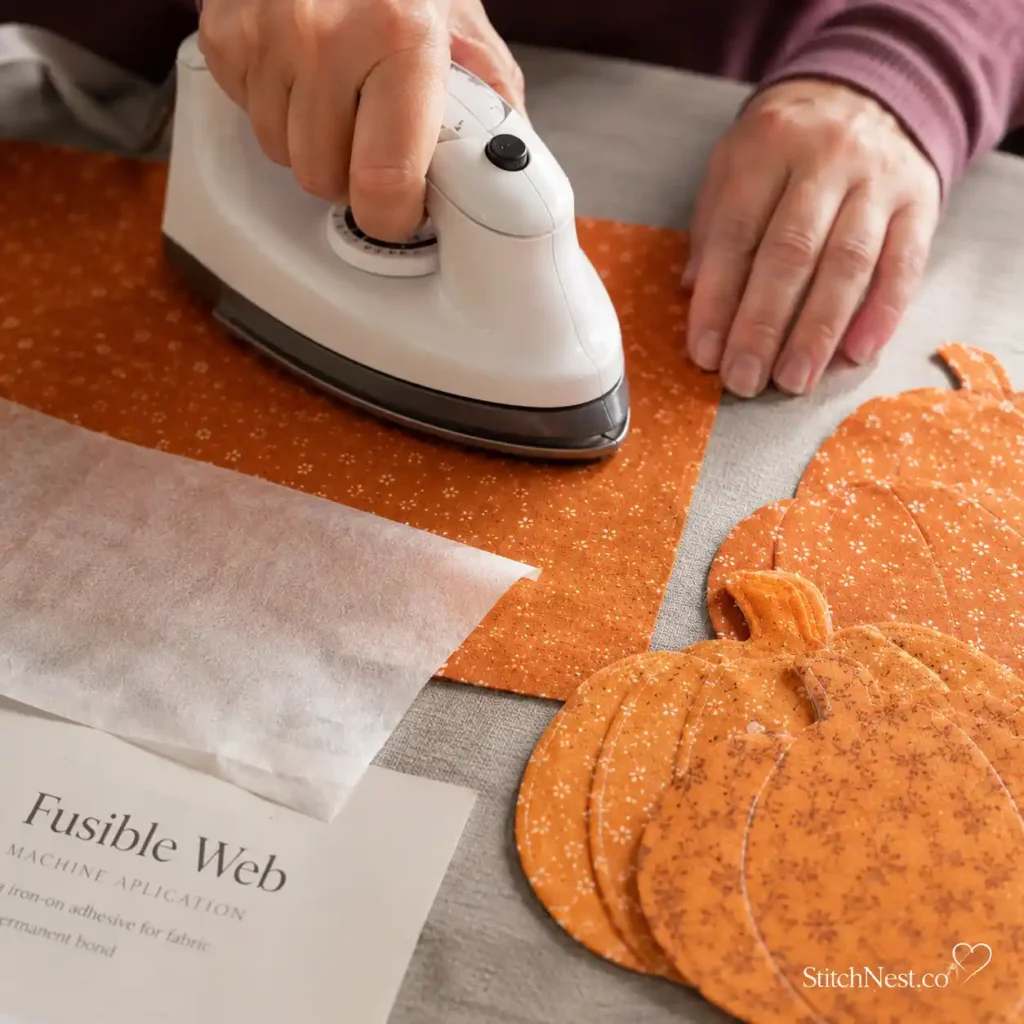
Fusible web is what temporarily holds your pumpkin pieces in place before you stitch them permanently. It keeps every piece exactly where you want it, so you’re not trying to hold tiny leaves in place and guide fabric under the sewing machine at the same time.
Lightweight fusible web is usually the best choice because it keeps the appliqué flexible. Heavy products can make fabric feel stiff, especially if you’re layering several pieces together.
Most beginners find paper-backed fusible web the easiest to use. You simply trace your template onto the paper side, cut it out, fuse it to the wrong side of the fabric, peel away the backing, and then iron the pumpkin onto your background fabric before sewing.
Love crocheting flowers? Our DIY crochet hibiscus flower tutorial walks you through every step and shows you how to create a realistic bloom you can add to bags, hats, hair clips, and more.
Let the iron do the work instead of moving it back and forth across the fabric. Press for a few seconds, lift it straight up, then move to the next area. Sliding the iron can shift small pieces without you noticing until they’re already fused down.
A small craft iron isn’t essential, but once you begin making appliqué regularly, you’ll probably wonder how you ever managed without one. The smaller soleplate makes it much easier to press tiny leaves and stems without accidentally moving nearby pieces.
A mini craft iron is especially helpful for appliqué because it lets you press small fabric shapes with much better control than a full-size household iron.
Preparing Your Pumpkin Template
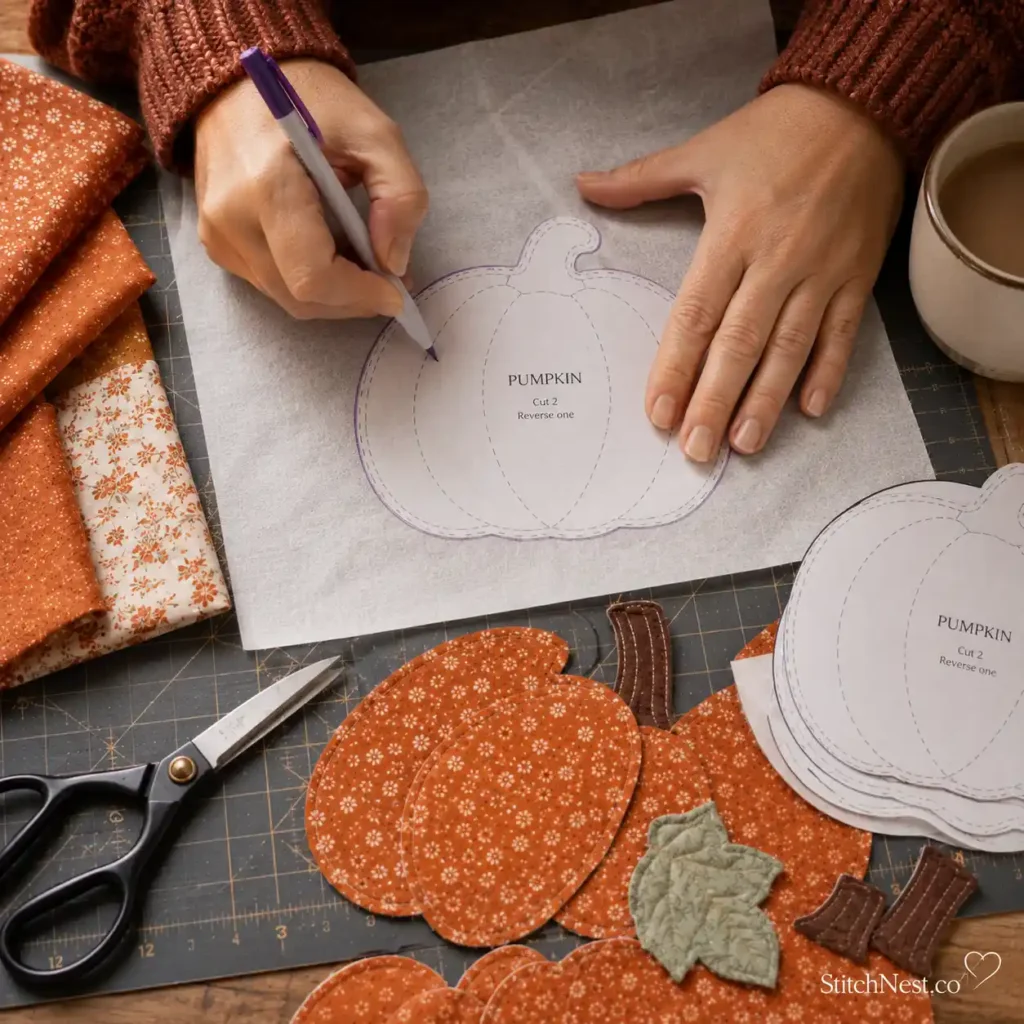
If this is your first appliqué project, resist the urge to add lots of little details. A clean pumpkin shape is easier to cut, easier to stitch, and usually looks better once it’s sewn onto a quilt or pillow.
Start with a pumpkin that’s about 5 to 6 inches wide. That’s large enough to practice smooth curves but still small enough to fit onto most home décor projects.
Instead of drawing every ridge separately, begin with one rounded pumpkin body. The stitched quilting lines you add later will naturally create the appearance of pumpkin sections.
Trace your pumpkin shape onto the paper side of the fusible web. Remember that the traced shape will be reversed once fused to the fabric. Symmetrical pumpkins won’t reveal the difference, but leaves and stems definitely will. If you’re using an asymmetrical leaf, flip your template before tracing so it faces the correct direction after fusing.
Cut around each traced piece, leaving roughly a quarter-inch border outside the line. There’s no need to cut perfectly at this stage because you’ll trim the exact shape after fusing.
Sometimes all it takes is a few appliqué pieces to turn a simple quilt into something truly memorable. If you’re looking for fresh inspiration, don’t miss these appliqué quilt patterns full of color and creativity.
Fusing the Pieces
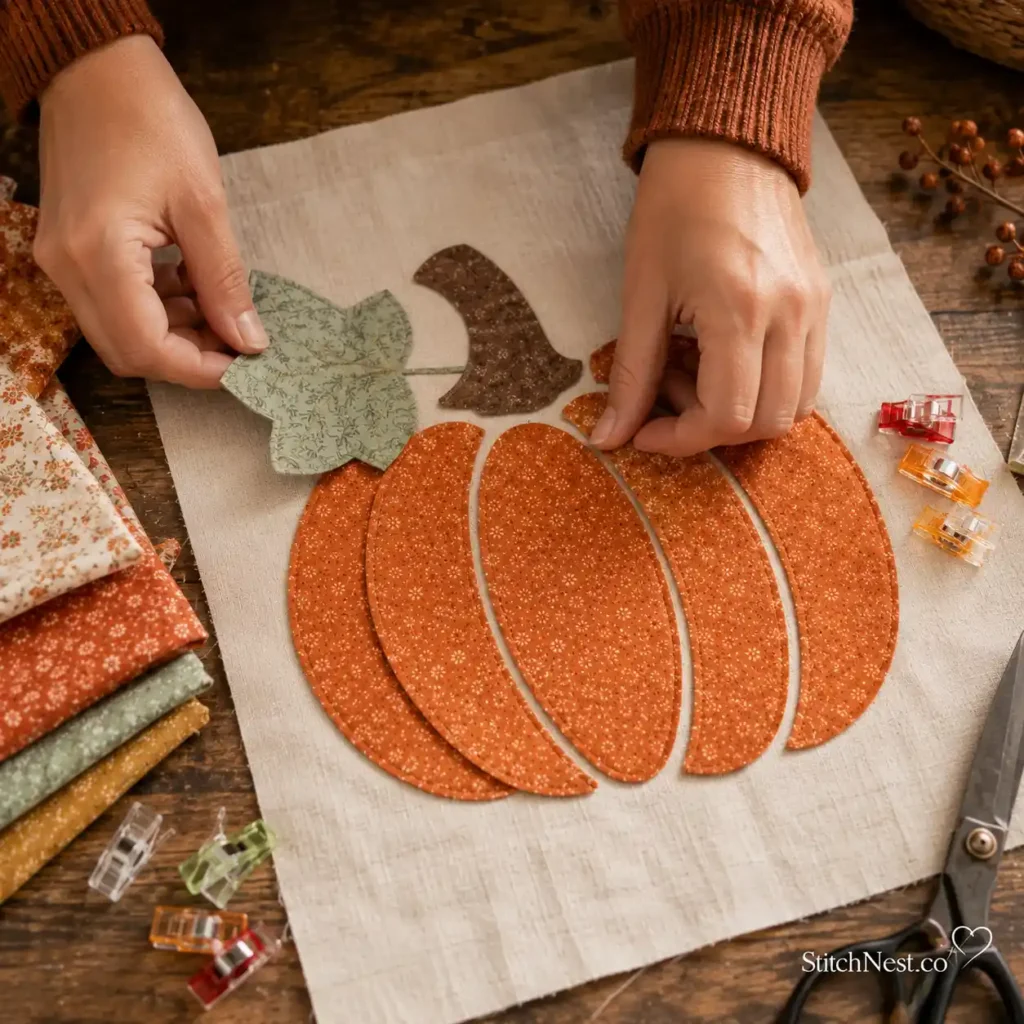
Lay the rough-cut fusible web pieces, adhesive side down, onto the wrong side of your pumpkin fabric. Check your fusible web manufacturer’s instructions for the recommended heat setting, but a dry cotton setting works well for most brands.
Press each piece firmly for several seconds rather than moving the iron back and forth. Let the fabric cool completely before cutting. Warm adhesive is softer and can shift slightly, making precise cutting more difficult.
Once cooled, carefully cut exactly along your traced line. Sharp scissors make a bigger difference than most people expect here. You’ll get smoother curves with slow, steady cuts than trying to trim the entire pumpkin in one snip. Slow, controlled cuts create smoother curves than rushing through the shape in one motion.
Now peel away the paper backing. You’ll notice a thin adhesive layer remaining on the fabric.
Arrange your pumpkin, stem, and leaves on your background fabric before ironing anything permanently. Move the pieces around until the proportions feel balanced. Sometimes shifting a stem upward by only a quarter inch completely changes the finished look.
When you’re happy with the arrangement, press each piece into place using a gentle up-and-down motion. Don’t worry if one edge lifts slightly; we’ll secure every edge with stitching in the next section.
There’s something about puppy quilts that never goes out of style. If you’re ready for another fun project, don’t miss these quilted puppies patterns every dog lover needs.
Stitching Your Pumpkin Appliqué
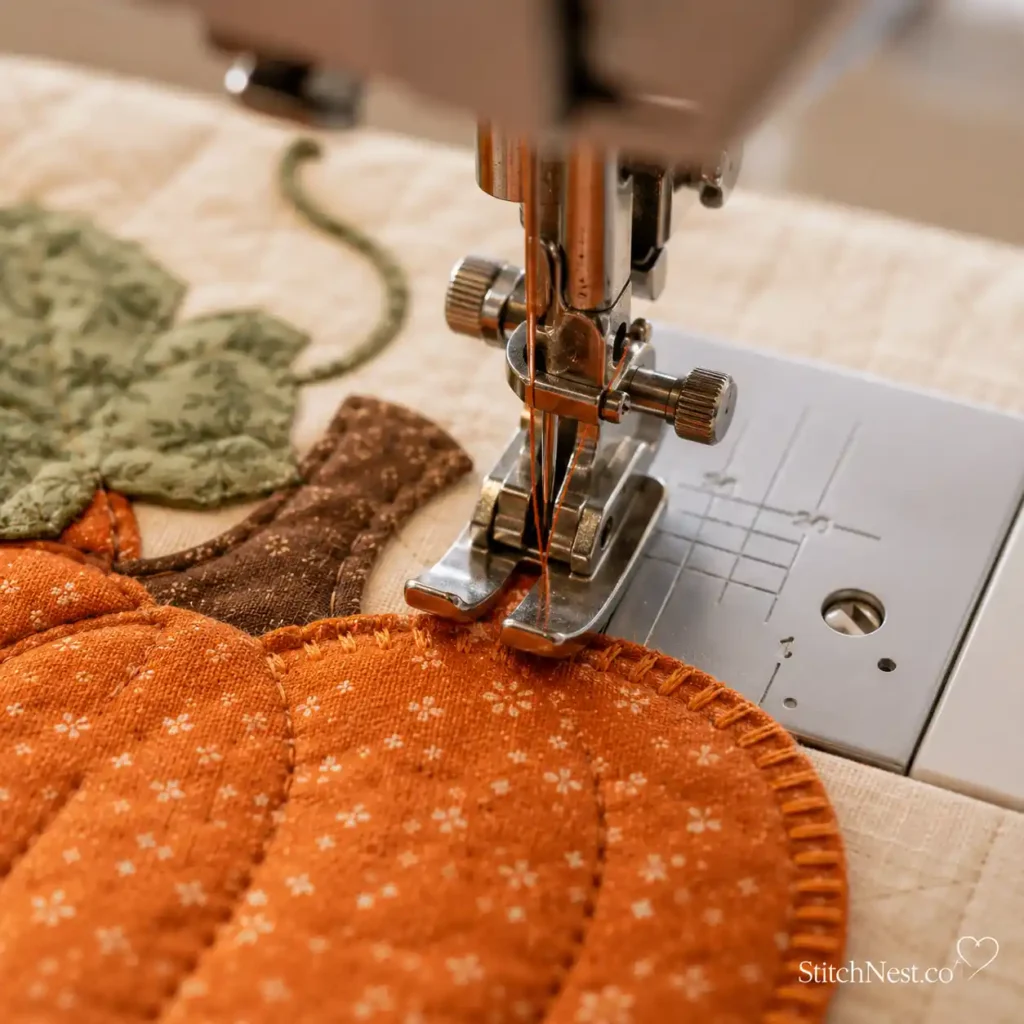
Now comes the part that brings everything together. Your pumpkin is already fused to the background fabric, so you don’t have to rush or worry about pieces shifting around. Take your time here. A steady pace almost always gives you smoother stitches than trying to finish as quickly as possible.
If this is your very first appliqué project, grab a couple of fabric scraps and sew a few practice lines before you begin on the pumpkin. Test your stitch width and length on a fabric scrap first. It’s much easier to make small adjustments now than to reach for the seam ripper halfway through your pumpkin.
For most pumpkin appliqués, you have three great options. A narrow zigzag stitch is beginner-friendly and forgiving. A blanket stitch creates a traditional handmade look that many quilters love. A satin stitch gives crisp, bold edges, but it takes a little more patience because the stitches sit very close together.
If you’re liking this one, then you’ll have loads more fun trying this DIY crochet dragonfly tutorial! Don’t miss out!
If you’re unsure which one to choose, start with a blanket stitch. It hides tiny imperfections beautifully and adds just enough texture without overwhelming the design.
Before sewing, thread your machine with a color that blends into the pumpkin fabric rather than matching the background. Matching the appliqué usually gives the cleanest finish because your eye naturally focuses on the pumpkin instead of the stitching.
Lower your sewing speed if your machine has a speed control. Slower stitching gives you much better control around curves, and you’ll feel more relaxed instead of trying to steer the fabric at the last second.
Sewing Around the Curves
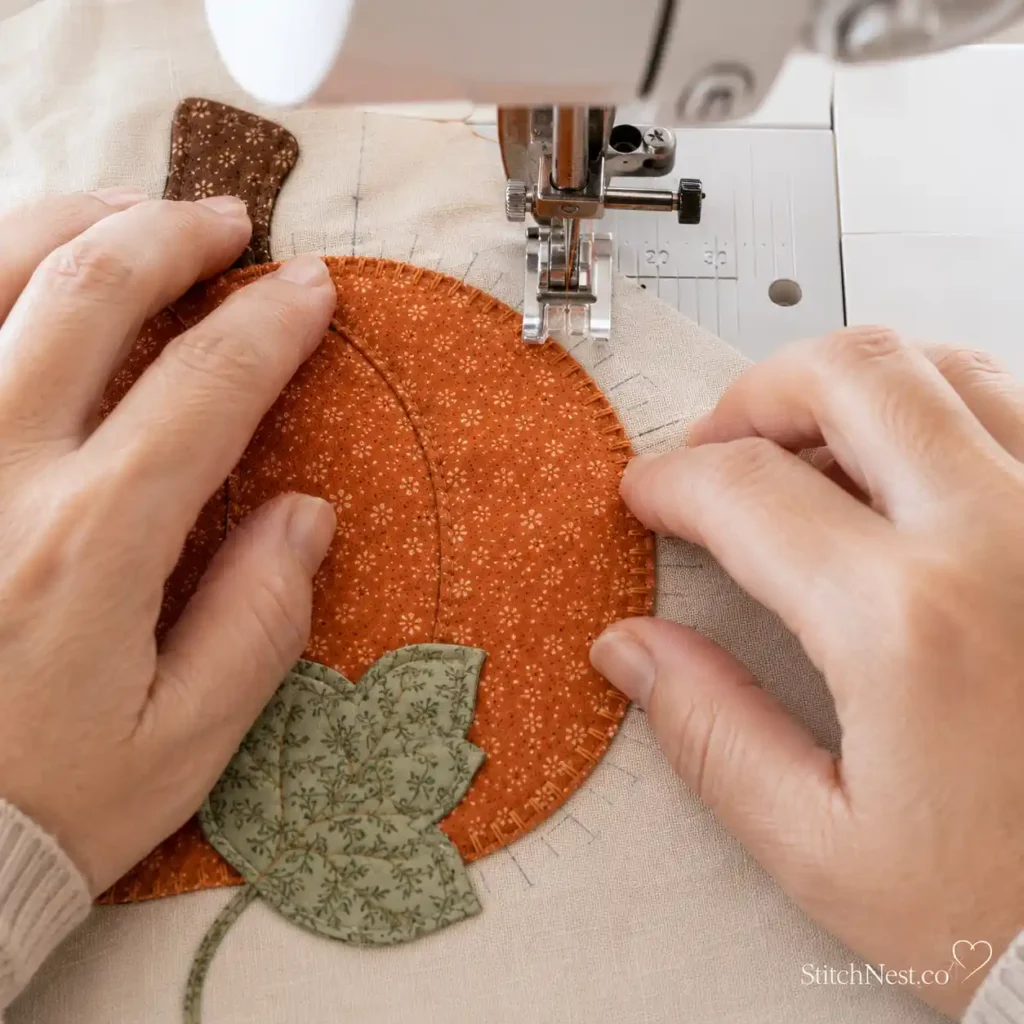
Start at the bottom edge of the pumpkin instead of the top. Any overlap where you finish will be much less noticeable near the base.
Guide the fabric gently under the presser foot. Let the sewing machine feed the fabric for you instead of pulling it forward. Pulling stretches the fabric ever so slightly, and that usually shows up as little ripples around the finished appliqué.
As you come to a curve, stop every few stitches with the needle in the down position. Lift the presser foot, rotate the fabric just a little, lower the foot, and continue sewing. Those tiny adjustments are what create smooth, rounded edges.
If Halloween quilting is on your project list, be sure to check out our DIY Quilted Halloween Table Runner guide. It includes step-by-step instructions, beginner tips, and plenty of practical quilting advice.
If one side feels easier to sew than the other, that’s completely normal. Most people naturally find one direction easier when stitching curves, and it gets more comfortable with practice.
And if your stitches look a little uneven, don’t sweat it. Once the pumpkin is attached to a pillow, quilt, or table runner, those tiny variations disappear into the texture of the project.
Adding the Stem and Leaves
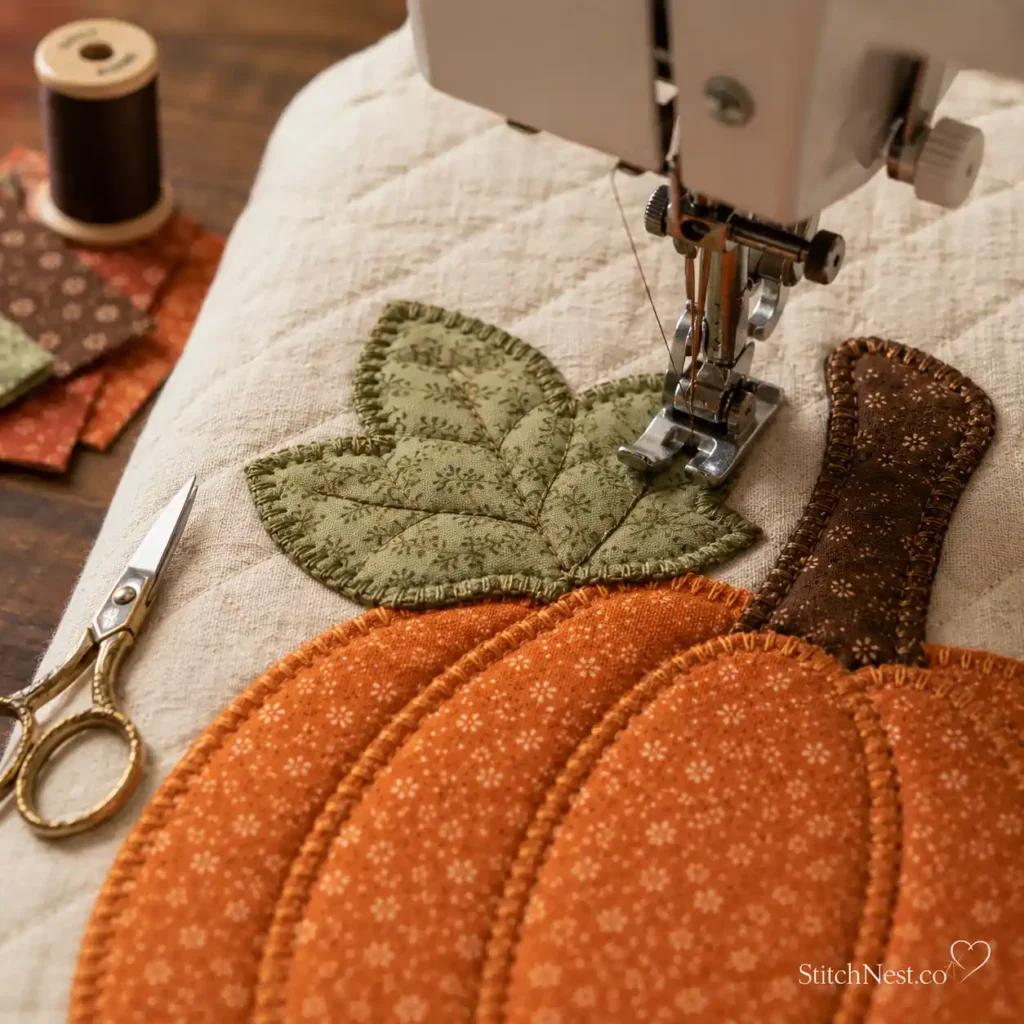
The stem is much smaller than the pumpkin, so shorten your stitch length slightly if you’re using a blanket stitch or zigzag stitch. Smaller stitches hug the curves better and make the edges look cleaner.
The leaves have gentle points that deserve a little extra attention. As you approach each tip, slow down, stop with the needle down, pivot carefully, and continue along the next edge. Trying to swing around the point in one motion almost always rounds it off.
If you’re looking for a beginner-friendly amigurumi project, our DIY Crochet Ladybug Tutorial teaches you how to crochet an adorable 3D ladybug with step-by-step instructions, helpful tips, and plenty of finishing advice.
If you’re making several pumpkins for one project, give each stem a slightly different angle. Nature is wonderfully imperfect, and those little differences make your finished project feel much more realistic. A darker brown thread also adds subtle depth to the stem without needing extra embroidery later.
Also, appliqué pressing sheets are worth having on hand. They let you arrange and fuse layered pieces without worrying about adhesive sticking to your ironing surface, especially when you’re making several pumpkins at once.
Creating the Pumpkin Sections
Right now, your pumpkin probably looks like one rounded shape. That’s exactly what we want. The sections are created with a few simple lines of stitching running from the top of the pumpkin to the bottom. These lines create the illusion of natural ridges without adding extra fabric.
Use a coordinating thread that’s just a shade darker than your pumpkin fabric. Starting at the top center, sew one gently curved line down to the bottom center. Then add two more curved lines on each side, spacing them evenly.
Don’t make the lines perfectly straight. Real pumpkins aren’t perfectly symmetrical, and a gentle curve gives them much more character. Keep these stitching lines light. They’re meant to suggest the shape, not dominate it.
Once those stitching lines are in place, the pumpkin starts taking on that familiar rounded look. It’s a small detail, but it adds enough definition that the appliqué suddenly feels complete.
A walking foot can help keep your stitching even when you’re sewing through multiple fabric layers, especially if your pumpkin is already attached to a quilt sandwich or thicker home décor project. It isn’t required for this tutorial, but it’s a handy upgrade once you start quilting more often.
Giving Your Pumpkin More Dimension
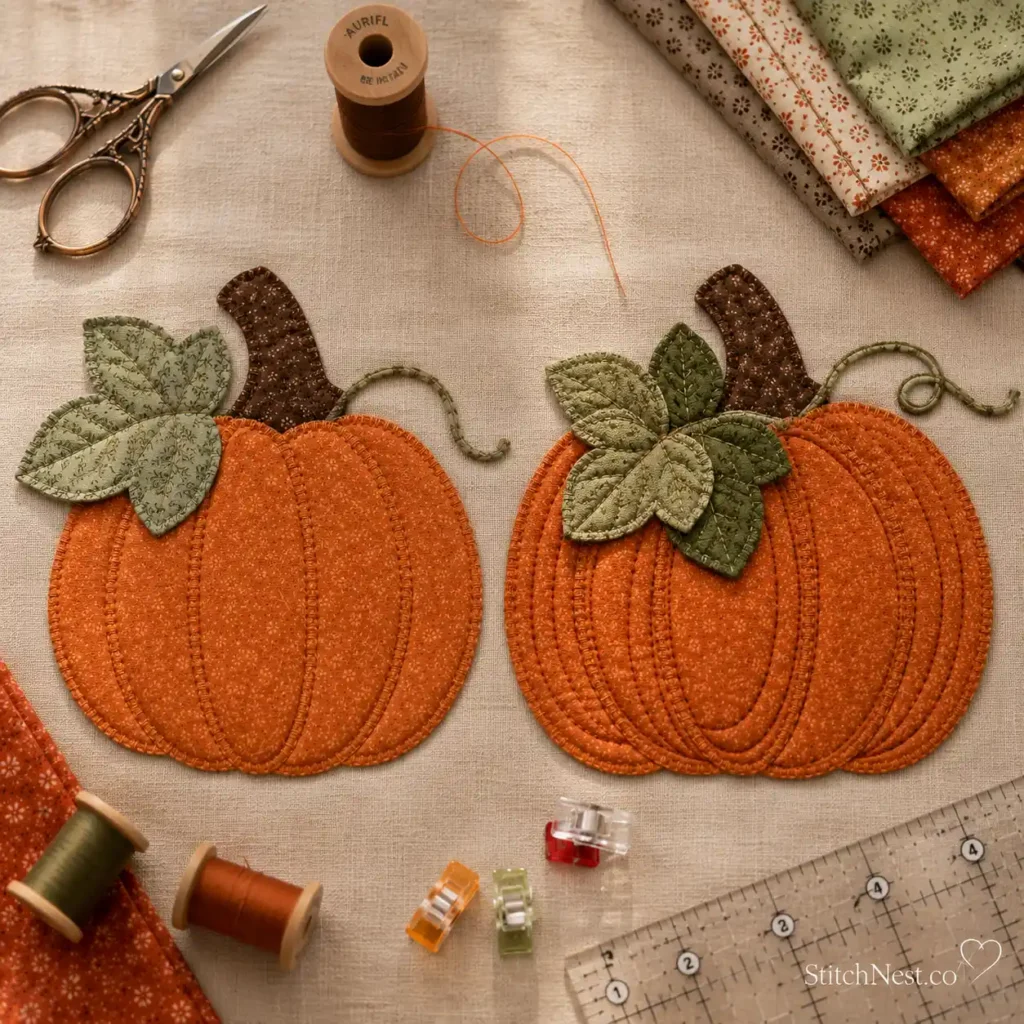
If you want your appliqué to look a little more polished, there are a few easy tricks that make a big difference.
Choose fabrics with subtle variations instead of completely flat solids. Even a lightly mottled orange quilting cotton catches the light differently and makes the pumpkin feel more dimensional.
You can also layer a small leaf partially behind the pumpkin before stitching everything down. That tiny overlap creates depth without adding much work.
Some quilters like to lightly quilt inside the pumpkin after it’s attached. A few echo-stitched curves following the pumpkin’s shape create soft texture that looks especially beautiful on table runners and wall hangings.
Keep the extra quilting subtle. A few stitched lines are usually enough to add texture without taking attention away from the pumpkin itself.
If you’re planning to make more seasonal appliqué projects, heat-erasable fabric pens can make marking quilting lines and repeating shapes much easier. They’re small additions to your sewing kit, but you’ll reach for them again and again.
Common Beginner Mistakes
Almost everyone makes the same few mistakes during their first appliqué project, and they’re all easy to fix. One of the biggest is rushing through the curves. Slow sewing almost always produces cleaner edges than fast sewing.
Another common issue is using thread that contrasts too much with the pumpkin fabric. Unless you’re intentionally creating a decorative look, matching thread usually gives a much neater finish. Some beginners also skip pressing between steps. A quick press after stitching helps the fabric relax and gives your pumpkin a crisp, finished appearance.
Finally, don’t worry if your first pumpkin isn’t picture perfect. Every new pumpkin teaches you something, whether it’s turning corners more smoothly, choosing a better stitch width, or figuring out exactly how slowly your machine likes to sew around curves. That’s how every quilter gets better.
That’s honestly one of the best parts of appliqué. Each project gets a little better than the last, and before long, you’ll be adding pumpkins to everything that could use a cozy fall vibe.
Fun Ways to Use Your Finished Pumpkin Appliqué
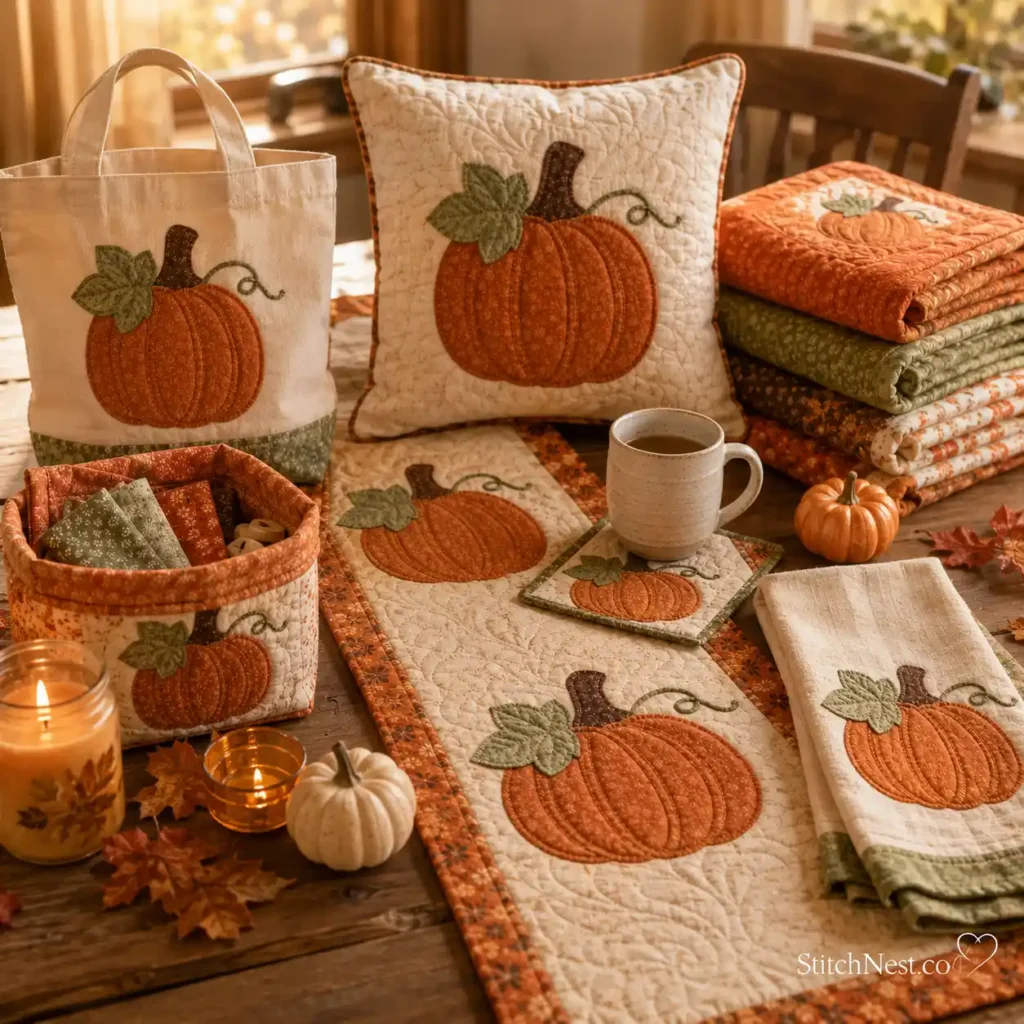
A quilted table runner is always a great place to start. A single oversized pumpkin creates a clean, modern look, or you can arrange several smaller pumpkins across the runner for a patchwork-inspired design that’s perfect for fall gatherings. Pumpkin appliqués also look beautiful on throw pillows. Pair them with plaid, gingham, or neutral fabrics to create cozy seasonal décor that blends right into your home instead of feeling overly themed.
Canvas tote bags are another favorite. Adding a pumpkin to the front turns an everyday tote into something that’s perfect for trips to the farmers market, the pumpkin patch, or even your local coffee shop on a crisp fall morning.
You can also use the same appliqué on fabric baskets, mug rugs, placemats, aprons, wall hangings, quilt labels, nursery décor, fabric bins, and even seasonal banners. Once you have a template you love, the possibilities keep growing.
Want a project you can finish in an afternoon? This cute crochet ghost is one of our fastest and most satisfying seasonal makes.
Caring for Your Pumpkin Appliqué
A stitched appliqué holds up remarkably well, especially when every edge has been securely sewn instead of relying only on fusible web.
Wash finished projects in cool water using a gentle cycle and a mild detergent whenever possible. This helps preserve both the fabric and the stitching through many fall seasons.
Avoid bleach, especially on richly colored fabrics, since it can gradually fade the colors and weaken the fibers.
For drying, choose a low heat setting or let your project air dry. Excessive heat isn’t necessary and can shorten the life of both the fabric and the adhesive underneath.
If your project comes out of storage with a few wrinkles, simply press it from the back of the fabric. If you need to iron from the front, place a pressing cloth over the appliqué first to protect the stitches.
With just a little care, your pumpkin appliqué can become part of your fall decorating year after year.
Now that you’ve mastered the basics of appliqué, why not try something you can use all year long? Our butterfly appliqué ideas are a great next project.
Helpful Tips You’ll Be Glad You Knew
After you’ve made two or three pumpkins, you’ll probably start noticing little habits that make each new one look even better.
- Cut a few extra pumpkins anytime you’re already working with your fabrics and fusible web. Having extra pieces ready to go makes future projects much faster, and you’ll always have one on hand when inspiration strikes.
- Try placing the stem slightly off center instead of perfectly in the middle. That tiny adjustment gives the pumpkin a much more natural appearance.
- Mix solid fabrics with subtle prints if you’re making several pumpkins together. The variety adds interest without making the design feel too busy.
- Don’t feel limited to classic orange, either. Cream, sage green, dusty blue, mustard, muted pink, and soft gray pumpkins all work beautifully for modern fall décor and coordinate with a wide range of color palettes.
Before you stitch everything permanently, step back and look at your project from a few feet away. You might notice that a leaf looks better tucked behind the pumpkin or that the stem would look more balanced with a slight tilt. Those little tweaks only take a minute, but they’re often the difference between a project that looks good and one that looks finished.
Frequently Asked Questions
Can you make a pumpkin appliqué without fusible web?
Yes. You can pin or baste the pieces in place before stitching around the edges. Fusible web simply makes the process easier by holding everything securely as you sew.
What’s the best stitch for beginners?
A blanket stitch is one of the easiest options because it creates clean edges and hides small imperfections well. A narrow zigzag stitch is another beginner-friendly choice if your machine doesn’t include a blanket stitch.
Can you sew a pumpkin appliqué by hand?
Absolutely. A hand-sewn blanket stitch creates a beautiful handmade finish. It takes a little more time than machine stitching, but many crafters enjoy the extra texture it adds.
Finished your pumpkin and ready to pick up your crochet hook? Our crochet animal appliqué patterns guide is a fun next step, showing you how to create adorable embellishments that are perfect for blankets, hats, bags, and more.
What fabric works best?
One hundred percent quilting cotton is the easiest fabric to work with. It cuts cleanly, presses beautifully, and stays stable throughout the appliqué process.
Can you reuse the same template?
Definitely, save your template after you’ve finished the project, and you can resize it for pillows, quilts, tote bags, placemats, table runners, wall hangings, and many other seasonal projects.
Once you’ve finished your first pumpkin appliqué, you’ll already have the skills to make dozens more. The same techniques work for leaves, snowflakes, flowers, hearts, stars, and countless other seasonal designs. Save your template instead of tossing it into the scrap pile.
Next fall, you’ll be able to pull it back out and use it on a quilt, pillow, table runner, tote bag, or whatever project lands on your sewing table next. That’s one of the best things about appliqué. One simple design can become part of your favorite handmade projects for years to come.
If appliqué has sparked your creativity, don’t stop with pumpkins. Learn how to make quilt animal appliqués and use the same techniques to create charming designs for quilts, wall hangings, pillows, and other handmade projects.